From Windows Start Menu, choose Settings -> Control Panel. - When the Control Panel dialog opens, double-click Administrative Tools to open the Administrative Tools dialog.
Double-click the Internet Information Services node and it will appear as shown in the following figure: 
(Or, right-click My Computer on the desktop and select Manage. When the Computer Management dialog appears, select Services and Applications and when that opens, double-click Internet Information Services.)
Open the Web Sites folder. Right-click the Default Web Site node and select New->Virtual Directory from the context menu. This opens the Virtual Directory Creation Wizard.
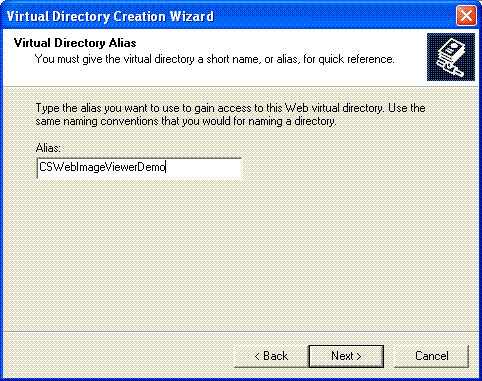
Click Next, which opens the Virtual Directory Alias page. In the Alias edit box, enter "CSWebImageViewerDemo" if you are working with the C# demo, or "VBWebImageViewerDemo" if you are working with the Visual Basic demo. This page is shown in the following figure:

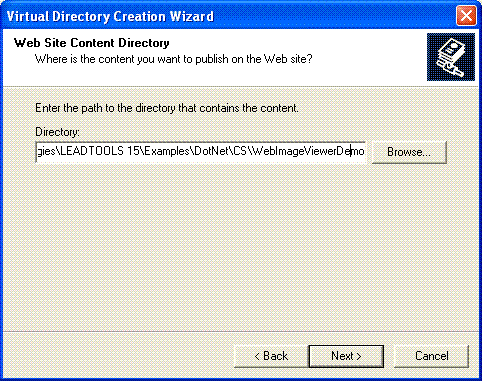
Click Next to open the Web Site Content Directory page. This page is shown in the following figure:

Click the Browse button to show the Browse For Folder dialog box, and browse to the location of the LEADTOOLS C# or VB WebImageViewer demo.
The default path to the C# demo is "C:\Program Files\LEAD Technologies\LEADTOOLS 15\Examples\DotNet\CS\WebImageViewerDemo".
The default path to the VB demo is "C:\Program Files\LEAD Technologies\LEADTOOLS 15\Examples\DotNet\VB\WebImageViewerDemo".
Click OK to close the Browse For Folder dialog box.Click Next to open the Access Permissions page.
Select the "Execute(such as ISAPI application or CGI)" check box.
Click Next to open the Completion page.
Click Finish to close the wizard and return to the Internet Information Services dialog. Under the Default Web Site node, you will notice the new node you added using the wizard. Right-click on the new node and select Properties.
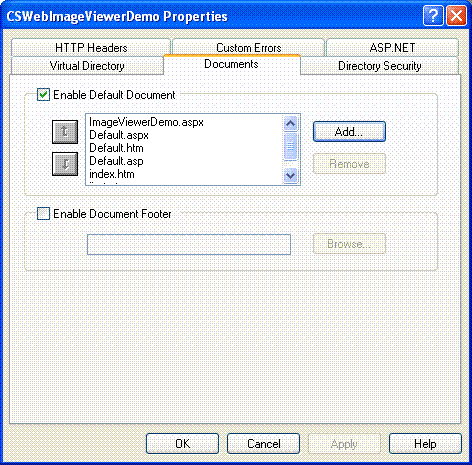
When the Properties dialog appears, click the Documents tab to open it. This tab is shown in the following figure:

Click Add to open the Add Default Document dialog box. In the Default Document Name edit box enter "ImageViewerDemo.aspx" and click OK.
Make sure to move the name up to the top of the Default Document list by clicking the Up arrow until the name is at the top.
Click the Virtual Directory tab to open it and then click Configuration to open the Application Configuration dialog box. You will use this dialog to map the LEADTOOLS ImageGenerator(.leadgen) and ImageInformation(.leadinfo) httphandlers to the ASP.NET engine. The Application Configuration dialog is shown in the following figure:

Click the Add button to open the Add/Edit Application Extension Mapping dialog box. Click Browse and browse to the location for the aspnet_isapi.dll file (it can be found at C:\WINDOWS\Microsoft.NET\Framework\v2.0.50727). Click Open to close the Open dialog. Set the other dialog options as shown in the following figure, and click OK:

Now repeat the previous step to map the LEADTOOLS ".leadinfo" httphandler, using the same dialog options (except changing the Extension to be ".leadinfo" rather than ".leadgen").
Click OK to close the Application Configuration dialog box, and then click OK to close the WebImageViewerDemo Properties dialog box.
Now create another Virtual Directory for the \LEAD Technologies\LEADTOOLS 15\Examples\DotNet\Resources\Web folder which will be used by the demo's webforms for the images and javascript file. To do so, repeat steps (2-7) but on the second page of the wizard type "Resources" in the Alias edit box, and on the third page of the wizard browse to the "\LEAD Technologies\LEADTOOLS 15\Examples\DotNet\Resources\Web" folder.
Now add a reference to the LEADTOOLS assemblies to make the WebImageViewerDemo work correctly. If you are working with the C# tutorial, open the "\LEAD Technologies\LEADTOOLS 15\Examples\DotNet\CS\WebImageViewerDemo" folder and create a new folder named "Bin". Similarily, if you are working with the VB tutorial, open the "\LEAD Technologies\LEADTOOLS 15\Examples\DotNet\VB\WebImageViewerDemo" folder and create a new folder named "Bin".
Copy the following LEADTOOLS assemblies to the demo's bin folder. You can get these assemblies from the "\LEAD Technologies\LEADTOOLS 15\Bin\Dotnet\Win32" folder.
Leadtools.Codecs.Bmp.dll Leadtools.Codecs.Cmp.dll Leadtools.Codecs.Cmw.dll Leadtools.Codecs.Fax.dll Leadtools.Codecs.Gif.dll Leadtools.Codecs.dll Leadtools.Codecs.J2k.dll Leadtools.Codecs.Png.dll Leadtools.Codecs.Tif.dll Leadtools.dll Leadtools.Web.dll
Now open an Internet browser and type "http://localhost/CSWebImageViewerDemo" in the Address bar and click Enter or Go to start viewing the WebImageViewerDemo.


