Detecting Registration Marks
When a user scans a form, perturbations or transformations are added to the image such as rotation, zooming, reduction, and translation (shifting in position). These effects make it difficult to identify the different parts of the form, complicating the detection and recognition phases.
Registration marks can be used to help the identify and localize the different parts of the form. Registration marks are predefined shapes that are added to the original form in specific locations. These marks can then be used to identify the transformations or deformation added to the original form, and then to correct a scanned form’s orientation and resize it to its original size.
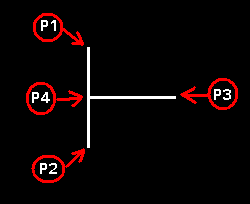
Currently, there is only one type of registration mark that has been defined for use with scanned forms (more are to be added later). The valid registration mark is a T-shaped figure as shown in the following figure. It is a "T" rotated by 90 degrees counter clockwise. The P4 point must be on the center point of Line P1P2 (that is, the distance from P1 to P4 equals the distance from P2 to P4). The line width should be greater than 2 pixels(preferably 3 pixels). There are no conditions on line lengths since you provide the values for uWidth, uHeight, uMaxScale, and uMinScale. Use the L_IsRegMarkBitmap function to ensure the selected mark is a valid registration mark.

Currently, to be used with the registration marks functions a document image must consist of white objects on a black background.
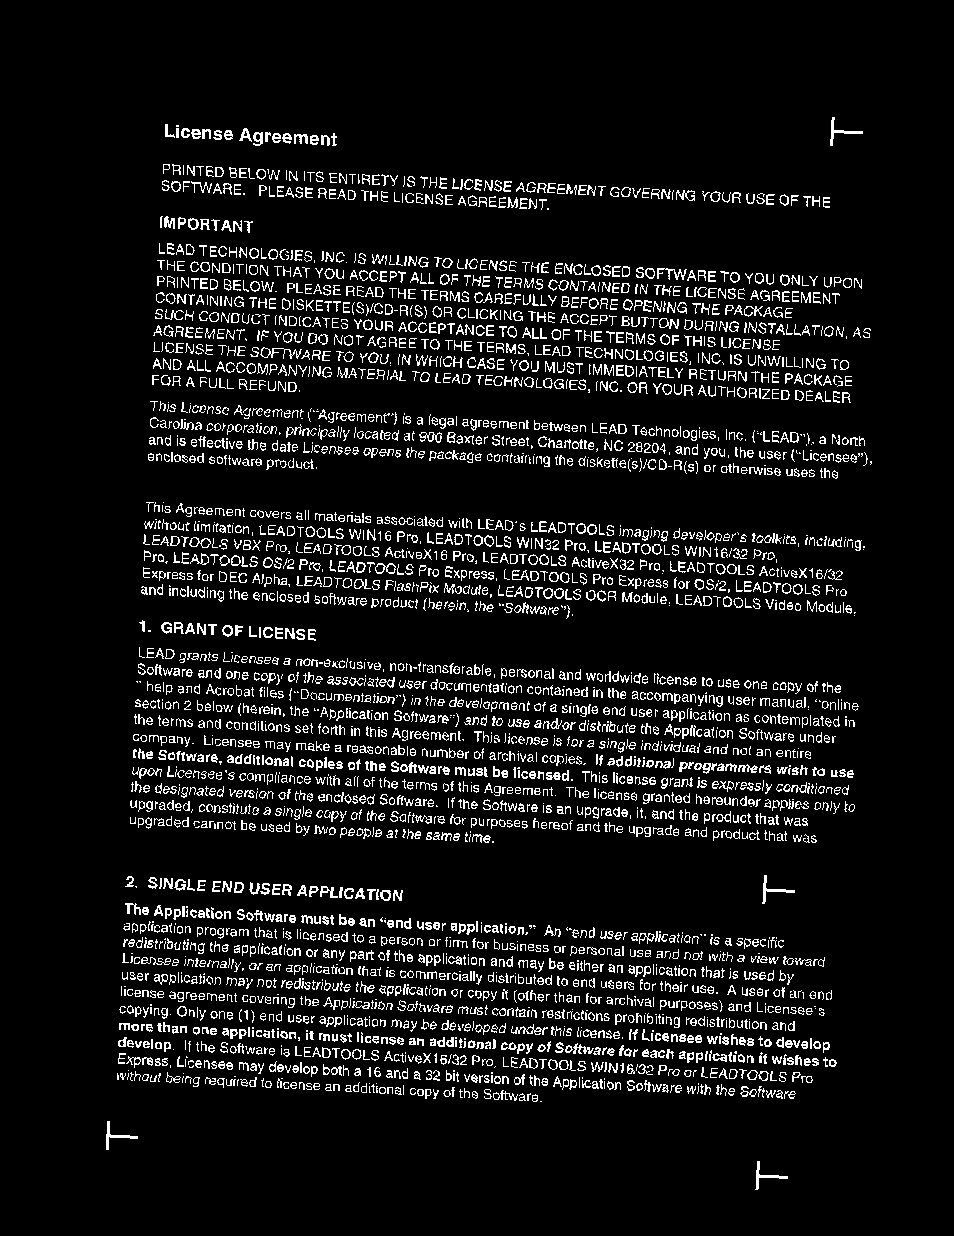
To use the registration functions, begin with creating the reference document that contains the registration marks in the exact positions on the form that will be used for scanning. The registration marks should be placed in different areas of the form far enough apart on the form that good triangulation can be performed – but not where they would not always appear on the form in their entirety when the form is scanned. The registration functions are designed to use three designated registration marks as reference points. A sample reference form (reduced in size) is shown in the following figure:

After creating the reference document, scan it to obtain a document image. The reference document must be scanned in perfectly: any documents using the reference document for registration will be transformed to match its size, shifting, and rotation exactly.
The registration functions work by finding the (X, Y) positions of three labeled points and comparing them with the positions of these points on the scanned image. With that information it is possible to determine the shifting, rotation and scaling of the scanned image (5 equations with 5 unknowns). The unknowns are:
Shifting along the X-axis
Shifting along the Y-axis
Scaling on the X-axis
Scaling on the Y-axis
Rotation angle.
On the example form, registration marks have been placed in five locations on the form. Three of these marks are to be selected and the other two ignored (the registration functions use the three locations on the form in order to solve the equations). Please note that the three selected marks should not be aligned (belong to a single line).
For each registration mark, designate the searching area for that mark, and specify the maximum allowable shift, rotation and scaling. Each searching area should contain only one registration mark and it is preferable that the mark be located in an otherwise blank portion of the form. This information is designated using a SEARCHMARKS structure and contains the following information:
|
Member |
Value |
|
uType = |
RGS_T |
|
uWidth |
Registration mark’s width, in pixels. |
|
uHeight |
Registration mark’s height, in pixels. |
|
uMinScale |
Minimum registration mark percentage scaling to be detected.(for example, 90,85, or 75 …etc) |
|
uMaxScale |
Maximum registration mark percentage scaling to be detected. (for example, 110,120, or 125 …etc) |
|
rcRect |
Rectangular area to be searched for registration marks. Note that if you select too small of a search area, you run the risk the mark will not be detected because of shift, rotation or scaling. However, the larger the area, the more time that is consumed in the search. |
|
uMarkSearchCount |
Number of expected registration marks inside the search area. Set this to 1. (Since there must be one registration mark inside each area.) |
|
pMarkDetectedPoints = |
(POINT L_FAR *) malloc(uNumOfMarks * sizeof(POINT)). This will be updated by L_SearchRegMarksBitmap function. |
|
uMarkDetectedCount |
Count of detected marks. Set this to 0. This will be updated by L_SearchRegMarksBitmap function. |
With this information you can use the L_GetMarksCenterMassBitmap function to compute the center of mass for each of these marks. Save these points to an array.
Now you can scan forms and correct their orientation and size. The following figure below shows a sample scanned form (reduced in size) with noticeable skew:

The next step is to search for the registration marks in the scanned image. Use the L_SearchRegMarksBitmap function on the scanned image to find the registration marks. If all of the registration marks were detected (the uMarkDetectedCount parameter in each SEARCHMARKS structure equals 1), then use the L_GetMarksCenterMassBitmap function to compute the center of mass for each registration mark, and save those to an array of points.
The next step is to determine the shifting, scaling and rotation necessary to re-orient the scanned image. To do this, pass the array of reference points as well as the array of transformed points to the L_GetTransformationParameters function.
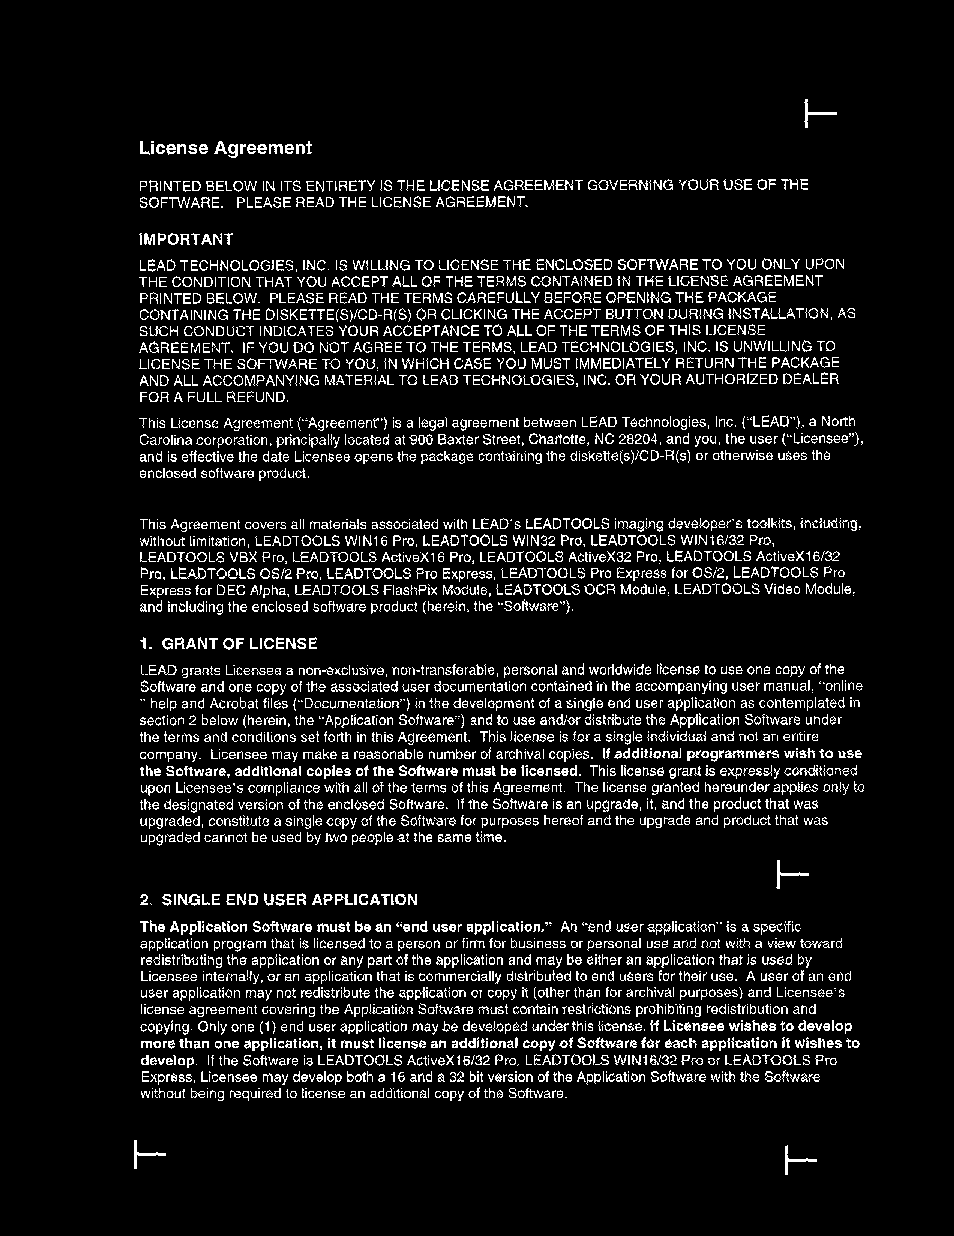
To re-orient and resize the scanned image so it is like the reference image, use the values from the L_GetTransformationParameters function in the L_ApplyTransformationParameters function. This is equivalent to shifting the image using L_CombineBitmapExt, rotating the image using L_RotateBitmap (without resizing), and scaling the image using either L_SizeBitmap or L_ResizeBitmap. (Note: It is important to do the operations in this order. You will get an incorrect result if you change the order.) The following figure (reduced in size) shows the scanned form after it has been re-oriented and re-sized:

A demo has been prepared to illustrate the use of these functions. For a tutorial, refer to How to Use the Registration Marks Demo.