1.
Start the demo. For more information on launching demos, see: Barcode Demo Overview.
2.
From the Main menu, select File-->New.
3.
In the File New dialog, either type the path to the "%UserProfile%\My Documents\LEADTOOLS Images" in the "File Name" edit box, or browse to this directory using the "Look in" drop box. Select the barcode1.tif file and select Open.
4.
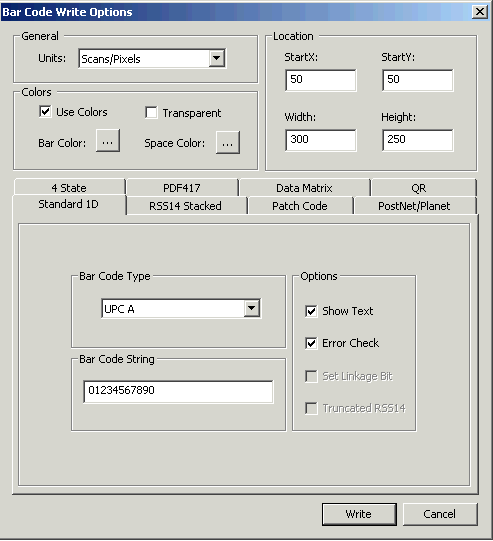
In the main window of the Bar Code Demo, select
Actions-->Write ….
to open the Bar Code Write Options dialog,
as shown in the following figure:

5.
Use the tabs to set options for the appropriate barcode type.
6.
Click the Write button.
7.
The new barcode will written to the image in the location specified in the Location group.