Writing Barcodes Using the Barcode Demo
Please note that even though these tutorials use the Barcode .NET C# demo, you can follow the same basic steps for any of the Barcode demos.
- Start the demo by: Selecting "Start" -> "Programs" -> "LEADTOOLS Raster Imaging Pro for .Net 17" -> "Barcode" -> "Dotnet Class Library" and click on the desired demo, as shown below. Please note that your exact path may vary, depending on the toolkit you have installed. or double-clicking on the CSBarcodeDemo.exe file in the LEAD/BIN directory, where LEAD represents the directory in which you installed the LEADTOOLS toolkit. (If you used the default settings when you installed the toolkit, that path would be "C:\Program Files (x86)\LEAD Technologies\LEADTOOLS 17\Bin\DotNet\Win32".)
- In the main window of the Bar Code Demo, select File -> Open.
- In the Open dialog, you can either set the path to the LEAD/Images directory in the "File" edit box or browse to this directory using the "Look in" drop box. Select the barcode1.tif file and select Open.
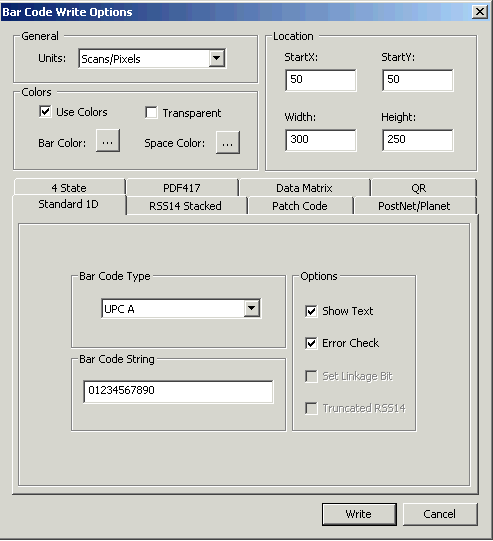
- In the main window of the Bar Code Demo, select Actions -> Write …. The Bar Code Write Options dialog will appear, as shown below:

- Use the settings shown above.
- Click OK in the Bar Code Write Options dialog.
- The new barcode will appear on the image.
