Getting Started with LEADTOOLS for iOS/OS X

Show in webframe
Take the following steps to start working with the LEADTOOLS for iOS/OS X toolkit to create an iOS application demo that runs on an iPhone/iPad simulator, or on an iOS device. Note: A MAC operating system (OS X 10.7 or later with XCode 4.2 or later) is needed. This can be a virtual machine.
  1. Start the XCode application. It can be found in the task bar, as shown below:

  2. If the Xcode application is not available on the taskbar, start Xcode by selecting the "Lanuchpad" from the taskbar, then clicking on the "Developer" icon. Then click the "Xcode" icon. OR you can search for it using the "Spotlight" application located on the top-right corner of the MAC monitor, as shown in the screenshot below:

  3. In the XCode startup dialog click the Create a new Xcode project button.
  4. Clicking the button opens a Choose a template for your new project: dialog box. Use it to specify the project type. Under "iOS" templates select "Application", then select "Single View Application", and click Next.

  5. A Choose options for your new project: dialog box will appear so you can specify the project name and options. Make your selections and then click Next.

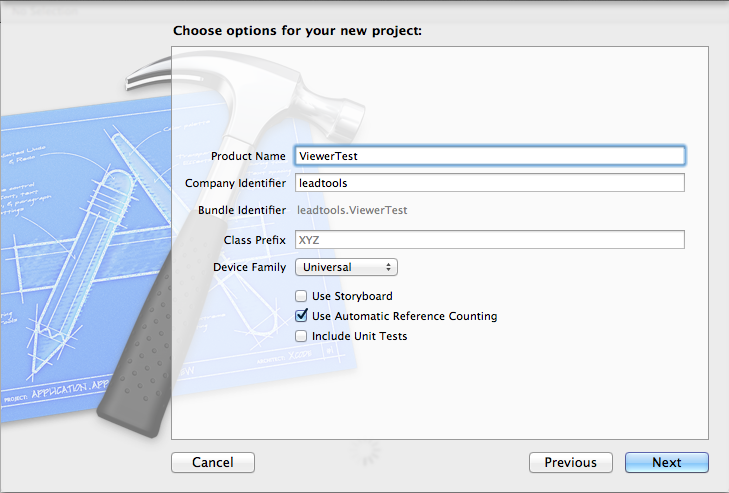
    Note: It is best to enable the "Use Automatic Reference Counting" option to make the compiler handle memory allocation/deallocation, avoiding avoid memory leaks.

  6. A dialog box will appear to specify the location where the project should be saved. Specify the location and then click the Finish button to create the project.
  7. Build the project by pressing Command + B, or select Product -> Build from the Xcode menu.

    Note: The "Command" button on the MAC is the same as the "Windows" keyboard button on regular Windows keyboards.

  8. To load an image from a device/simulator images album, navigate to the Xcode project navigator, then select and expand the "Frameworks" folder. Right-click it and select Add Files to "ViewerTest"…

  9. Using the files browser dialog box, locate the extracted iOS frameworks installed with the toolkit and select the following frameworks, and then click Add:
    • Leadtools.framework
    • Leadtools.Kernel.framework
    • Leadtools.Controls.framework
    • Leadtools.Converters.framework
    • Leadtools.ImageProcessing.Utilities.framework
    • Leadtools.ImageProcessing.Color.framework
  10. From the project navigator, expand the "Supporting Files" folder and click ViewerTest-Prefix.pch. Add the following #import statements:
    • #import <Leadtools/Leadtools.h>
    • #import <Leadtools.Controls/Leadtools.Controls.h>
    • #import <Leadtools.Converters/Leadtools.Converters.h>
    • #import <Leadtools.ImageProcessing.Color/Leadtools.ImageProcessing.Color.h>
  11. To add a user interface to the project, from the project navigator click on the ViewerController_iPhone.xib -- the interface builder file for iPhone --

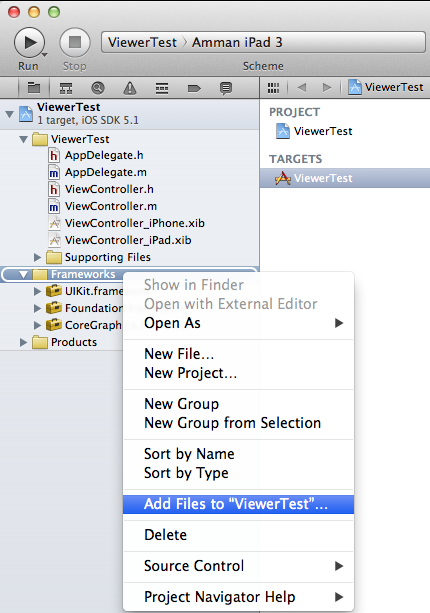
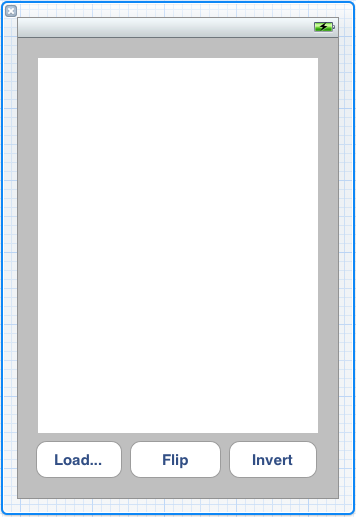
    Note: The ViewerController_iPad.xib is the interface builder file for iPad.

    Note: These two interface builder files are separated. To make the application capable of running on both iPhone and iPad, you need to add the same controls in both places.

  12. Add buttons and viewer controls by writing the control name in the Find Text Box control at the bottom of the Library Pane, located on the right-bottom corner of Xcode application, as shown below:

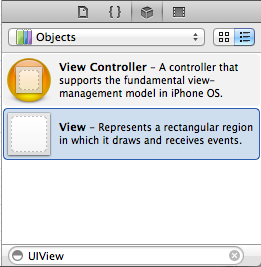
    For example, write "UIButton" or "UIView" and add these controls to the interface builder.

  13. Change the "UIView" base type to "LTImageViewer" control by changing the "Class" name to "LTImageViewer" from the Identity Inspector pane located on the right side of the Xcode IDE as shown below:

  14. Add outlet connections to the owner class "ViewController" of the interface builder objects. From the Xcode IDE menu select View -> Assistant Editor -> Show Assistant Editor to display the assistant editor. This editor opens up the owner class source code side-by-side to the interface builder.
  15. Select the viewer control from the interface builder by pressing the "Ctrl" key + dragging the viewer control into the opened ViewController.h inside the assistant editor. A popup dialog box will appear. Enter the name of the variable as "imageViewer", and then click the Connect button.

  16. Repeat the above steps to add buttons for the Load, Flip and Invert actions. For example, to add a button for the Load action, inside the connection dialog box, select "Action" from "Connection" combo box and name the new action method as "loadImageFromAlbum", then click Connect.

  17. Add two linker flags "-lstdc++ -ObjC" to the project build settings by selecting the project root target from the project navigator pane, and then selecting the "Build Settings" tab. In the search edit box enter other linker flags to the filter settings to show only the field. Click on it, and then add the settings "-lstdc++ -ObjC".

  18. Compile the project.
  19. Open the "ViewController.h" file to add the following code as the image picker delegates to the interface declaration:
    
                @interface ViewController : UIViewController<UIImagePickerControllerDelegate, UINavigationControllerDelegate>
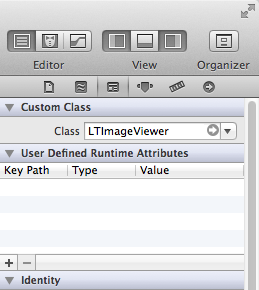
                @property (strong, nonatomic) IBOutlet LTImageViewer *imageViewer;
                
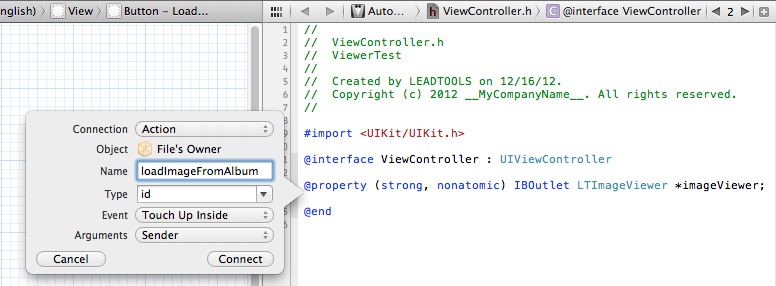
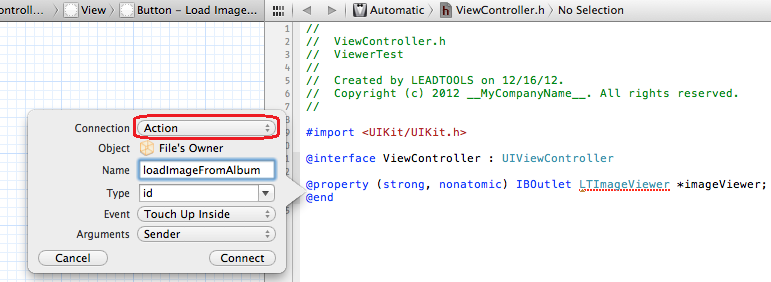
                - (IBAction)loadImageFromAlbum:(id)sender;
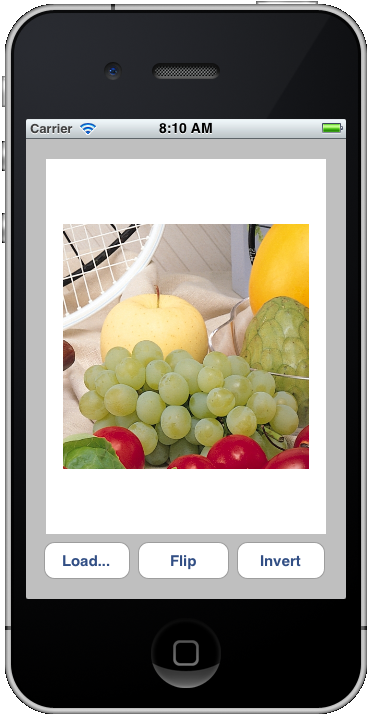
                - (IBAction)flipImage:(id)sender;
                - (IBAction)invertImage:(id)sender;
                - (void)showError:(NSError*)error;
                
                @end
                
    
  20. Open the implementation file (.m) and add the following code:
    
                -(void)imagePickerController:(UIImagePickerController *)picker didFinishPickingMediaWithInfo:(NSDictionary *)info
                {
                   self.imageViewer.image = [info objectForKey:UIImagePickerControllerOriginalImage];
                   [self dismissViewControllerAnimated:NO completion:nil];
                }
                
                - (void)showError:(NSError*)error
                {
                   NSString* str;
                   if(error != nil)
                      str = [NSString stringWithFormat:@"@\nReason@\nDescription: @\nCoded\n", @"Error", [error localizedDescription], [error localizedFailureReason], [error code]];
                   
                   UIAlertView* alert = [[UIAlertView alloc] initWithTitle:@"Error" message:str delegate:self cancelButtonTitle:@"OK" otherButtonTitles:nil, nil];
                   [alert show];
                }
                
                - (IBAction)loadImageFromAlbum:(id)sender
                {
                   UIImagePickerController* imagePicker = [[UIImagePickerController alloc] init];
                   imagePicker.allowsEditing = NO;
                   imagePicker.delegate = self;
                   
                   if(![UIImagePickerController isSourceTypeAvailable:UIImagePickerControllerSourceTypePhotoLibrary])
                   {
                      [[[UIAlertView alloc] initWithTitle:@"Warning" message:@"your device does not allow using PhotoLibrary" delegate:nil cancelButtonTitle:@"OK" otherButtonTitles:nil] show];
                      return;
                   }
                   
                   imagePicker.sourceType = UIImagePickerControllerSourceTypePhotoLibrary;
                   [self presentViewController:imagePicker animated:YES completion:nil];
                }
                
                - (IBAction)flipImage:(id)sender
                {
                   NSError* error = nil;
                   LTRasterImage* rasterImage = [LTRasterImageConverter convertFromImage:self.imageViewer.image options:LTConvertFromImageOptions_None error:&error];
                   if(rasterImage == nil && error != nil) // error occurred
                   {
                      [self showError:error];
                      return;
                   }
                   
                   LTFlipCommand* command = [[LTFlipCommand alloc]initWithHorizontal:NO];
                   
                   BOOL ret = [command run:rasterImage error:&error];
                   if(ret == NO && error != nil) // error occurred
                   {
                      [self showError:error];
                      return;
                   }
                   
                   // Put the updated image back into the viewer
                   [self.imageViewer setRasterImage:rasterImage];
                }
                
                - (IBAction)invertImage:(id)sender
                {
                   NSError* error = nil;
                   LTRasterImage* rasterImage = [LTRasterImageConverter convertFromImage:self.imageViewer.image options:LTConvertFromImageOptions_None error:&error];
                   if(rasterImage == nil && error != nil) // error occurred
                   {
                      [self showError:error];
                      return;
                   }
                   
                   LTInvertCommand* command = [[LTInvertCommand alloc]init];
                   BOOL ret = [command run:rasterImage error:&error];
                   if(ret == NO && error != nil) // error occurred
                   {
                      [self showError:error];
                      return;
                   }
                   
                   // Put the updated image back into the viewer
                   [self.imageViewer setRasterImage:rasterImage];
                }
                
    
  21. Run the demo by selecting the target scheme it is to be run on (iPhone simulator, iPad simulator or iOS device). For example, select "iPhone Simulator" from the scheme list at the top of the Xcode IDE, and then click Run.

  22. Click Load... and select an image from the photo library. The viewer will display it.


Products | Support | Contact Us | Copyright Notices
© 2006-2014 All Rights Reserved. LEAD Technologies, Inc.