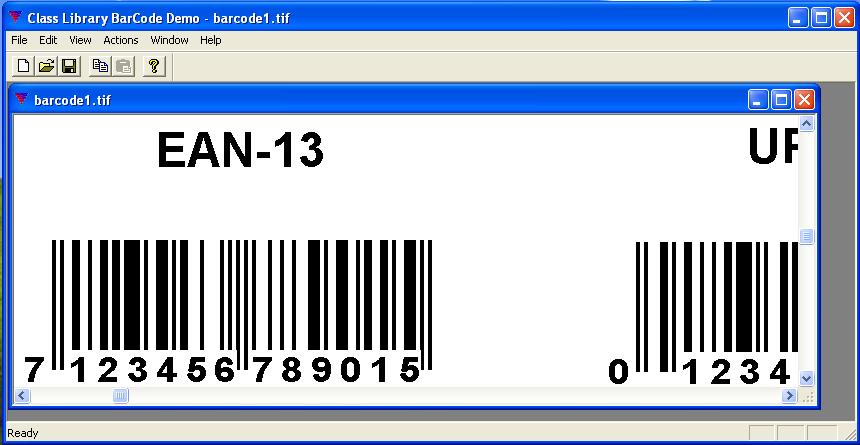
Barcode Demo Overview
This document describes how to use the basic features of the LEADTOOLS Barcode Demos, which demonstrate Barcode module features. These enable you to:
Save your image to any output file format supported by LEAD Technologies, Inc.
API - L_BarCodeWrite
Class Library - LBarCode::Write
.NET Class Library - Leadtools.Barcode.BarcodeEngine.Write
Read several barcode types from an image.
API - L_BarCodeRead
Class Library - LBarCode::Read
.NET Class Library - Leadtools.Barcode.BarcodeEngine.Read
Save the results obtained from reading barcodes to a Log file (Class Library demo only).
Write different types of barcodes over an image using different options.
API - BARCODEDATA
Class Library - BARCODEDATA
.NET Class Library - Leadtools.Barcode.BarcodeData
Write different barcodes using different colors.
API - BARCODECOLOR
Class Library - BARCODECOLOR
.NET Class Library - Leadtools.Barcode.BarcodeColor
Support Twain scanning.
To start a LEADTOOLS Barcode Demo:
Select Start-->Programs-->LEADTOOLS Medical Imaging Suite 15 -->Barcode--> API or C++ Class Library or Dotnet Class Library --> <desired demo>.
NOTE: The exact path may vary, depending on the toolkit you have installed.
or
From the <Install Directory>\Bin\, (default is C:\Program Files\LEAD Technologies\LEADTOOLS 15\Bin\), double-click to launch any of the following .EXE files:
|
Platform |
Win 32 |
x64 |
|
API |
\Bin\API\Win32\Barcode_Original.exe |
\Bin\API\x64\Barcode_Original.exe |
|
C++ Class Library |
\Bin\API\Win32\CLBarcode_Original.exe |
\Bin\API\x64\CLBarcode_Original.exe
|
|
.NET Class Library |
\Bin\Dotnet\Win32\CSBarcode_Original.exe |
\Bin\Dotnet\x64\CSBarcode_Original.exe |
The Barcode Demo will launch and open the Main window. From the Main menu, select File-->Open. In the Open dialog, either type the path to the LEAD\Images directory in the "File Name" edit box, or browse to this directory using the "Look in" drop box. Select the barcode1.tif file and select Open.
Barcode Demo – Main Window
Barcode C++ Class Library Demo:
Main Window Menus
The File menu includes:
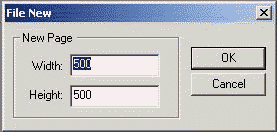
New: Opens a File New dialog so you can specify the width and height, as shown in the following dialog:
Open: Opens an image in order to find existing barcodes or write new barcodes.
Close: Closes the active child window.
Save As: Saves the active image to a physical file.
TWAIN Select Source: Opens a Select Source dialog so you can select a TWAIN source.
TWAIN Acquire: Opens the TWAIN source user interface to acquire barcode images.
Exit: Ends the application.
The Edit menu includes:
Copy: Copies the active image to the clipboard.
Paste: Pastes the clipboard contents to a new child window.
The Actions menu is shown in the following figure:
This menu contains the following items:
Read: Selecting this option opens the Read Options dialog. This dialog is used to set the search criteria used when searching for barcodes in the active window. For more information, please refer to Read Options Dialog.
Write: Selecting this option opens the Write options dialog. This dialog is used to set the write criteria used when writing a barcode over the active window. For more information, please refer to Write Options Dialog.
Duplicated Info: Selecting this option opens a sub menu for finding the duplicated barcodes in the active window. It has the following options:
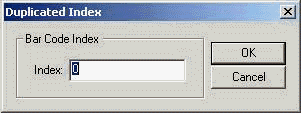
First: Selecting this option opens the Duplicated Index dialog, shown below. This dialog is used to enter the index for the barcode, for which to find a duplicate.
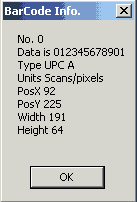
If the barcode toolkit finds a duplicated barcode, then the demo will display the information for the duplicated barcode as shown below. Otherwise, the demo will bring up an error.
Next: Finds the next duplicated barcode, if one exists. Otherwise, the demo will display an error.
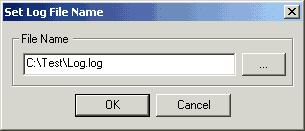
Set Log File: Selecting this option opens the Set Log File Name dialog. This dialog is used to set the path for the Log File. When barcodes are read, the results are placed in this file:
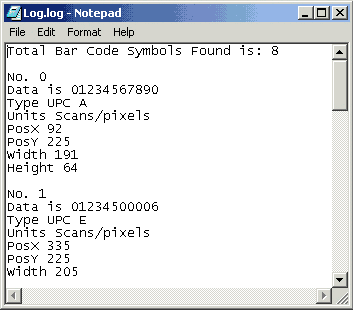
Open Log File: Selecting this option opens the Log File in Notepad. This menu item is enabled only after the setting a log file in using the Set Log File menu item and reading the barcodes. Selecting this menu item displays the Log File, as shown below:
For more instructions, refer to: