Walkthrough 3 - Using the Anonymize Script
Perform the following steps in order to use the anonymize script created by Walkthrough 2:
- Click the Database Manager tab.
- Select both records and click the Export Selected button.
- Note that MyNewScript appears as the default in the Anonymize Script drop-down list. This is because MyNewScript has been activated.
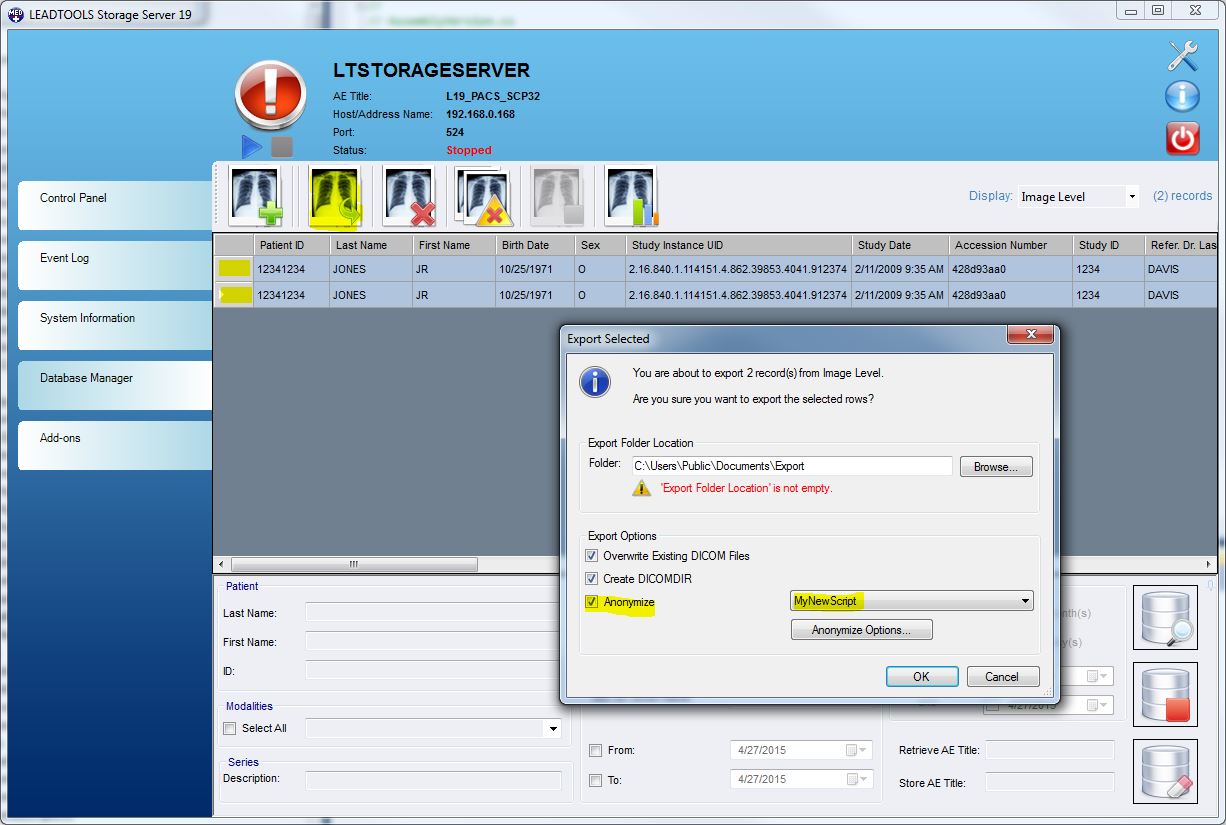
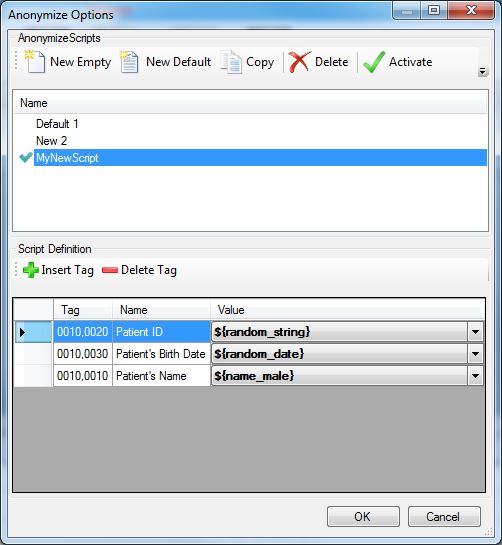
- Click the Anonymize Options button. The Anonymize Options dialog appears which allows users to create/edit/copy/delete/activate Anonymize Scripts.
Note that the Anonymize Options dialog is also accessible by choosing Administration ->Anonymize Options from the Server Settings dialog.
- Click Cancel to close the Anonymize Options dialog.
- Change the Export Folder Location to be:.
- C:\Users\Public\Documents\ExportAnonymize
- Select the checkboxes for the following tags, and then click OK.
- Overwrite Existing DICOM Files
- Create DICOMDIR
- Anonymize
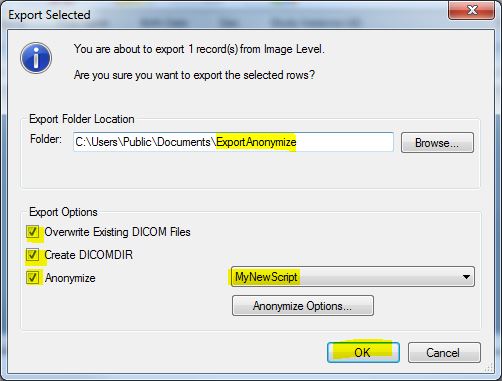
- Click OK.
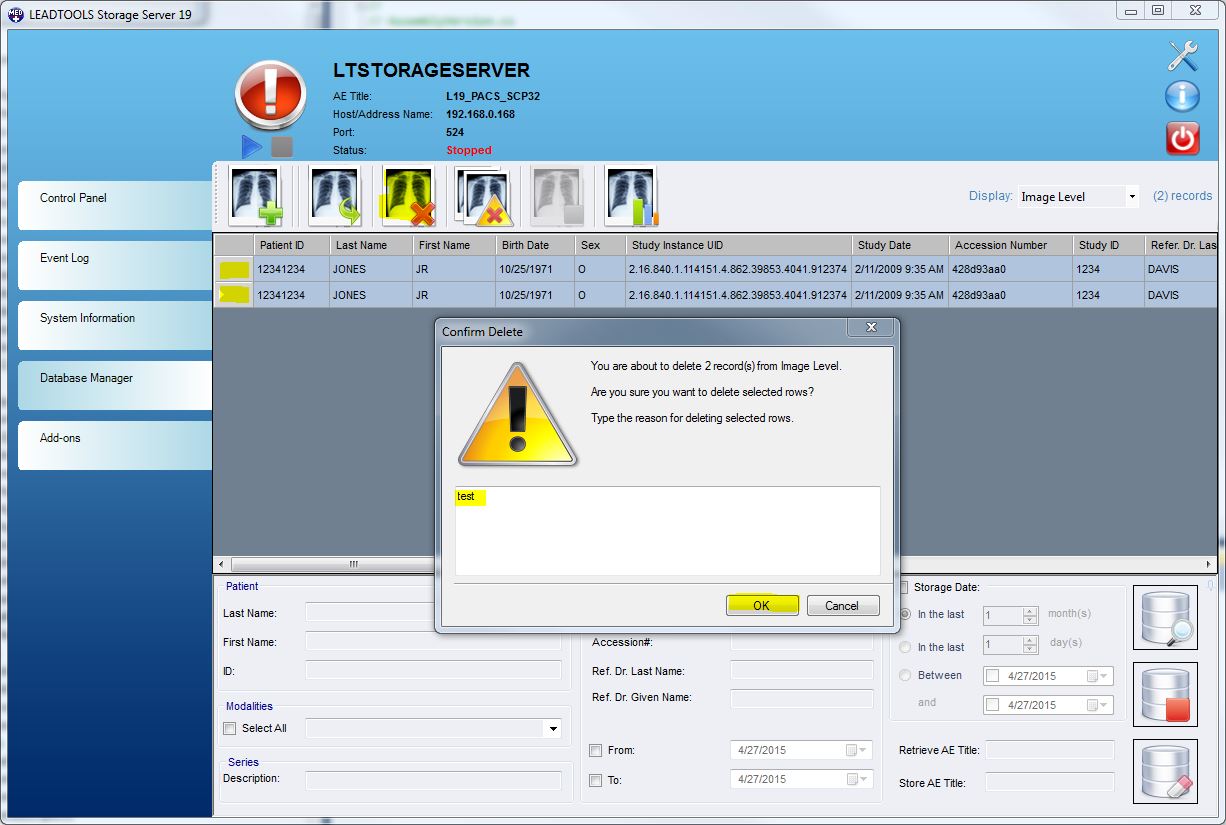
- Select both records and click the Delete Selected button to remove the patient from the database.
- Enter test for the reason, and click OK to delete the two records.
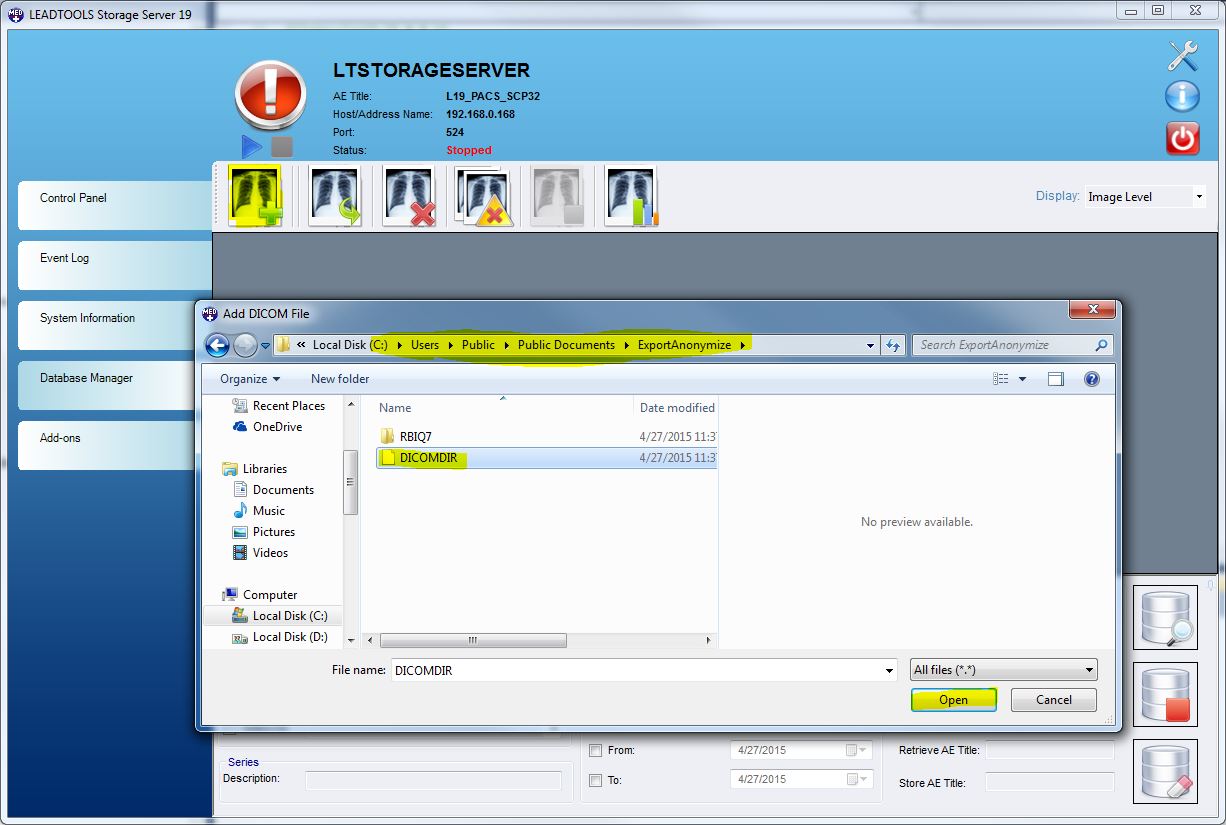
- Click the Add DICOM button to make MyNewScript the active script.
- Browse to the ExportAnonymize location
- C:\Users\Public\Documents\ExportAnonymize
- Select the DICOMDIR file.
- Click the Open button.
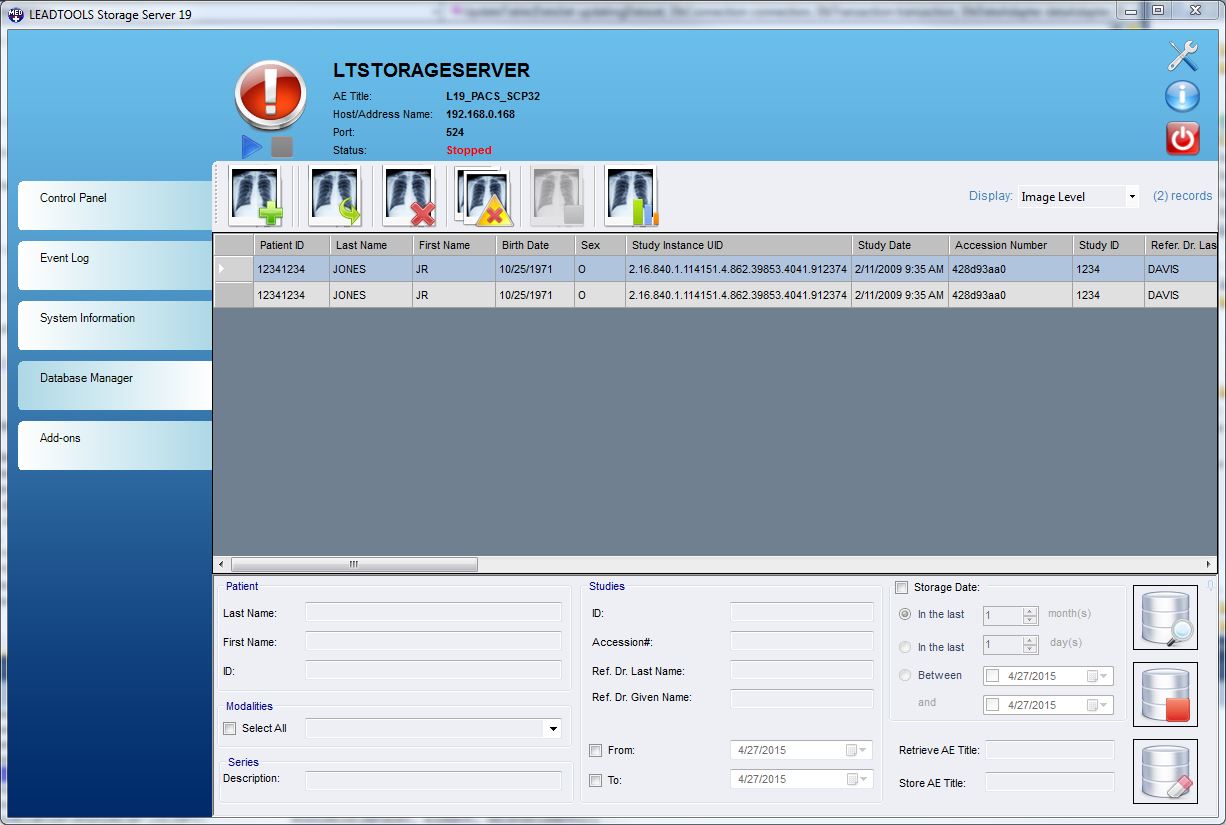
- After the import, you can see that the Patient ID, Patient Name, and Birth Date have been anonymized. All other fields remain as they were .
Note: Since the Anonymization is random, you will see different anonymized values from what is shown below:

- Select both records, and click the Delete Selected button to remove the anonymized datasets from the database.
- Click the Add DICOM button.
- Browse to the backup location:
- C:\Users\Public\Documents\ExportBackup
- Select the DICOMDIR file.
- Click the Open button.
- The database now contains the original two patient records.
References
Configuring the LEADTOOLS Storage Server Application using the Control Panel:Administration
Walkthrough 1 - Export Selected: Backing up existing patient information
Walkthrough 2 - Creating an Anonymize Script
Anonymize Script Macros
