Display Images in an Image Viewer - Android Java
This tutorial shows how to load, display, and save images using the LEADTOOLS SDK in an Android Java application.
| Overview | |
|---|---|
| Summary | This tutorial covers how to display images in an Image Viewer in an Android application. |
| Completion Time | 30 minutes |
| Android Studio Project | Download tutorial project (7 MB) |
| Platform | Android (Java) |
| IDE | Android Studio |
| Development License | Download LEADTOOLS |
| Try it in another language |
|
Required Knowledge
Get familiar with the basic steps of creating a project by reviewing the Add References and Set a License tutorial, before working on the Display Images in an Image Viewer - Android Java tutorial.
Create the Project and Add the LEADTOOLS References
Start with a copy of the project created in the Add References and Set a License tutorial. If you do not have that project, follow the steps in that tutorial to create it.
The references needed depend upon the purpose of the project. This project requires the following .JAR and .SO files:
The .JAR files can be found at: <INSTALL_DIR>\LEADTOOLS21\Bin\Java
Leadtools.jarLeadtools.codecs.jarLeadtools.controls.android.jarLeadtools.caching.jarLeadtools.converters.android.jar
The .SO files can be found at: <INSTALL_DIR>\LEADTOOLS21\Bin\Android
libleadtools.solibleadtools.codecs.solibleadtools.codecs.bmp.solibleadtools.codecs.cmp.solibleadtools.codecs.fax.solibleadtools.codecs.png.solibleadtools.codecs.tif.so
For a complete list of which DLL files are required for your application, refer to Files to be Included With Your Application.
Set the License File
The License unlocks the features needed for the project. It must be set before any toolkit function is called. For details, including tutorials for different platforms, refer to Setting a Runtime License.
There are two types of runtime licenses:
- Evaluation license, obtained at the time the evaluation toolkit is downloaded. It allows the toolkit to be evaluated.
- Deployment license. If a Deployment license file and developer key are required, refer to Obtaining a License.
Note
Adding LEADTOOLS local references and setting a license are covered in more detail in the Add References and Set a License tutorial.
Set the Application Layout
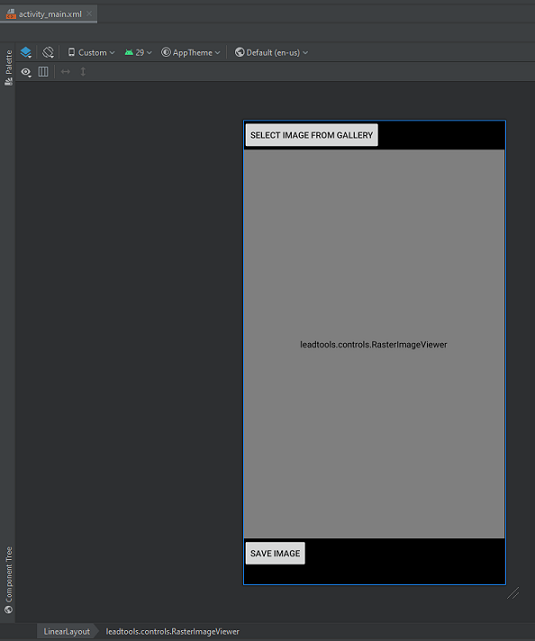
In the Project Explorer window, open the activity_main.xml file found in the app/src/main/res/layout directory. Replace the current code with the XML below.
<LinearLayout xmlns:android="http://schemas.android.com/apk/res/android"android:layout_width="match_parent"android:layout_height="match_parent"android:orientation="vertical"android:weightSum="1.0"android:background="@android:color/black"><Buttonandroid:layout_width="wrap_content"android:layout_height="wrap_content"android:text="Select Image From Gallery"android:onClick="onSelectImage"/><leadtools.controls.RasterImageViewerandroid:id="@+id/rasterimageviewer"android:layout_width="match_parent"android:layout_height="0dp"android:layout_weight=".96"android:background="@android:color/white"/><Buttonandroid:id="@+id/button"android:layout_width="wrap_content"android:layout_height="wrap_content"android:text="Save image"android:onClick="onSaveImage"/></LinearLayout>
Select the Design tab and check if the application layout matches.

Add the Load, Display, and Save Code
Navigate to MainActivity.java and add the following import statements before the MainActivity class.
import android.content.Context;import android.content.Intent;import android.net.Uri;import android.view.View;import leadtools.LeadStreamFactory;import leadtools.RasterImage;import leadtools.RasterImageFormat;import leadtools.ILeadStream;import leadtools.codecs.RasterCodecs;import leadtools.controls.RasterImageViewer;import leadtools.controls.ImageViewerPanZoomInteractiveMode;import java.io.File;
Add the following member variables.
private static final int IMAGE_GALLERY = 0x0001;private RasterImageViewer mViewer;private RasterCodecs codecs;private Intent intent;
Update the onCreate() function as shown below.
@Overrideprotected void onCreate(Bundle savedInstanceState) {super.onCreate(savedInstanceState);setContentView(R.layout.activity_main);// Load LEADTOOLS native librariestry{Platform.setLibPath(sharedLibsPath);Platform.loadLibrary(LTLibrary.LEADTOOLS);Platform.loadLibrary(LTLibrary.CODECS);}catch(Exception ex) {Log.d(TAG,"Failed to load LEADTOOLS Native libraries" );}mViewer = (RasterImageViewer)findViewById(R.id.rasterimageviewer);mViewer.setTouchInteractiveMode(new ImageViewerPanZoomInteractiveMode());codecs = new RasterCodecs();intent = new Intent();}
Add the following functions to enable loading, displaying, and saving an image.
public void onSelectImage(View v){intent.setType("image/*");intent.setAction(Intent.ACTION_GET_CONTENT);startActivityForResult(Intent.createChooser(intent, "Select Picture"), IMAGE_GALLERY);}public void onSaveImage(View v ){RasterImage image = mViewer.getImage();File file = new File(this.getFilesDir(), "input.png");String path = file.getAbsolutePath();if(image != null){codecs.save(image, LeadStreamFactory.create(path), RasterImageFormat.PNG, 0);Toast.makeText(this, path, Toast.LENGTH_LONG).show();}else{Toast.makeText(this, "No Image is loaded", Toast.LENGTH_LONG).show();}}@Overrideprotected void onActivityResult(int requestCode, int resultCode, Intent data){if(resultCode == RESULT_OK){if(requestCode == IMAGE_GALLERY){Uri imageUri = data.getData();try{ILeadStream stream = LeadStreamFactory.create(getContentResolver().openInputStream(imageUri),true);RasterImage image = codecs.load(stream);mViewer.setImage(image);}catch(Exception ex){Toast.makeText(this, ex.getMessage(), Toast.LENGTH_LONG).show();}}}}
Run the application
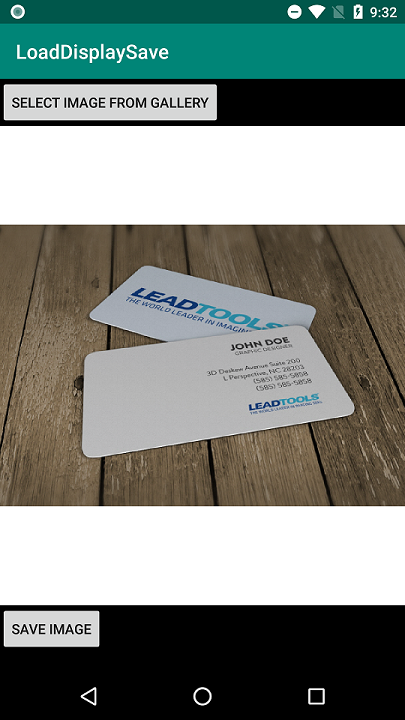
Press Shift + F10 to run the application.
- On the device, press
SELECT IMAGE FROM GALLERYto load and display an image. -
Press the
SAVE IMAGEbutton to save the image.
Wrap-up
This tutorial showed how to load, display, and save images. In addition, it showed how to use the RasterImageViewer and RasterCodecs classes.
