Barcode Demo Overview
This document describes how to use the LEADTOOLS Barcode Demos for .NET Framework for Windows to demonstrate Barcode technology features. Barcode technology features enable you to:
-
Create a RasterImage object from
-
Any image file supported by LEADTOOLS using RasterCodecs.Load.
-
A scan from a scanner or a camera, using Acquire from any TWAIN-capable device.
-
-
Set the default barcode reading and writing options using BarcodeReader.GetDefaultOptions and BarcodeWriter.GetDefaultOptions. Save and load the options to disk using BarcodeReader.SaveOptions, BarcodeReader.LoadOptions, BarcodeWriter.SaveOptions and BarcodeWriter.LoadOptions
-
Read a certain barcode or barcodes from the image by using BarcodeReader.ReadBarcode and BarcodeReader.ReadBarcodes
-
Export barcode data to disk as XML using BarcodeData.Save
-
Write any supported barcode on an image using BarcodeWriter.WriteBarcode
NOTE: This topic is for LEADTOOLS .NET Framework for Windows. The Barcode demos for other platforms (Java, Xamarin, UWP, JavaScript, Android, Linux, iOS, and macOS), are very similar and perform the same way. Demos for these platforms are listed in Leadtools.Barcode Getting Started. In addition, many demos are installed with the most recent LEADTOOLS Installation packages. Find them at <INSTALLDIR>\Shortcuts\Barcode. Going there opens a directory of folders (organized by platform), containing barcode demos.
A searchable list of demos is available at LEADTOOLS Installed SDK Demos.
Xamarin Framework Deprecation
As of LEADTOOLS v23, the cross-platform Xamarin framework has been deprecated and replaced with LEADTOOLS .NET MAUI framework.
For any LEADTOOLS Xamarin apps you have already built, we recommend you migrate to the LEADTOOLS .NET MAUI framework. To help you with the migration, review the LEADTOOLS .NET MAUI tutorials to get you started.
This change is driven by Microsoft's announcement to end Xamarin support.
Starting a LEADTOOLS Barcode Demo
From the short-cuts menu in your LEADTOOLS installation Start Menu folder, select one of the following shortcuts
- <INSTALLDIR>\Shortcuts\Barcode\.NET Framework Class Libraries\Barcode Demo\Barcode Demo 32-bit
- <INSTALLDIR>\Shortcuts\Barcode\.NET Framework Class Libraries\Barcode Demo\Barcode Demo 64-bit
Alternatively, you can run the pre-compiled demo directly from this location
- <INSTALLDIR>\Bin\DotNet4\Win32\CSBarcodeMainDemo_Original.exe
- <INSTALLDIR>\Bin\DotNet4\x64\CSBarcodeMainDemo_Original.exe
The LEADTOOLS Barcode Demo will launch and try to open the default sample barcode images (Barcode1.tif and Barcode2.tif) that ship with LEADTOOLS:
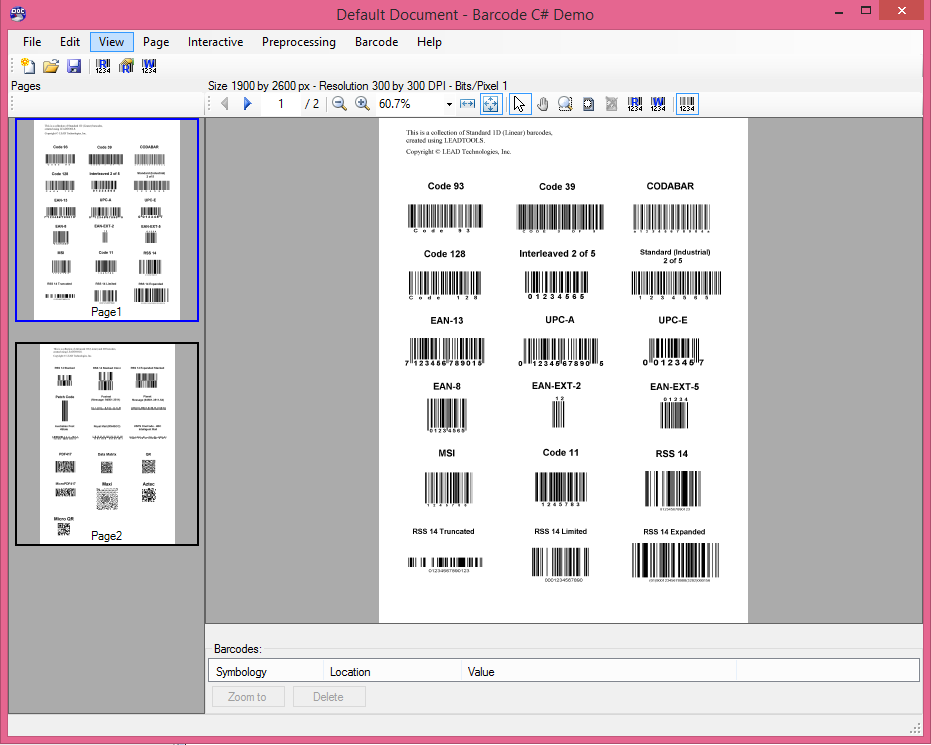
Load your own image by selecting File->Open or File->Scan->Acquire.
Reading Barcodes
When you are ready for reading barcodes, select Barcode->Read Symbologies Options to set up the read options. From this dialog, select which symbologies to read (by default all symbologies are selected). Drill down to the individual symbology or group of symbologies read options and fine-tune the options to your needs:
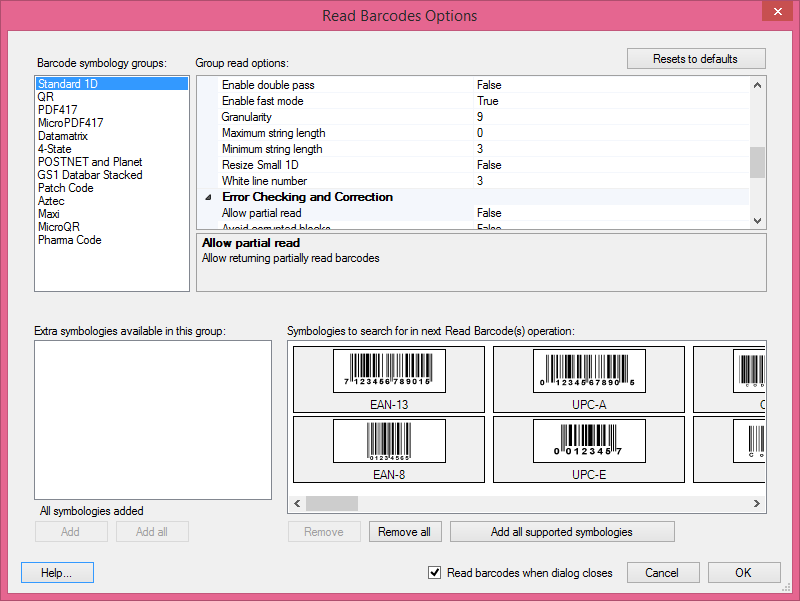
When satisfied with these options, click OK and the demo will automatically start reading the barcodes in the current open document. You can also read barcodes at any time by selecting the Barcode->Read Barcodes menu item (or pressing the F5 keyboard shortcut). The demo will use the BarcodeReader.ReadSymbology event to show the barcodes as they are being read from the document:
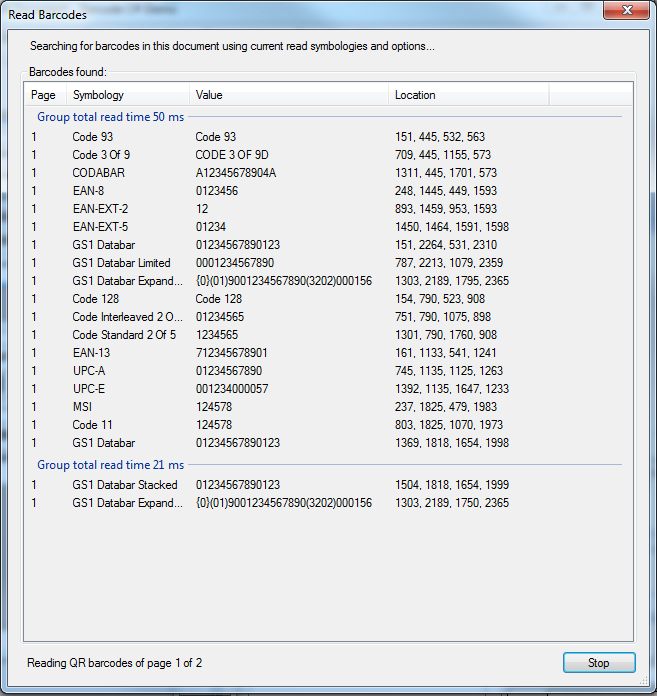
After the barcodes have been read, click OK and the demo will add the barcodes that have been read to the "Barcodes" list view, which is below the main view of the current page. The demo will draw the barcodes on top of the image so you can select specific barcodes for examination using the mouse:
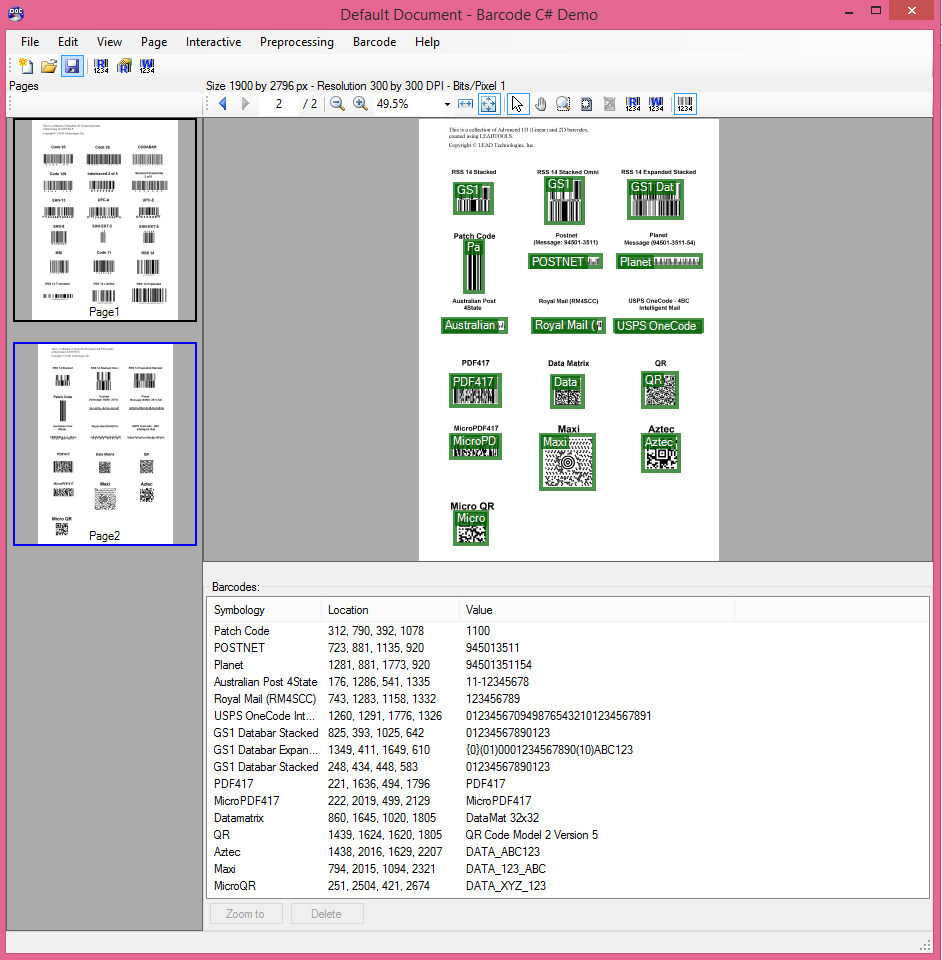
You can also read barcode(s) from a specific area of the page by either adding a region of interest (Interactive->Region of interest menu item) or directly rubber-banding the area of interest (Interactive->Read barcode menu item)
Writing Barcodes
To write a barcode to the current open document page, select Barcode->Write barcode from the main menu (or select the Interactive->Write barcode menu item). The following Write Barcode dialog will appear:
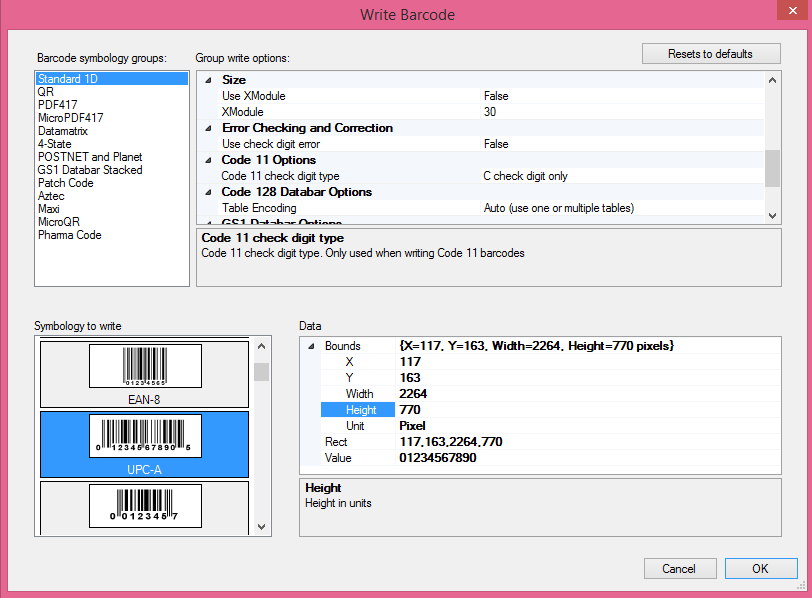
From this dialog, select the barcode symbology, its data, and any extra options. In the example above, we selected a UPC Version A barcode with data equal to "01234567890", at location (117, 163, 2264, 770 pixels).
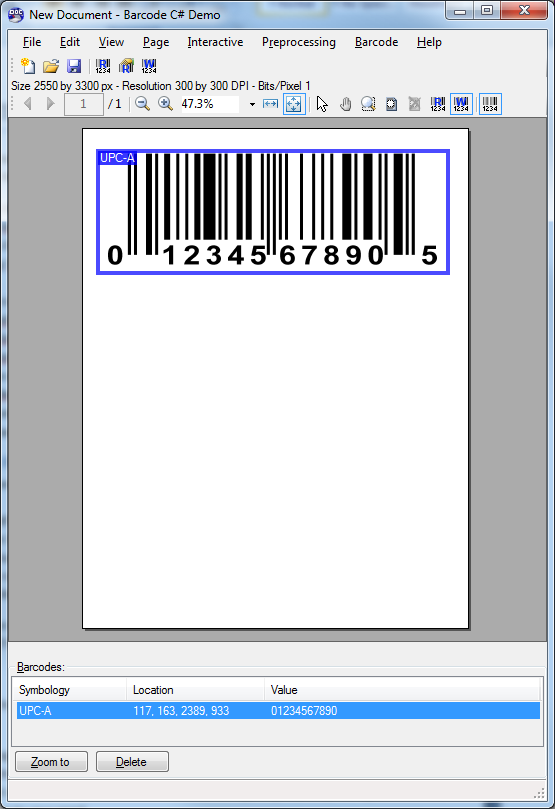
After clicking OK, the toolkit will try to write the specified barcode. If successful, the demo will add this new barcode to the Barcodes list view and draw it on top of the image:
The demo contains additional functionality such as loading/saving options or barcode data, zooming in and out, panning, and more.
