Is this page helpful?
Configuring the Media Creation Service
The Medical Workstation Media Creation Service helps the end-user burn files to a disc for viewing on computers independent of the Medical Workstation. Only administrators can configure this service. The Medical Workstation Media Creation Service works with any CD or DVD burner/writer. Additionally, there is a special integration with the Primera Disc Publisher (more automation and labelling). If you are going to use the Primera Disc Publisher and PT Burn Service, make sure they are configured before setting up and turning on the Media Creation Service.
Media Creation Service
Perform the following steps to set up and configure the Media Creation Service:
-
Select the Service Manager icon at the bottom of the window.

-
Select the Media Creation Configuration icon at the top of the window.

-
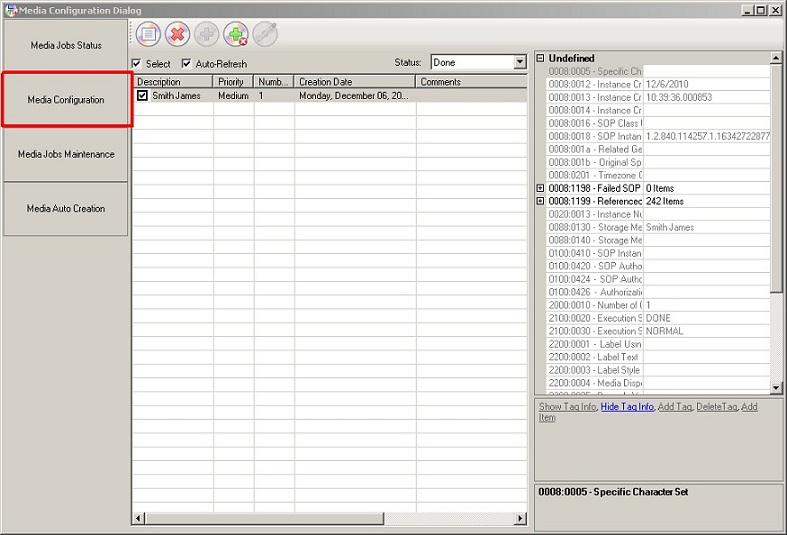
On the Media Configuration Dialog, click the Media Configuration button.
-
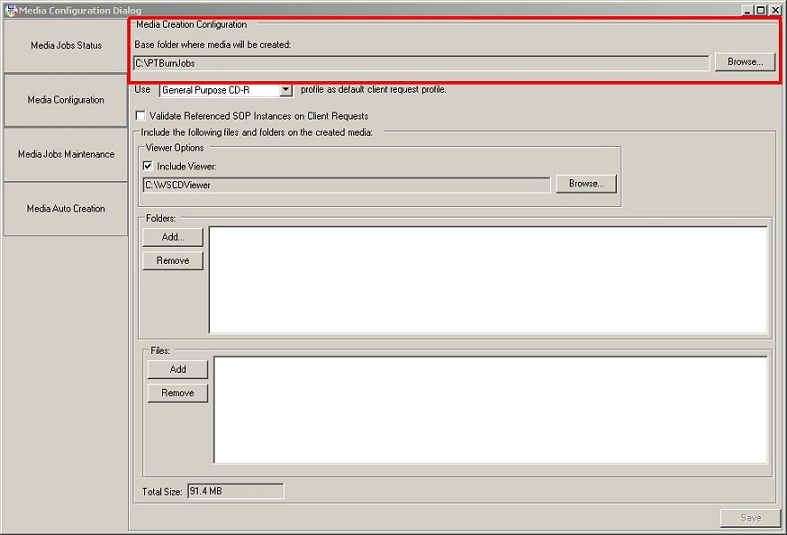
In the Media Creation Configuration group, click the Browse button besides the Base Folder Where Media Will Be Created field, and navigate to the directory your PT Burn Service watches for print jobs.
-
Open the Use drop-down list to select the type of media to be used in your burner(or Primera Disc Publisher).

-
If you want validation to be performed prior to burning, select the Validate Referenced SOP Instances on Client Requests check box.

-
Use the fields in the Viewer Options group to specify whether to include a CD version of the Medical Workstation on the disc. Select the Include Viewer check box to include the viewer. Click the Browse button and navigate to the location of the CD version of the Medical Workstation. The CD Viewer will now be copied to each disc made.

-
You can also include other files and folders, such as an auto run file (which causes the disc to automatically load the Viewer and any other files on the disc whenever the disc is first inserted into a computer). Use the fields in the Folders and the Files groups to select the folders and files.
-
To add files or folders, click the appropriate Add button. Depending on which button is clicked, either the Open dialog to select files, or a Browse For dialog to select folders appears. Navigate to the location of the folder or file and click OK.
-
Remove items by making a selection in one of the lists and then clicking its Remove button. This removes items from the burn process.
-
-
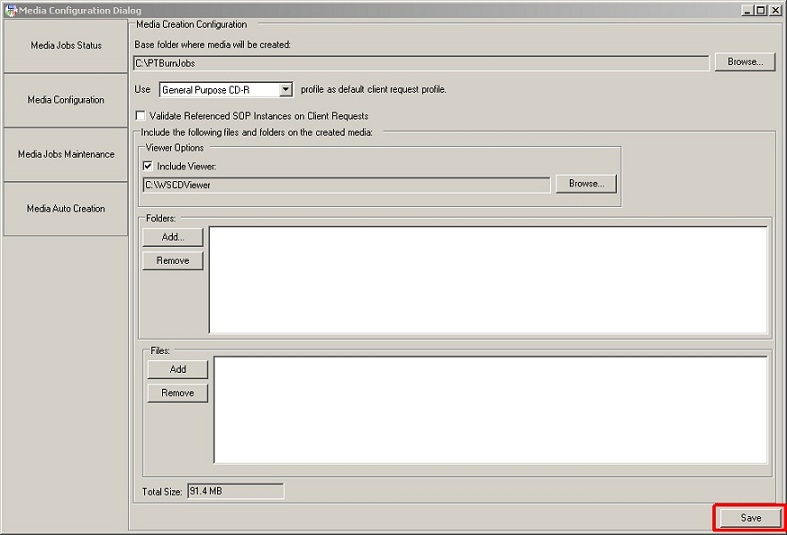
When configuration is complete, click the Save button on the bottom right corner of the Media Configuration Dialog box.
Media Job Maintenance
When a Media Job is created, the files that are used to assist in the burning process (along with the actual files themselves), are copied to the base folder specified in step 4 above. It is best to enable a maintenance plan for the cleanup of this folder.
Perform the following steps to configure maintenance plan options:
-
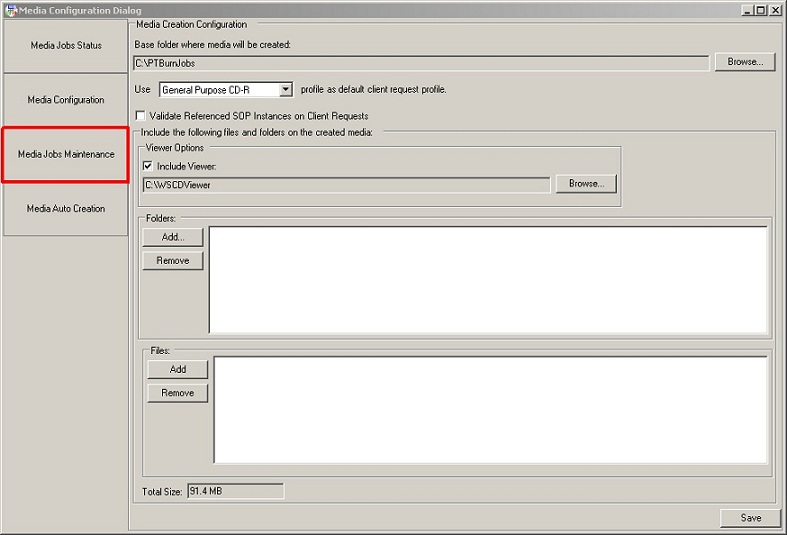
On the Media Configuration Dialog, click the Media Jobs Maintenance button.
-
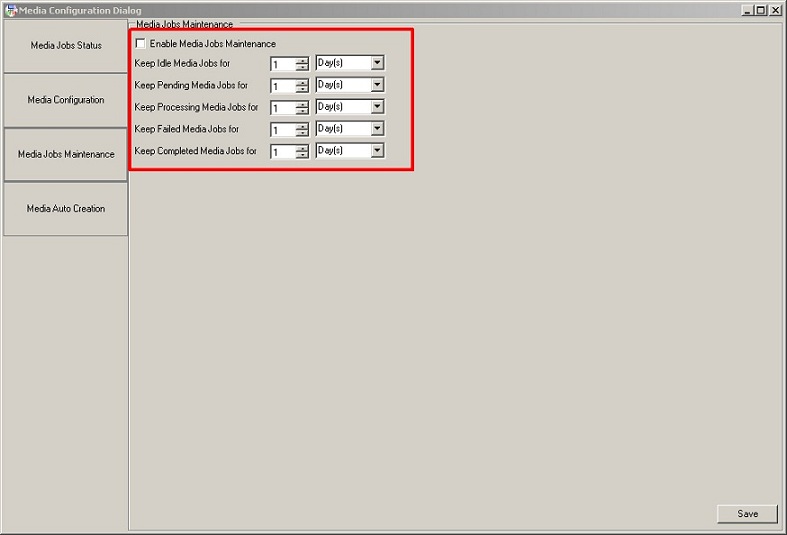
Select the Enable Media Jobs Maintenance check box.
-
Specify how long the files should be kept. Each status can have a different amount of time. After a time limit is exceeded the job gets deleted from the folder.
-
When you are finished, click the Save button on the bottom right corner of the dialog box to save the settings.
Media Auto Creation
You can specify in the Media Configuration Dialog whether a request made by an end user to create a Media Project will be automatically performed. By default the request is kept in a queue so administrators can start or delete the request.
To enable automatic media creation by end users (without requiring administrator approval), perform the following steps:
-
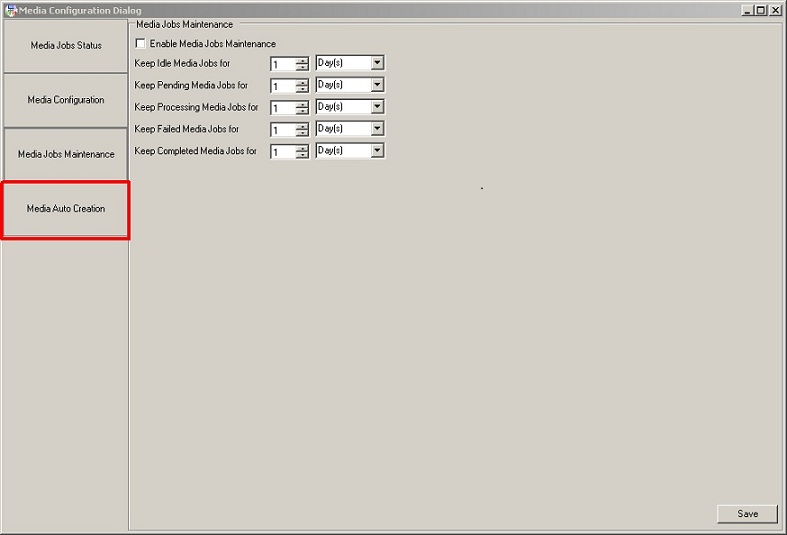
On the Media Configuration Dialog, click the Media Auto Creation button.
-
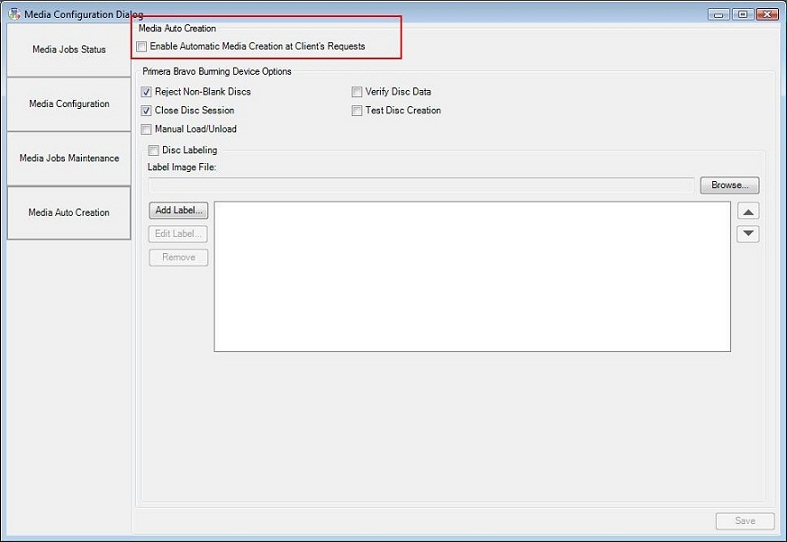
Select the Enable Auto Media Creation On Client's Request check box to enable burning at the time the end user requests it. Clear the check box if you want the request to be kept in the Pending queue where administrators can start or delete the request.
-
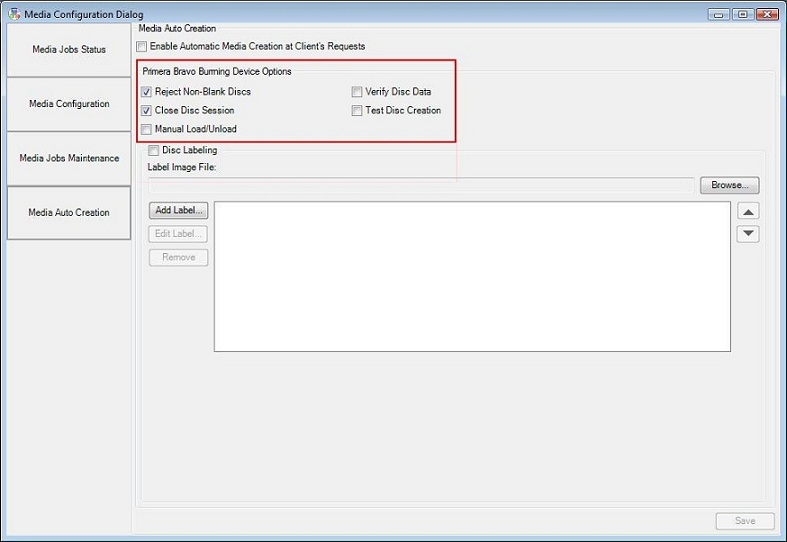
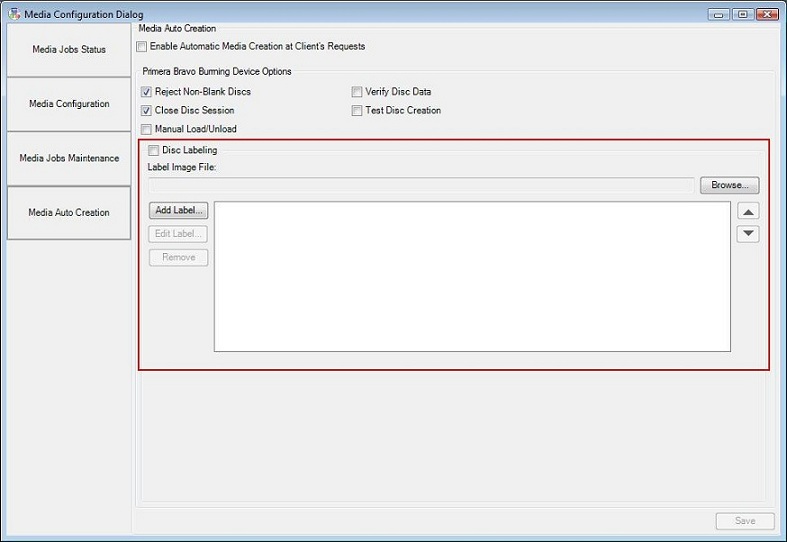
Use the following options in the Primera Bravo Burning Device Options group to specify additional options for the burn process.
-
If the Reject Non-Blank Discs check box is selected, the disc will be rejected unless blank media is inserted. If the check box is clear, the system will attempt to add a session.
-
Select the Close Disc Session check box if you want to close the disc so that no other sessions can be added.
-
Select the Manual Load/Unload check box if you want to manually load and unload the burner.
-
Select the Verify Disc Data check box if you want the disc to be verified.
-
Select the Test Disc Creation check box if you want the disc to be tested instead of recorded.
Select the check boxes beside the options you want.These options are specifically for the Primera Bravo Burning Device.
-
-
If you are using the Primera Bravo Burning device, you can also select the Disc Labeling check box to have labels automatically written on the front of the CD. Specify the format for the label by clicking the Browse button and navigating to an STD file created with the Sure Thing Labeler. You can also specify items that should automatically be applied to the label by clicking the Add Label button. Use the Add Label dialog to add an image or client-requested text. Specify DICOM Tags that should be filled into Merge Fields that were created in Sure Thing Labeler by clicking the Custom button.
-
Click the Save button on the bottom right corner of the Media Creation dialog after all the settings have been confirmed.
Media Job Status
When automatic media creation is enabled (the Enable Auto Media Creation On Client's Request check box is selected), use the Media Jobs Status dialog to view the status of media requests. When automatic media creation is not enabled, the administrator manages the progress of the media request using this dialog.
Automatic Media Creation is Enabled Scenario
Viewing
Use the following procedures when automatic media creation is enabled. To view all requests by end users, perform the following steps:
-
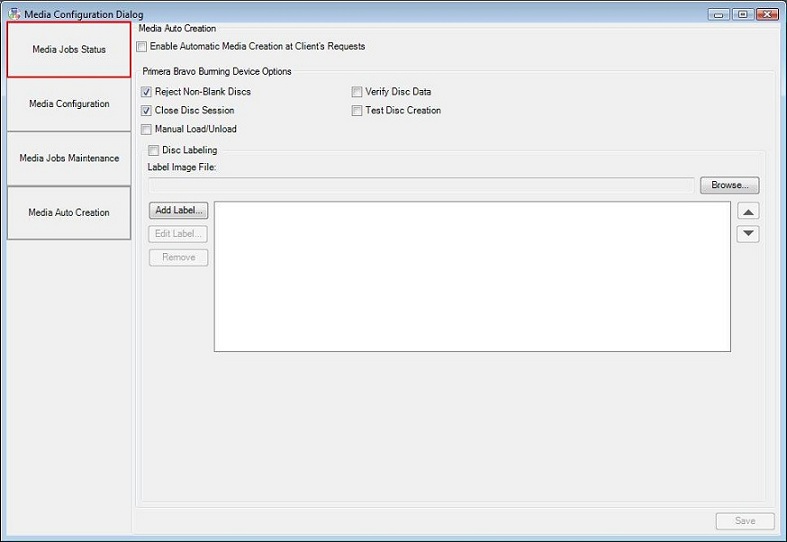
On the Media Configuration Dialog, click the Media Job Status button.
-
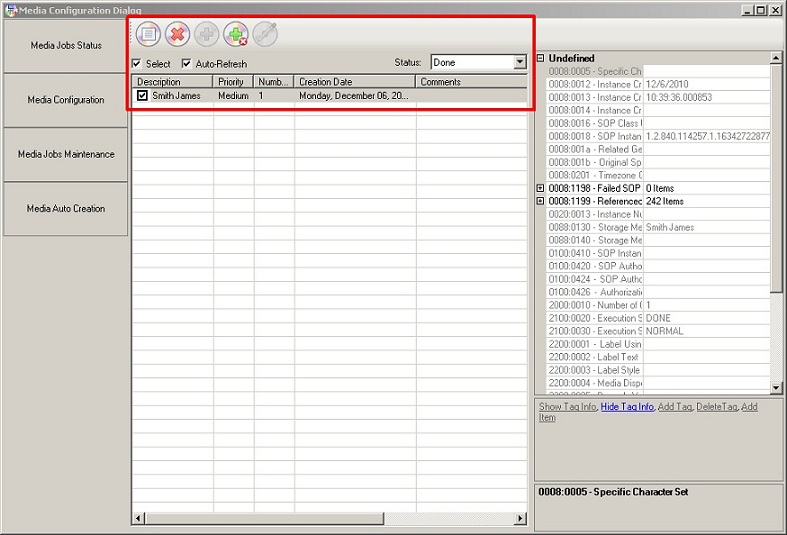
Use the Media Jobs Status list view to view the status of the Media Requests, grouped by status.
-
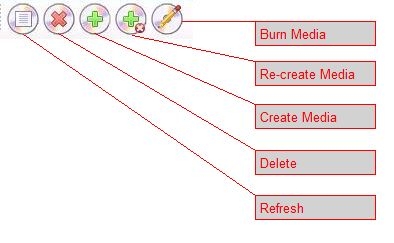
The icons at the top of the dialog control the process, as shown in the following figure:
-
Open the Status drop-down list and select a status(Pending, Creating, Idle, Failure and Done) to view all of the items having that status.
-
To select all of the items in the list, select the Select check box. Conversely, to deselect all of the items in the list, clear the Select check box
-
Select the Auto-Refresh check box to have the list updated without user interaction. Manually refresh the list by clicking the Refresh button.
-
Viewing, Burning, Deleting Requests
To view, burn, or delete an end user request while creating media in manual mod, perform the following steps:
-
On the Media Configuration Dialog, click the Media Jobs Status button.

-
Use the Media Jobs Status list view to control the status of all Media Requests, grouped by status. Open the drop-down list and select a status (Pending, Creating, Idle, Failure and Done).
-
The icons at the top of the dialog control the process, as shown in the following figure:

-
Open the Status drop-down list and select a status (Pending, Creating, Idle, Failure, and Done) to view all of the items having that status.
-
To select all of the items in the list, select the Select check box. Conversely, to deselect all of the items in the list, clear the Select check box.
-
Select the Auto-Refresh check box to have the list updated without user interaction. Manually refresh the list by clicking the Refresh button.

-
-
All incoming requests are given a “Pending” status. If Media Auto Creation has been enabled, to complete a request, select the job request and click the Create Media icon. The job request moves to the “Creating” status after a job has started.

-
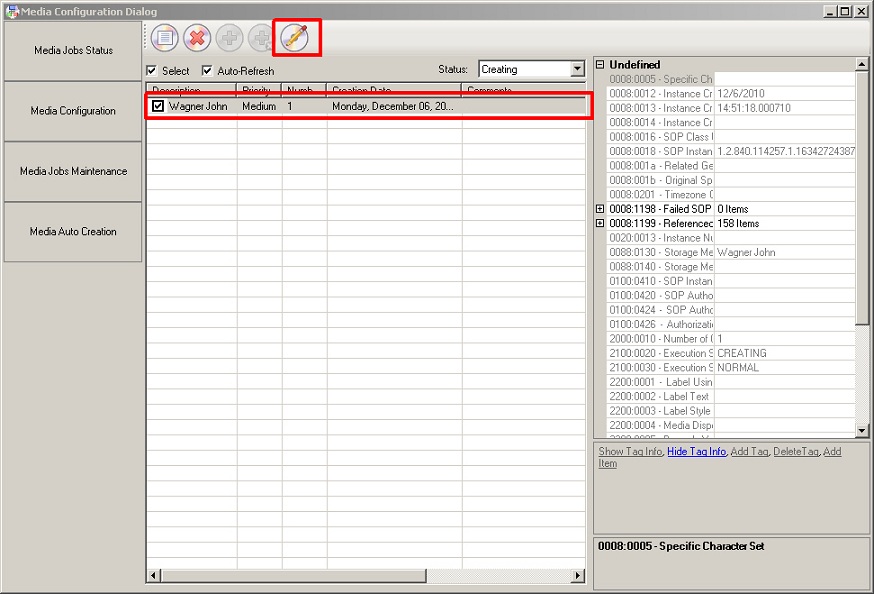
After the job has moved to the “Creating” status and finished the process of writing the job to your PT Burn folder, you can then burn the job using your Primera device. Select the job in the Media Jobs Status list view and click the Burn icon. The Burn Media dialog box should appear. If the Burn icon is not available, see if the job has been given a "Failure" status. If so, resolve the issue. Failures can occur if the Primera device is turned off, there are unresolved installation issues, etc.
-
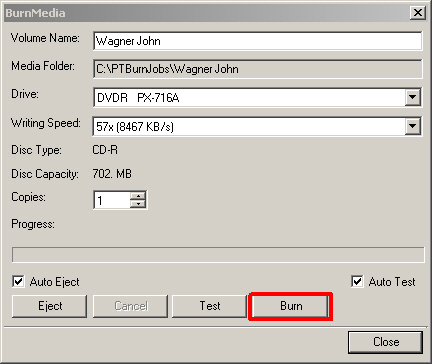
On the Burn Media dialog, select the drive to be used for burning. You can also specify a name for the disc, which write speed to use and how many copies to make. Test the feasibility of the media job by clicking the Test button. Click the Burn button to copy the contents of the folder to the specified CD or DVD. Click the Close button to go back to the main window.
-
After the burn process completes, the media job is given a "Done" Status. Re-create the job by clicking the Re-Create Media icon, or delete the job by clicking the Delete icon.
