Load UserMedicalPack Custom Annotations - WinForms C# .NET 6
This tutorial shows how to build, load, and debug the Annotations UserMedicalPack assembly, which contains a package of medical-specific custom annotations objects, using the LEADTOOLS SDK.
| Overview | |
|---|---|
| Summary | This tutorial covers how to build, load, and debug the UserMedicalPack sample assembly. |
| Completion Time | 30 minutes |
| Visual Studio Project | Download tutorial project (10 KB) |
| Platform | WinForms C# .NET 6 Application |
| IDE | Visual Studio 2022 |
| Development License | Download LEADTOOLS |
Required Knowledge
Get familiar with the basic steps of creating a project by reviewing the Add References and Set a License tutorial, before working on the Load UserMedicalPack Custom Annotations - WinForms C# .NET 6 tutorial,
In order to run the pre-built demo, download and install the LEADTOOLS v23 SDK here, and make sure that the license and key files are located in the <INSTALL_DIR>\LEADTOOLS23\Support\Common\License directory.
The installed LEADTOOLS SDK contains pre-defined annotation objects, in addition to features that enable creating user-defined custom annotations. One mechanism for implementing such custom objects is to include their code in a package in a separate DLL assembly, then load that package when it is needed into the application.
A project that implements a package of custom objects is included with the toolkit setup and a mechanism for using such packages is included in the .NET Annotations demo, located in the <INSTALL_DIR>\LEADTOOLS23\Examples\Annotation\DotNet\AnnotationsDemo folder.
Build the UserMedicalPack Project
Navigate to the example source code for the package project:
<INSTALL_DIR>\LEADTOOLS23\Examples\Annotation\DotNet\UserMedicalPack.WinForms\net\UserMedicalPack.WinForms.csproj
Open the project in Visual Studio and ensure that the selected solution platform is x64. Build the User Annotations Medical Package using Build Solution from the Build menu.
This should cause the creation of the file, Leadtools.Annotations.UserMedicalPack.WinForms.dll, in the following folder:
<INSTALL_DIR>\LEADTOOLS23\Bin\net
Load the Package in the Annotations Demo
Navigate to the Annotations demo Bin folder:
C:\LEADTOOLS23\Bin\net\AnnotationsDemo_Original.exe
Run the demo and notice the objects in the toolbar.
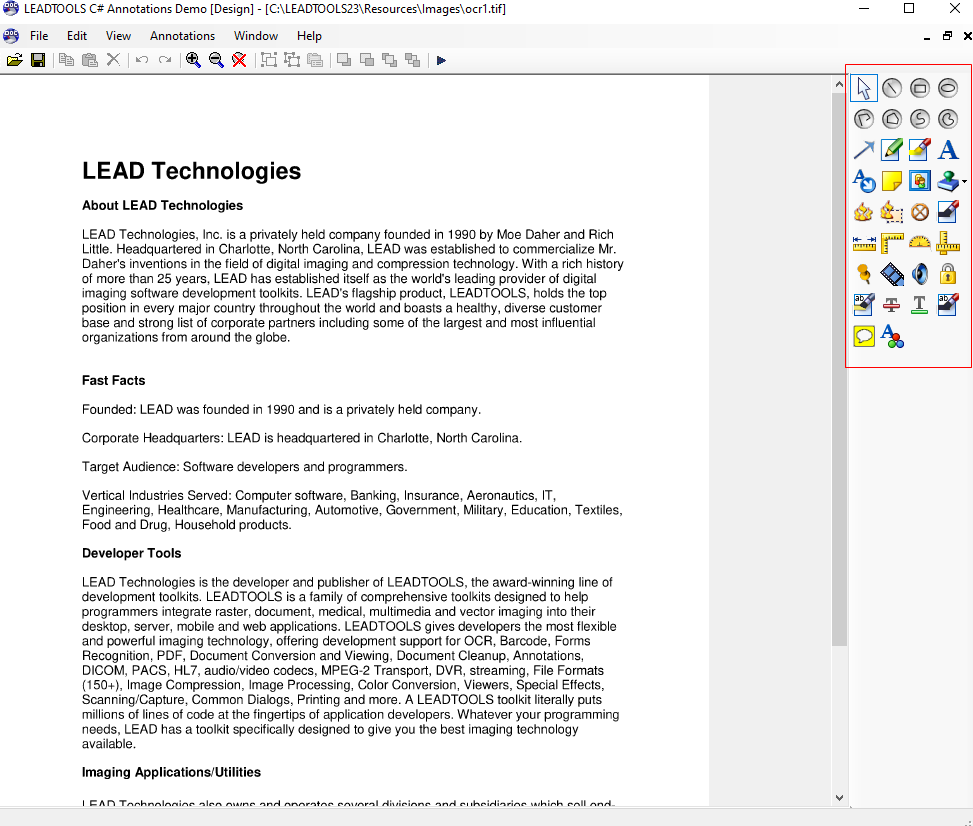
Load the package by selecting Load Package... from the File menu. If a Load Package Information dialog box appears, press OK to dismiss it.
A Load Annotations Package dialog box should appear. Navigate to the folder that contains the package assembly that was built in the previous step, and select Leadtools.Annotations.UserMedicalPack.WinForms.dll, then press Open.
Important Note: Make sure that the package DLL and Annotations Demo have the same platform, which is x64.
After loading the package, notice that the toolbar has new objects in it.
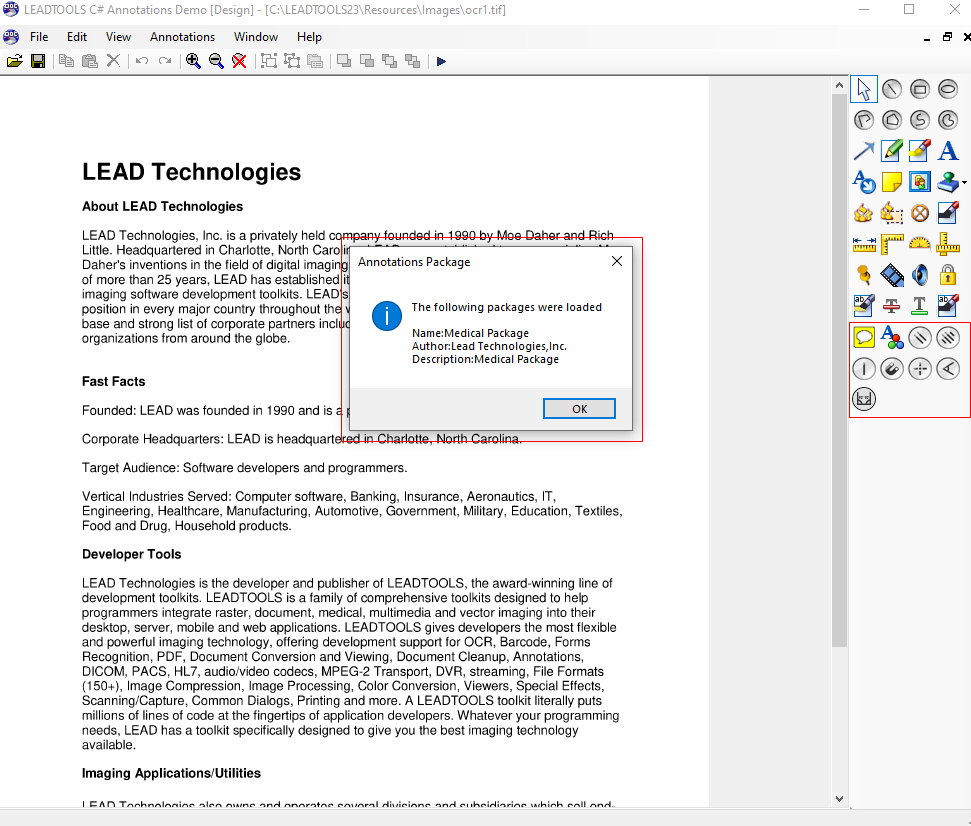
Click on one of the newly added toolbar buttons and draw the corresponding object on the image.
Debug the Package Source Code
Since the package is contained in a DLL project, it needs to be loaded by an EXE application if it is to be debugged. Make sure the Annotations demo is closed before proceeding. With the package project loaded in Visual Studio, right-click the project's name in the Solution Explorer and select Properties.
In the Debug tab, select Open debug launch profiles UI and create a new Launch Profile and select Executable.
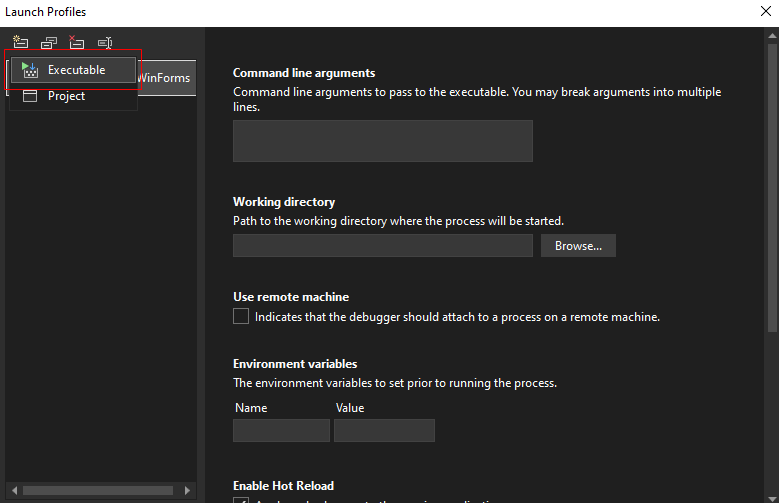
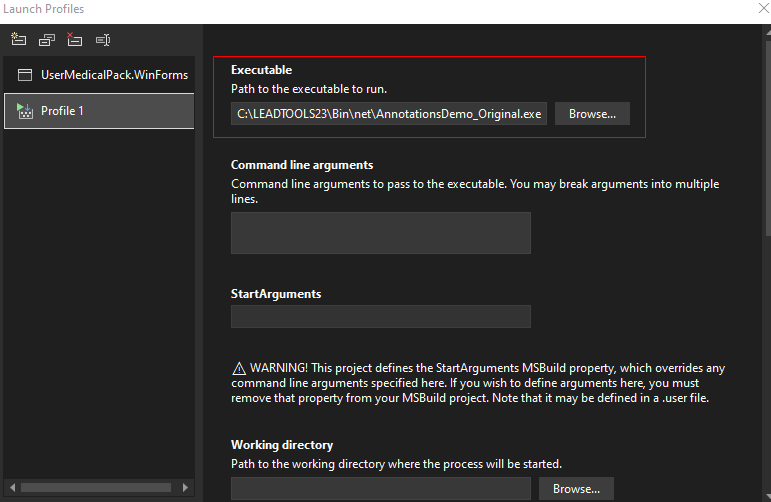
Under the Executable option, browse to the AnnotationsDemo_Original.exe executable and select it.
Open the AnnMedicalPack.cs file and locate the following function:
private static void CreateToolBarItem(AnnAutomationObject annAutomationObject, string resourceName) Place a breakpoint inside the function using Toggle Breakpoint from the Debug menu.
Start debugging by pressing F5, or Debug -> Start Debugging. This will run the Annotations demo. Load the package following the same steps above.
As the package's objects are loaded, the breakpoint will trigger several times.
Load the Package Code
Start with a copy of the project created in the Draw and Edit Annotations on Images tutorial. If the project is not available, follow the steps in that tutorial to create it.
Make the following changes to the project to add the code needed for loading the package.
Right-click on Form1.cs in the Solution Explorer and select View Code to display the code behind the form.
Add the following using statement to the using block at the top.
using System.Reflection; Locate the following line of code, which declares a local variable named managerHelper inside the Form1_Load method and change it as follows:
//Change the following line://AutomationManagerHelper managerHelper = new AutomationManagerHelper(annAutomationManager);//To become like this:managerHelper = new AutomationManagerHelper(annAutomationManager);
Instead of the managerHelper local variable, add it as a global variable outside the Form1_Load method, and add another global variable with it named alreadyLoaded as follows:
private AutomationManagerHelper managerHelper = null;private bool alreadyLoaded = false;
Navigate back to the Form1_Load method. Locate the line Controls.Add(managerHelper.ToolBar);, and add the following line below it to change the location of the toolbar to the bottom of the form.
managerHelper.ToolBar.Dock = DockStyle.Bottom; Open Form1.cs in the Solution Explorer. In the designer, add a File dropdown menu with an Open menu item. To do so, open the Toolbox and double-click MenuStrip, which will add a menu to the form. Add another menu item to the File menu and set its text to &Load Package. Leave the new item's name as loadPackageToolStripMenuItem. Double-click the newly added Load Package menu item to edit its event handler.
Add the following code to the loadPackageToolStripMenuItem_Click event handler.
private void loadPackageToolStripMenuItem_Click(object sender, EventArgs e){string fileName = "Leadtools.Annotations.UserMedicalPack.WinForms.dll";if (!System.IO.File.Exists(fileName)){MessageBox.Show($"Cannot find file \"{fileName}\". Please provide full path for package DLL");return;}if (alreadyLoaded){MessageBox.Show("Should not try to load the same package more than once.");return;}alreadyLoaded = true;Assembly assembly = Assembly.LoadFrom(fileName);Type[] types = assembly.GetTypes();Type packageType = typeof(IAnnPackage);bool packageFound = false;IAnnPackage package = null;foreach (Type type in types){if (packageType.IsAssignableFrom(type)){packageFound = true;package = (IAnnPackage)Activator.CreateInstance(type);managerHelper.LoadPackage(package);break; // No need to search remaing types}}if (packageFound)MessageBox.Show($"Loaded package \"{fileName}\".");elseMessageBox.Show("The specified DLL doesn't contain annotations packages.");}
Run the Project
Run the project by pressing F5, or by selecting Debug -> Start Debugging.
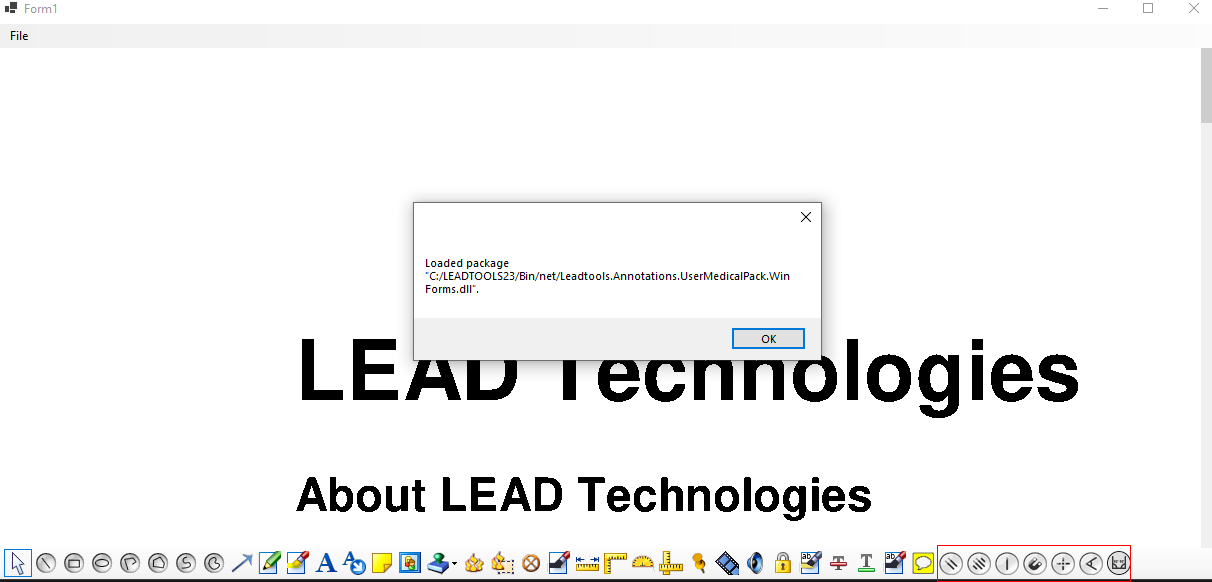
If the steps were followed correctly, the application runs and the user can select Load Package from the File menu to load the package and add the custom objects to the toolbar.
Wrap-up
This tutorial showed how to load custom annotations objects from a package DLL. Also, we covered how to use the IAnnPackage interface.
