Edit Text Annotations After Draw - HTML5 JavaScript
This tutorial shows how to create an HTML5 JavaScript application that uses the LEADTOOLS SDK to create text annotations and edit the default text after drawing them.
| Overview | |
|---|---|
| Summary | This tutorial covers how to use LEADTOOLS Annotations Mark-up SDK technology in an HTML5 JavaScript Application. |
| Completion Time | 30 minutes |
| Visual Studio Project | Download tutorial project (133 KB) |
| Platform | JS Web Application |
| IDE | Visual Studio Code - Client |
| Development License | Download LEADTOOLS |
Required Knowledge
Get familiar with the basic steps of creating a project by reviewing the Add References and Set a License - HTML5 JavaScript and Work with Automated Annotations - HTML5 JavaScript tutorials, before working on the Edit Text Annotations After Draw - HTML5 JavaScript tutorial.
This tutorial makes use of http-server, a console command for running a static file server. To install http-server first install Node.js and then install http-server.
Create the Project and Add LEADTOOLS References
Start with a copy of the project created in the Work with Automated Annotations - HTML5 JavaScript tutorial. If that project is unavailable, follow the steps in that tutorial to create it.
The references needed depend upon the purpose of the project. References can be added by .js files located at <INSTALL_DIR>\LEADTOOLS23\Bin\JS.
For this project, the following references are needed:
Leadtools.jsLeadtools.Controls.jsLeadtools.Annotations.EngineLeadtools.Annotations.Rendering.JavaScript.jsLeadtools.Annotations.Designers.jsLeadtools.Annotations.Automation.jsLeadtools.Demos.jsLeadtools.Demos.Annotations.js
Make sure to copy these files to the project's lib folder.
For a complete list of which JS files are required for your application, refer to Files to be Included with your Application
Set the License File
The License unlocks the features needed for the project. It must be set before any toolkit function is called. For details including tutorials for different platforms, refer to Setting a Runtime License.
There are two types of runtime licenses:
- Evaluation license, obtained at the time the evaluation toolkit is downloaded. It allows the toolkit to be evaluated.
- Deployment license. If a Deployment license file and developer key are needed, refer to Obtaining a License.
Note
Adding LEADTOOLS references and setting a license are covered in more detail in the Add References and Set a License - HTML5 JavaScript tutorial.
Write the JS File
With the project created, dependencies added, the license set, and the Work with Automated Annotations - HTML5 JavaScript tutorial code added, coding can begin.
Open the app.js file located in the project folder. Add the code below to the bottom of window.onload property event to add the functionality to edit text annotations after drawing them.
automation.add_draw(function(sender, e) {const drawObject = e.object;if(e.operationStatus == lt.Annotations.Engine.AnnDesignerOperationStatus.end && drawObject.supportsFont){const rect = automation.container.mapper.rectFromContainerCoordinates(drawObject.bounds);const editTextEventArg = lt.Annotations.Engine.AnnEditTextEventArgs.create(drawObject, rect);automation_EditText(this, editTextEventArg);}});automation.add_editText(automation_EditText);function automation_EditText(sender, e) {const textElement = document.createElement("textArea");textElement.id = 'textObject';textElement.style.left = e.get_bounds().get_left() + 'px';textElement.style.top = e.get_bounds().get_top() + 'px';textElement.style.position = 'absolute';textElement.style.zIndex = '100';textElement.style.height = e.get_bounds().get_height() + 'px';textElement.style.width = e.get_bounds().get_width() + 'px';_textObjectUserData = e.get_textObject();textElement.value = e.get_textObject().get_text();textElement.style.color = e.get_textObject().get_textForeground().get_color();textElement.style.fontFamily = e.get_textObject().get_font().get_fontFamilyName();textElement.style.fontSize = e.get_textObject().get_font().get_fontSize() + 'pt';textElement.wrap = "off";const parent = imageViewer.get_mainDiv().parentNode;parent.appendChild(textElement);automationControl.automationLostFocus.invoke(this, lt.LeadEventArgs.empty);textElement.focus();textElement.addEventListener("focusout", function() {const parent = imageViewer.get_mainDiv().parentNode;let child = document.getElementById('textObject');if (child) {_textObjectUserData.set_text(child.value);parent.removeChild(child);// $("#Content").focus();child = null;}});}
Run the Project
To run the project, open the Command Line and cd into the project folder. Use the following command to run a static file server: http-server.
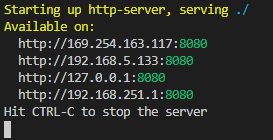
The server should start and run on http://localhost:8080. A message should appear in the console indicating all the ports that the server is available on.

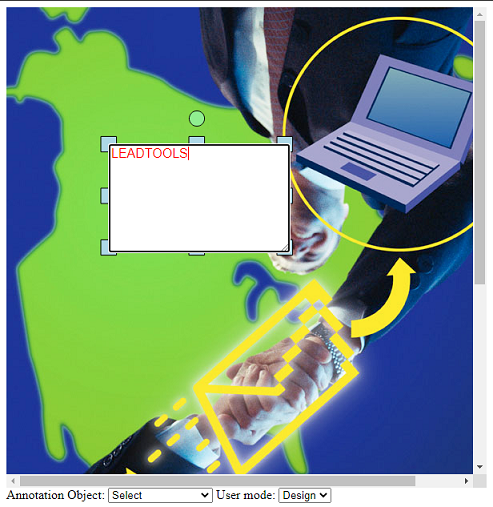
While in design mode, select a text annotation and draw one on the displayed image. Once you have finished drawing the annotation, you should be able to edit the text inside the annotation automatically, as shown below. Also, to edit the text in the annotation you can double-click it.

Wrap-up
This tutorial showed how to edit the default text in a text annotation after drawing the annotation in an HTML5 JavaScript application.
