Display Image in Different View Layouts - WPF C# .NET 6
This tutorial shows how to change the view layout of the ImageViewer in a WPF C# application using the LEADTOOLS SDK.
| Overview | |
|---|---|
| Summary | This tutorial shows how to work with Image Viewer Layouts in a WPF C# application. |
| Completion Time | 30 minutes |
| Visual Studio Project | Download tutorial project (4 KB) |
| Platform | C# Windows WPF Application |
| IDE | Visual Studio 2022 |
| Development License | Download LEADTOOLS |
Required Knowledge
Get familiar with the basic steps of creating a project by reviewing the Add References and Set a License and Display Images in an Image Viewer tutorials, before working on the Display Image in Different View Layouts - WPF C# tutorial.
Create the Project and Add LEADTOOLS References
Start with a copy of the project created in the Display Images in an Image Viewer tutorial. If you do not have that project, follow the steps in that tutorial to create it. Saving the image code is not required for this tutorial and can be commented out.
The references needed depend upon the purpose of the project. References can be added by one or the other of the following two methods (but not both).
If using NuGet references, this tutorial requires the following NuGet packages:
Leadtools.Formats.Raster.CommonLeadtools.Viewer.Controls.Wpf
If using local DLL references, the following DLLs are needed.
The DLLs are located at <INSTALL_DIR>\LEADTOOLS23\Bin\net:
Leadtools.dllLeadtools.Codecs.dllLeadtools.Controls.Wpf.dllLeadtools.Pdf.dll
For a complete list of which DLL files are required for your application, refer to Files to be Included With Your Application.
Set the License File
The License unlocks the features needed for the project. It must be set before any toolkit function is called. For details, including tutorials for different platforms, refer to Setting a Runtime License.
There are two types of runtime licenses:
- Evaluation license, obtained at the time the evaluation toolkit is downloaded. It allows the toolkit to be evaluated.
- Deployment license. If a Deployment license file and developer key are needed, refer to Obtaining a License.
Note
Adding LEADTOOLS NuGet and local references and setting a license are covered in more detail in the Add References and Set a License tutorial.
Add the View Layout Code
With the project created, the references added, the license set, the Image Viewer initialized, and the load image code added, coding can begin.
In the Solution Explorer, open MainWindow.xaml. Add a new dropdown MenuItem named ViewLayouts. Inside this new MenuItem add the 3 MenuItems in the table below.
| MenuItem Name | MenuItem Header |
|---|---|
_singleItem |
Single Item Mode |
_horizontalLayout |
Horizontal Mode |
_verticalLayout |
Vertical Mode |
The new XAML code should look like the code below.
<Grid><Grid.RowDefinitions><RowDefinition Height="Auto"></RowDefinition><RowDefinition Height="*"></RowDefinition></Grid.RowDefinitions><Grid Grid.Row="1" Name="imageViewerGrid"></Grid><Menu Name="_mainMenu"><MenuItem Name="_file" Header="File"><MenuItem Name="_fileOpen" Header="Open" InputGestureText="Ctrl+O" Click="_fileOpen_Click"/></MenuItem><MenuItem Name="_viewLayouts" Header="View Layouts"><MenuItem Name="_singleItem" Header="Single Item Mode" Click="_singleItem_Click"/><MenuItem Name="_horizontalLayout" Header="Horizontal Mode" Click="_horizontalLayout_Click"/><MenuItem Name="_verticalLayout" Header="Vertical Mode" Click="_verticalLayout_Click"/></MenuItem></Menu></Grid>
After the above XAML code is added, open MainWindow.xaml.cs, to bring up the code behind the window. Add the using statements below to the top.
using System;using System.IO;using System.Windows;using Microsoft.Win32;using Leadtools;using Leadtools.Codecs;using Leadtools.Controls;
Next, add a new RasterImage global variable.
private RasterImage image; Update the code inside the _fileOpen_Click event handler, to load all the pages of the image and add each page as an ImageViewerItem.
private void _fileOpen_Click(object sender, RoutedEventArgs e){OpenFileDialog dlg = new OpenFileDialog();dlg.InitialDirectory = @"C:\LEADTOOLS23\Resources\Images";if (dlg.ShowDialog() == true){codecs.Options.Load.AllPages = true;imageViewer.Items.Clear();image = codecs.Load(dlg.FileName);imageViewer.Image = image;for (int page = 1; page <= image.PageCount; page++){image.Page = page;ImageViewerItem item = new ImageViewerItem();item.Image = image.Clone();imageViewer.Items.Add(item);}imageViewer.UpdateTransform();imageViewer.Invalidate(LeadRectD.Empty);}}
Add a new method to the MainWindow class named SetLayout(ImageViewerViewLayout _layout). This method will be called inside each layout event handler to set the new ImageViewer view layout. Add the code below inside the new method.
private void SetLayout(ImageViewerViewLayout _layout){if (_layout != null)imageViewer.ViewLayout = _layout;imageViewer.UpdateTransform();imageViewer.Invalidate(LeadRectD.Empty);}
Now add the code below to each respective layout event handler to initialize the ImageViewer view layouts.
private void _singleItem_Click(object sender, RoutedEventArgs e){// Switch to a single item layout, this is the ImageViewer's default behaviorImageViewerSingleViewLayout layout = new ImageViewerSingleViewLayout();SetLayout(layout);}
private void _horizontalLayout_Click(object sender, RoutedEventArgs e){// Switch to a one row horizontal view layoutImageViewerHorizontalViewLayout layout = new ImageViewerHorizontalViewLayout();layout.Rows = 1;SetLayout(layout);}
private void _verticalLayout_Click(object sender, RoutedEventArgs e){// Switch to a one column vertical view layoutImageViewerVerticalViewLayout layout = new ImageViewerVerticalViewLayout();layout.Columns = 1;SetLayout(layout);}
Run the Project
Run the project by pressing F5 or by selecting Debug -> Start Debugging.
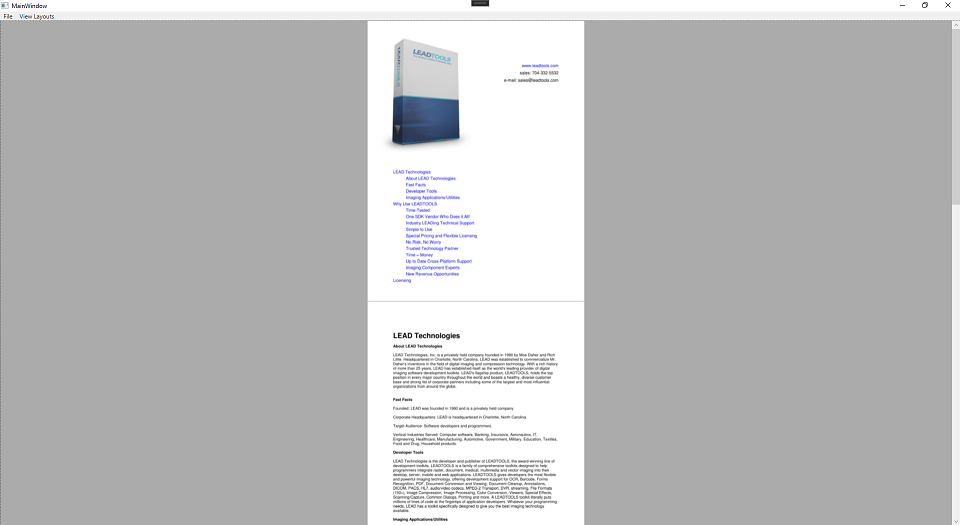
If the steps were followed correctly, the application should run and display an empty ImageViewer. To test, follow the steps below:
-
Click on File -> Open to bring up the OpenFileDialog.
-
Select an image to be loaded into the ImageViewer. Ensure that you pick a multipage file to see the view layout change.
-
Select the desired view layout in the
View Layoutsdrop down menu to change the view layout of theImageViewer.
Wrap-up
In this tutorial, we covered how to use the ImageViewerItem class with the ImageViewer class to change the view layout when viewing a multipage image file.
