Add References and Set a License - Java Android
This tutorial shows how to get started with the LEADTOOLS SDK in a Java Android application.
| Overview | |
|---|---|
| Summary | This tutorial covers how to set a license in an Android application. |
| Completion Time | 30 minutes |
| Project | Download tutorial project (102 KB) |
| Platform | Java (Android) |
| IDE | Android Studio |
| Runtime License | Download LEADTOOLS |
| Try it in another language |
|
Required Knowledge
Before any functionality from the SDK can be leveraged, a valid runtime license will have to be set.
For instructions on how to obtain a runtime license refer to Obtaining a License.
Create the Project
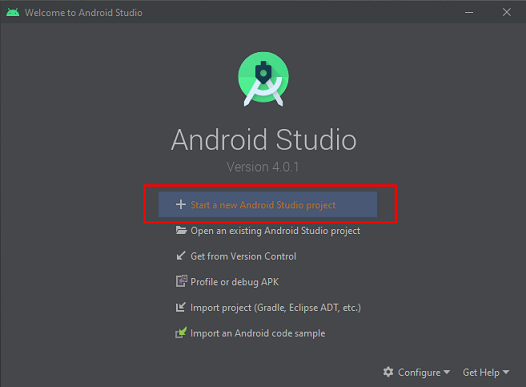
Launch Android Studio and select Start a new Android Studio project.
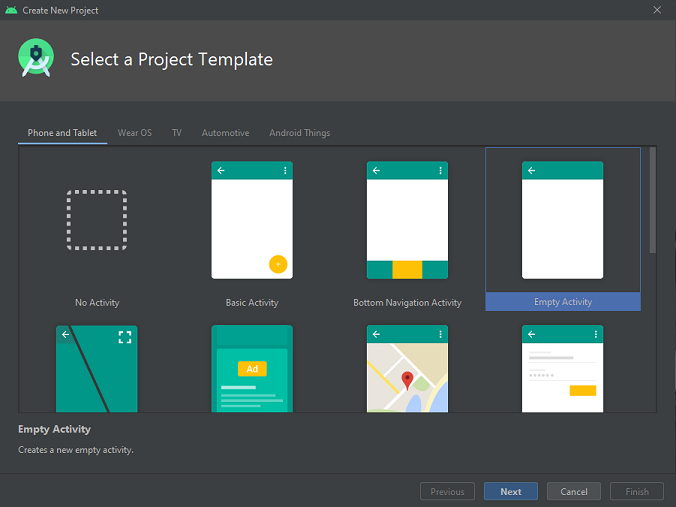
Choose a template for the project. This tutorial uses the Empty Activity project. Select Next to continue.
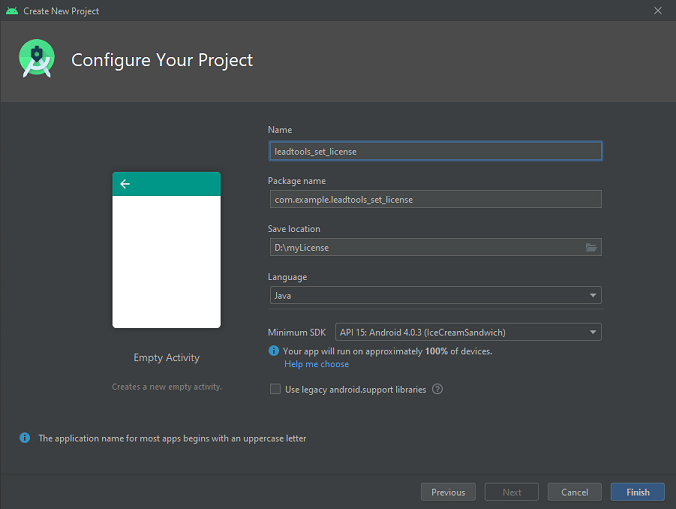
Name this project leadtools_set_license, and select the Java language. Click Finish to continue.
Allow gradle and background processes to complete upon creation of a new application.
Configure the Project
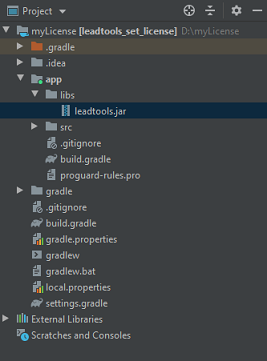
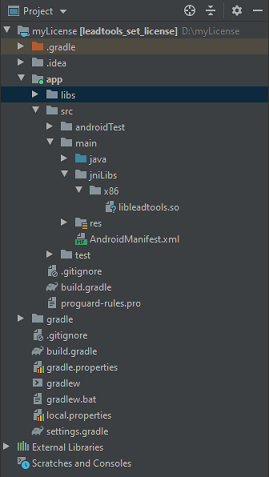
Ensure Project is selected, open the app folder and look for the libs folder. Add the leadtools.jar into the libs folder. You can find leadtools.jar in the following path: <INSTALL_DIR>\Bin\Java, after installing the LEADTOOLS Android SDK.
Open the <APP_DIR>\app\src\main folder, create a new folder and name it jniLibs. Add a subfolder for the CPU architecture that will be supported. This example will use x86 architecture. Copy the appropriate version of libleadtools.so to this x86 subfolder. The .SO files can be found in the <INSTALL_DIR>\Bin\Android directory.
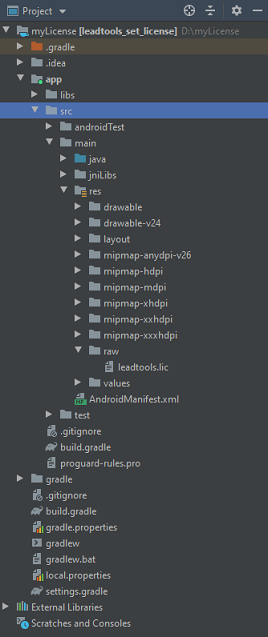
Open the <APP_DIR>\app\src\main\res and create a folder called raw. Input the LEADTOOLS license LIC file inside the raw folder. Ensure the LIC file is named leadtools.lic, and that the naming convention does not include any capitalization in the name.
Locate and open build.gradle. Add the following line in the 'dependencies' block.
implementation fileTree(dir: 'libs', include: ['*.jar']) 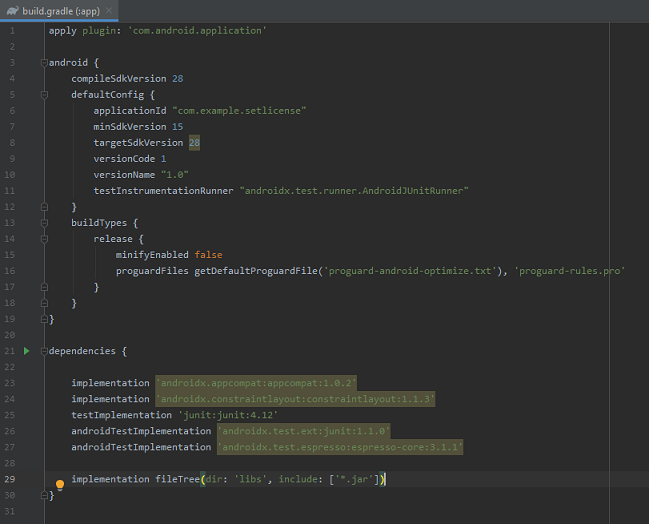
Add the Set License Code
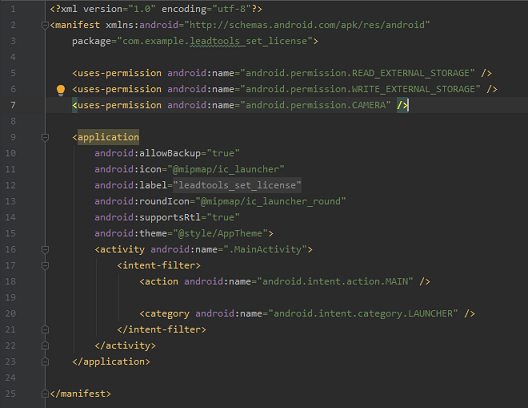
Locate the AndroidManifest.xml file in the \app\src\main folder. In this file, add the following code to enable permissions for the application.
<uses-permission android:name="android.permission.READ_EXTERNAL_STORAGE" /><uses-permission android:name="android.permission.WRITE_EXTERNAL_STORAGE" /><uses-permission android:name="android.permission.CAMERA" />
Open app\src\main\java\ and locate the MainActivity.java file. A license will need to be set in order to be able to access the LEADTOOLS SDK. Here is an example code on how to achieve this. Be sure to replace "Input_Developer_Key_Here" with the development key that is being used.
import androidx.core.app.ActivityCompat;import android.Manifest;import android.os.Build;import leadtools.RasterSupport;import leadtools.LTLibrary;import leadtools.Platform;import android.content.Context;import android.util.Log;import android.widget.Toast;import android.content.pm.PackageManager;public class MainActivity extends AppCompatActivity {private int Storage_Permission_Code =1;private String [] PERMISSIONS = { // Permissions to enableManifest.permission.READ_EXTERNAL_STORAGE,Manifest.permission.WRITE_EXTERNAL_STORAGE,Manifest.permission.CAMERA};private final String TAG = "Info";@Overrideprotected void onCreate(Bundle savedInstanceState) {super.onCreate(savedInstanceState);setContentView(R.layout.activity_main);if(!hasPermissions(this, PERMISSIONS)){ActivityCompat.requestPermissions(this, PERMISSIONS, Storage_Permission_Code);}// Get shared libraries path for APKString sharedLibsPath = this.getApplicationInfo().nativeLibraryDir;// Load LEADTOOLS native librariestry{Platform.setLibPath(sharedLibsPath);Platform.loadLibrary(LTLibrary.LEADTOOLS);}catch(Exception ex) {Log.d(TAG,"Failed to load LEADTOOLS Native libraries" );}// Set the LEADTOOLS licensetry{RasterSupport.setLicense(this, getResources().openRawResource(R.raw.license), "Input_Developer_Key_Here");}catch(Exception ex){Log.d(TAG, "Failed to set LEADTOOLS license");finish();}if(RasterSupport.getKernelExpired()){Log.d(TAG, "LEADTOOLS kernel is expired");finish();}Toast.makeText(getApplicationContext(), "My set license app", Toast.LENGTH_LONG).show();}public boolean hasPermissions(Context context, String... permissions){if (context != null && permissions != null){for(String permission : permissions){if(ActivityCompat.checkSelfPermission(context, permission) != PackageManager.PERMISSION_GRANTED){return false;}}}return true;}}
Run the Project
Run the project by pressing Shift + F10.
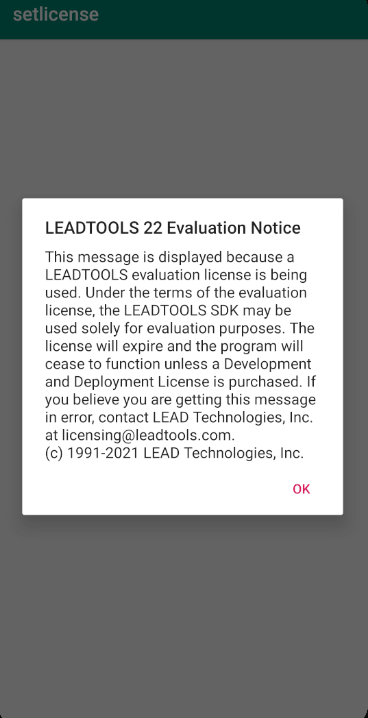
If the steps were followed correctly, the application runs with the LEADTOOLS license set.
Pitfall - Using the wrong architecture
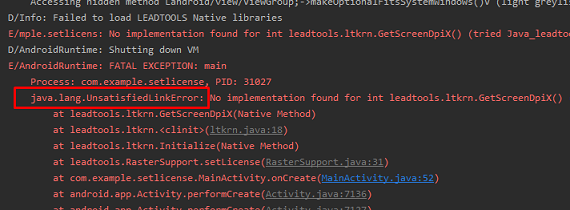
If the android device that is being deployed to does not use the x86 architecture, an UnsatisfiedLinkError exception will occur. To fix this, update the libleadtools.so file to match the architecture of the device.
The Import Feature
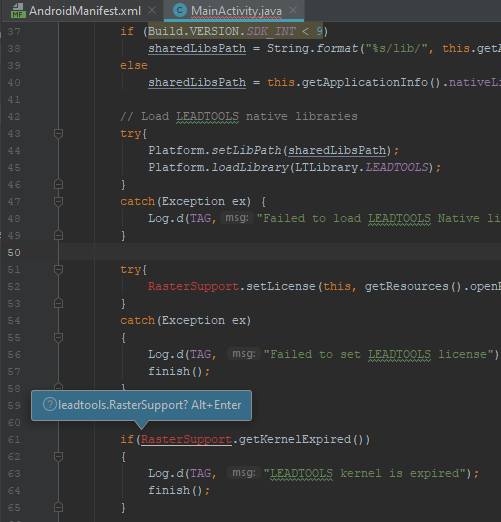
Once the .SO and JAR files are added in a application, the import keyword will let the application know which package to use. Android Studio provides a useful feature which will add this declaration automatically. To do this, press Alt + Enter when prompted to add the necessary declaration at the beginning of the application.
Wrap-up
This tutorial showed how to set a license in a new Java Android Project, and how to enable permissions. This is the basis for all Android applications using the LEADTOOLS SDK. All the functionality in the SDK is unlocked via setting a license, setLicense must be called before calling any LEADTOOLS SDK methods. After the SDK is purchased, the evaluation license can be replaced with a valid runtime license to disable the Nag Message.
