Get Started with the Document Editor - HTML5 JavaScript
This tutorial shows how to configure and run the LEADTOOLS Document Editor Demo with the Document Service.
| Overview | |
|---|---|
| Summary | This tutorial covers how to run the LEADTOOLS Document Editor Demo and use some of its features. |
| Completion Time | 5-10 minutes |
| Platform | HTML5/JS |
| IDE | Visual Studio Code/ Visual Studio 2017, 2019, 2022 |
| Development License | Download LEADTOOLS |
Required Knowledge
Be sure to download and install the LEADTOOLS SDK, and make sure that your license and key files are located in your <INSTALL_DIR>\LEADTOOLS23\Support\Common\License directory.
Open the Document Editor Demo
The installed LEADTOOLS SDK includes the Document Editor Demo which showcases many of the features that the SDK offers.
Once the LEADTOOLS SDK is installed, using File Explorer, navigate to the demo in the file path below:
<INSTALL_DIR>\LEADTOOLS23\Examples\Editors\JS\DocumentEditorDemo
Open the folder in Visual Studio Code, by clicking File -> Open Folder, then selecting the Document Editor Demo directory in the file dialog.
You can also load the project's solution file located in its directory, which will load the Document Editor Demo as well as the .NET Framework Document Service in Visual Studio. You can run them both by selecting Debug > Start Debugging or by pressing F5. If choosing to use Visual Studio for these projects, you can skip this next section.
Set up and Configure the Demo with the Document Service
The Document Editor Demo relies on a server-side backend service for some of its functionality:
- Importing document formats such as
PDFandDOCX - Exporting the current document to the same or different format
The Document Service is written in three different languages. Each Document Service uses a different Port when deploying, by default.
| Language | Path to Service Project | Default Url | Compatible OS |
|---|---|---|---|
| .NET Framework | <INSTALL_DIR>\LEADTOOLS23\Examples\Document\JS\DocumentServiceDotNet\fx |
http://localhost:40000/ |
Windows |
| .NET 6 | <INSTALL_DIR>\LEADTOOLS23\Examples\Document\JS\DocumentServiceDotNet\net |
http://localhost:30000/ |
Windows, Linux, Mac |
| Java | <INSTALL_DIR>\LEADTOOLS23\Examples\Document\JS\DocumentServiceJava |
http://localhost:8080/ |
Windows, Linux, Mac |
By default, the Document Editor Demo is configured to work with the .NET Framework service. To change the URL to work with another service URL, simply open <INSTALL_DIR>\LEADTOOLS23\Examples\Editors\JS\DocumentEditorDemo\site\serviceConfig.json and modify the serviceHost value to the correct URL:
{"serviceHost": "http://localhost:40000","servicePath": "","serviceApiPath": "api",}
Run the .NET Framework Document Service
The .NET Framework Document Service has two different projects that can be opened. The DocumentService.csproj uses local references from <INSTALL_DIR>\LEADTOOLS23\Bin\Dotnet4\<CPU_ARCH>, and the DocumentService_Nuget.csproj uses NuGet Packages. Choose one, and open it in Visual Studio.
Run the project through Visual Studio and explore the resources and options already available. Decide on the type of project to compile, and whether to use the NuGet Packages.
Run the .NET 6 Document Service
The .NET 6 Document Service has two different projects that can be opened. The DocumentService.csproj uses local references from <INSTALL_DIR>\LEADTOOLS23\Bin\net, and the DocumentService_Nuget.csproj uses NuGet Packages. Choose one, and open it in Visual Studio.
Run the project through Visual Studio and explore the resources and options already available. Decide on the type of project to compile, and whether to use the NuGet Packages.
Run the Java Document Service
To set up the Java Environment for use with the LEADTOOLS Document Service, refer to the PDF located here: <INSTALL_DIR>\LEADTOOLS23\Examples\Document\JS\Services\Help\JavaDocumentViewerSetup.pdf
Run the Document Editor Demo with a Service
Now that the Document Service is running and the Document Editor Demo is properly set up to use the URL in the serviceConfig.json file as described in the steps above, open a new terminal window in Visual Studio Code. Run the npm i command to download the necessary dependencies and npm run start to run the application. To deploy, run npm run build. The TypeScript demo, when built, will compile into a single bundle.js script within the site folder.
For instructions on how to build and launch the demo using Node.js, see the readme.md file inside the project directory.
When the project launches, it will connect to the service and display a blank document.
Test the Features of the Document Editor Demo
Import Documents
Once everything is set up and the project is connected to the service, documents and images can now be loaded via File -> Import Document. The Document Editor Demo supports the following document file formats.
DOCDOCXPDFRTFTXT
Search and Replace
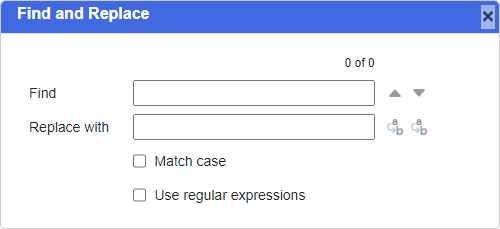
You can search for specific words or phrases, as well as replace them with others using Edit -> Find and Replace.
You can enter the phrase you are searching for in the first textbox and the phrase you want to change it to in the second textbox. This also supports regular expressions.
Undo/Redo Changes
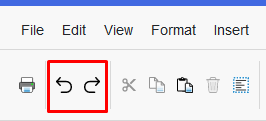
To use the Undo command, click the icon on the left within the highlighted area.
To use the Redo command, click the icon on the right within the highlighted area.
Clipboard Tools
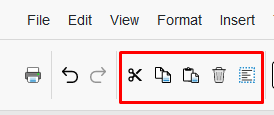
| Clipboard Tool | Action |
|---|---|
| Cut Command | Click on the scissors icon after selecting the object(s) you wish to cut. |
| Copy Command | Click on the pages diagonally from each other icon after selecting the object(s) you wish to copy. |
| Paste Command | Click on the clipboard with a paper icon after selecting the area you wish to implant the object(s) that were selected to be copied or cut. |
| Delete Command | Click on the trash can icon after selecting the object(s) you wish to delete. |
| Select All Command | Click on the dotted blue box icon to select all the objects on the page. |
Note
All of these commands, besides Select All, can also be accessed by selecting the desired document objects and right-clicking on them with your mouse.
Ruler
To show the Ruler, select View -> Show Ruler. By adjusting the blue triangle sliders, you can set the width/margins of the paper for adding document items.

Fonts and Styles
Fonts change the appearance of the text within the document and can be changed within the dropdown box in the highlighted blue area shown below.

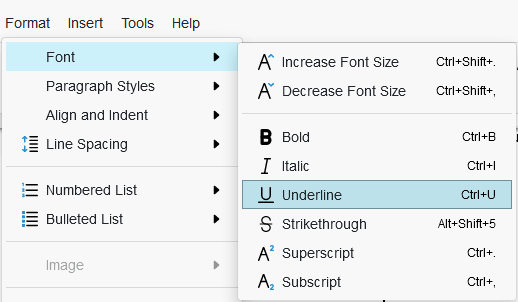
To customize fonts even further, different Styles can be applied by selecting Format -> Font and picking a style or by clicking the matching icon on the toolbar by the Font selector dropdown box.
- Font Size
- Bold
- Italics
- Underline (multiple options with dropdown arrow)
- Strikethrough (multiple options with dropdown arrow)
- Superscript
- Subscript
- Font Color (multiple options with dropdown arrow)
- Highlight (multiple options with dropdown arrow)
Paragraph Styles
To change Paragraph Styles, select Format -> Paragraph Styles and select a style listed.
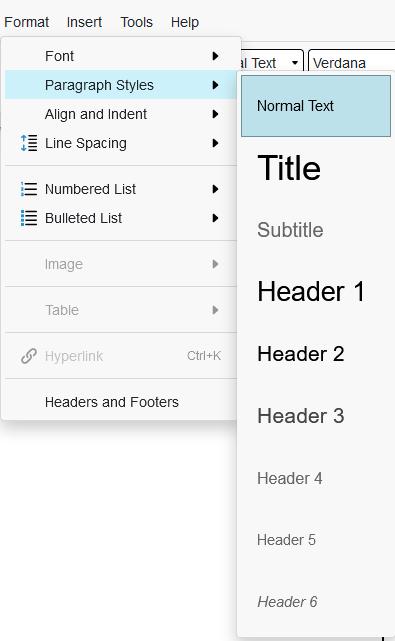
You can also select a style from the Paragraph Styles toolbar in the highlighted area below.

Alignment
To change the Alignment options, select Format -> Align and Indent and select the desired style.
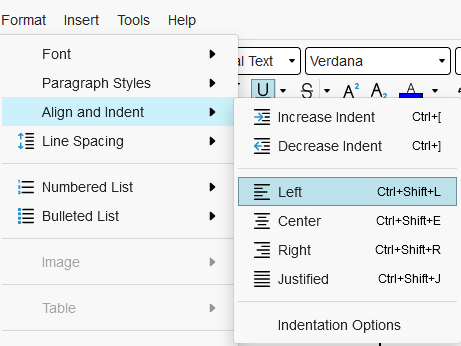
You can also click on the matching icons on the toolbar as shown below.

Lists
To add either Number Lists or Bulleted Lists, select Format -> Numbered List or Format -> Bulleted List.
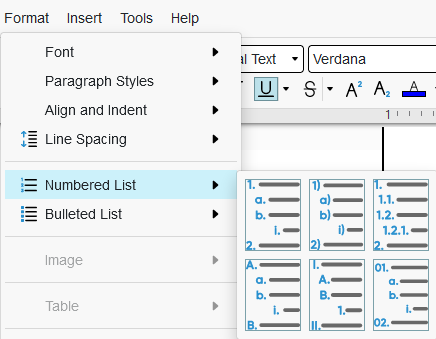
These list options also have matching icons you can select, highlighted in the screenshot below.
Image and Image Formats
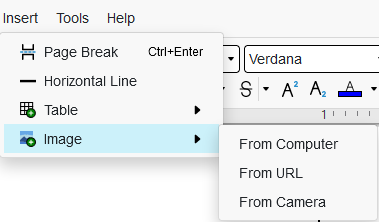
Select Insert -> Image, to insert an image into the document. You have the option to acquire the image via Upload From Computer, By URL, or Camera.
The Upload From Computer option allows you to select an image from your machine in various formats such as JPEG, GIF, and PNG. The By URL option allows you to insert an image from URL. The Camera option opens a window to connect to a camera input device via the browser once permission is allowed.
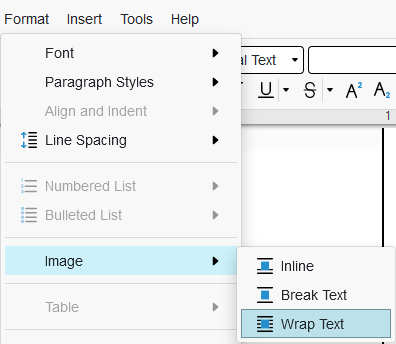
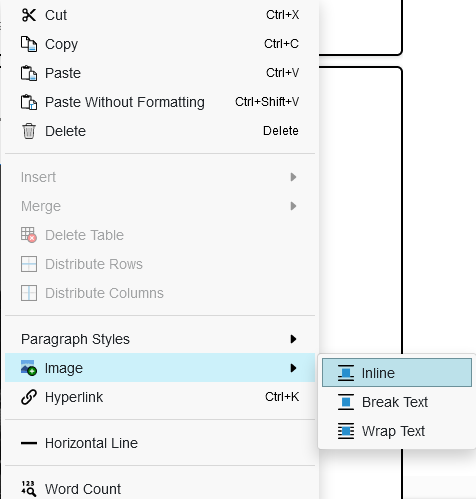
To change the Image Format options, select the image you wish to format and use one of the options below:
-
Select Format -> Image and click a format.
-
Click on the matching icons on the toolbar within the highlighted area shown in the screenshot below.

-
Right-click on the image and select Image and click on a format.
Tables and Table Formats/Styles
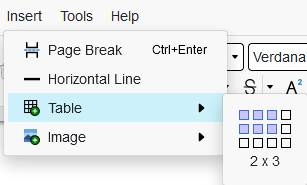
To insert a Table, select Insert -> Table and then select the dimensions you wish to use.
Or you can click the icon in the toolbar, as shown below.
Tables can also be inserted within a different Table, to do this you must click inside a Table cell and then repeat the steps above.
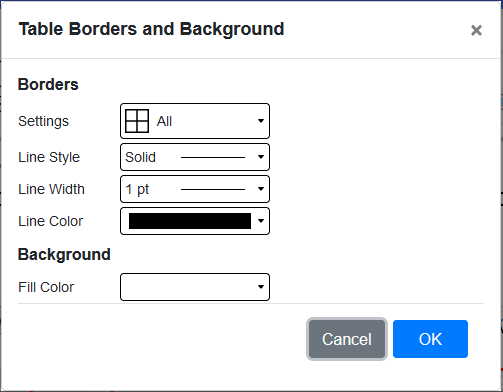
To edit the styles/borders of a table, select the table or the parts of the table you wish to change and then select the icon in the toolbar shown below.

This will open a dialog box for you to select the various options the Document Editor provides.
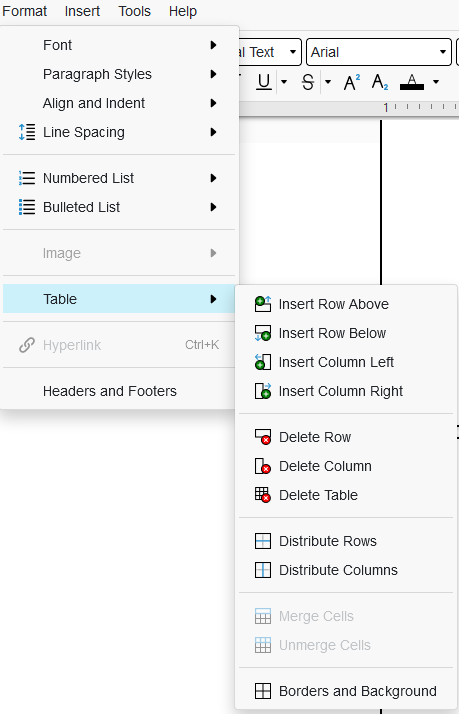
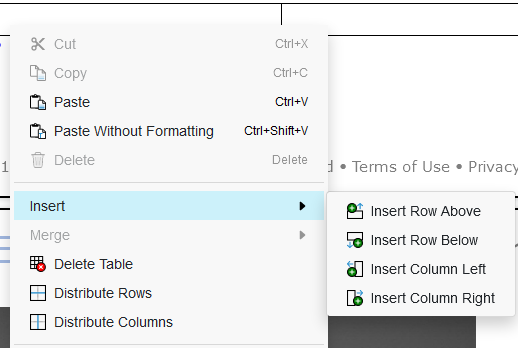
To edit the cells in a Table (merge, split, insert/delete, etc.), select the desired cells and follow one of the three steps below to edit:
-
Select Format -> Table and click on the option you wish to use.
-
Click on the icons in the toolbar shown below.

-
Right-click on the selected area, then click either Insert, Merge, or one of the other options below.
Hyperlinks
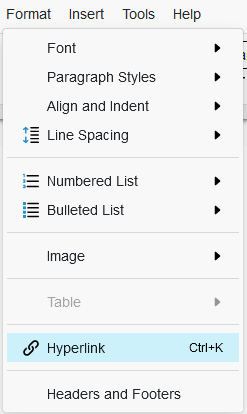
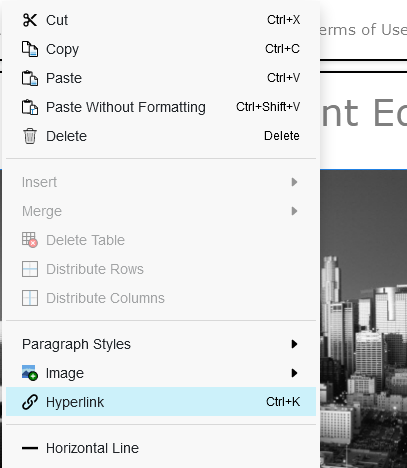
To create a Hyperlink, select a document object and use one of the below options:
-
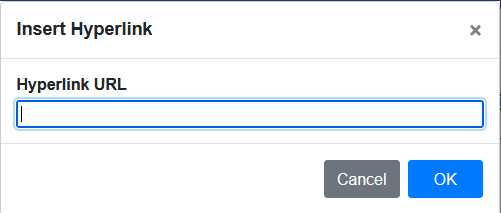
Select Format -> Hyperlink, then add in the url for the hyperlink.
-
Click on the Hyperlink icon in the toolbar, then add in the url for the hyperlink.

-
Right-click on the selected area and click Hyperlink, then add in the url for the hyperlink.
Below is a screenshot of the URL dialog box.
Headers/Footers
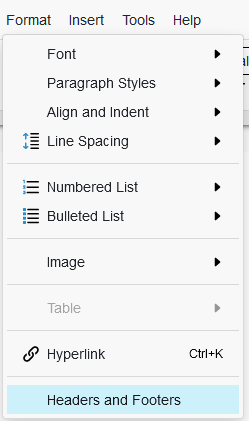
To edit the Headers & Footers format of the document, select Format -> Headers and Footers.
Then, change the options in the dialog box, and click OK.
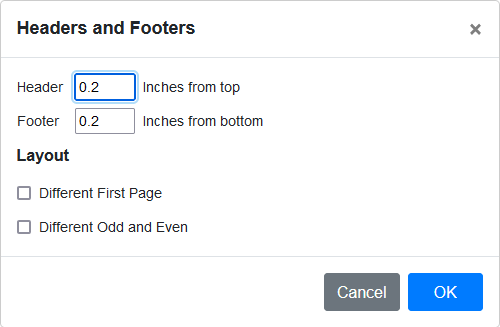
To edit the content inside the Headers & Footers of the document, double left-click on the top or bottom of the document.

Page Breaks
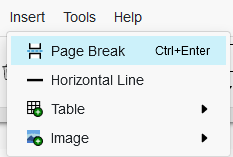
To insert a Page Break into the document, select the area where you want the break to occur, then click Insert -> Page Break.
Keyboard Shortcuts
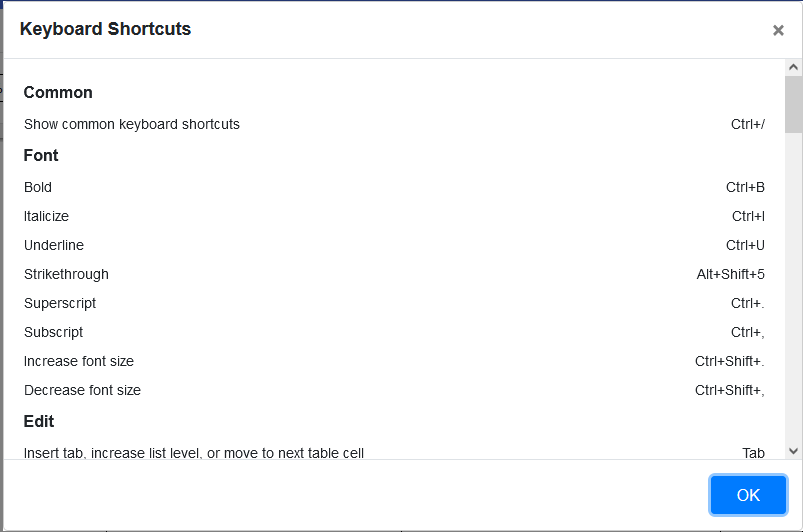
To view all the keyboard shortcuts available in the document editor, select Help -> Keyboard Shortcuts.
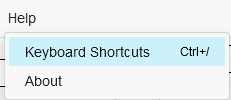
This will open the keyboard shortcuts dialog.
Export Documents
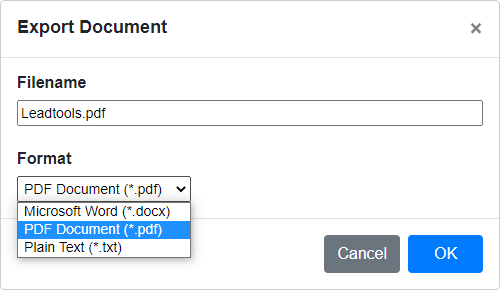
When you are ready to save the document, select File -> Export Document and choose the desired format. The document can be saved to the same or different format as the original file. The demo supports exporting to PDF, DOCX, or TXT formats.
Wrap-Up
This tutorial showed how to connect and configure the LEADTOOLS Document Editor Demo with the Document Service and how to preform various actions such as:
- Import Documents
- Search and Replace
- Export Documents
- Undo/Redo
- Clipboard Actions (Cut, Copy, Paste, Delete, Select All)
- Ruler
- Fonts and styles
- Paragraph styles
- Alignment
- Lists(Bulleted and Numbered)
- Images/Image Formats
- Tables/Table Formats
- Hyperlinks
- Headers/Footers
- Page Breaks
- Keyboard Shortcuts
