Place Annotation on Right Click in the Document Viewer - HTML5 JavaScript
This tutorial shows how to place an annotation on right click in the document viewer in an HTML5 JS application using the LEADTOOLS SDK.
| Overview | |
|---|---|
| Summary | This tutorial covers how to place an annotation on right click inside the HTML5/JS DocumentViewer. |
| Completion Time | 30 minutes |
| Visual Studio Project | Download tutorial project (4 KB) |
| Platform | JS Web Application |
| IDE | Visual Studio Code |
| Development License | Download LEADTOOLS |
Required Knowledge
Get familiar with the basic steps of creating a project and working with the HTML5/JS Document Viewer by reviewing the Add References and Set a License and Add Annotations Programmatically to the Document Viewer tutorials, before working on the Place Annotation on Right Click in the Document Viewer - HTML5 JavaScript tutorial.
This tutorial makes use of http-server, a console command for running a static file server. To install http-server first install Node.js and then install http-server.
Create the Project and Add LEADTOOLS References
Start with a copy of the project created in the Add Annotations Programmatically to the Document Viewer tutorial. If that project is unavailable, follow the steps in that tutorial to create it.
The references needed depend upon the purpose of the project. References can be added by .js files located at <INSTALL_DIR>\LEADTOOLS23\Bin\JS.
For this project, the following references are needed:
Leadtools.jsLeadtools.Annotations.Automation.jsLeadtools.Annotations.Designer.jsLeadtools.Annotations.Engine.jsLeadtools.Annotations.Rendering.JavaScript.jsLeadtools.Controls.jsLeadtools.Document.jsLeadtools.Document.Viewer.jsLeadtools.ImageProcessing.Color.jsLeadtools.ImageProcessing.Core.jsLeadtools.ImageProcessing.Effects.jsLeadtools.ImageProcessing.Main.js
Make sure to copy these files to the project's lib folder.
For a complete list of which JS files are required for your application, refer to Files to be Included with your Application
Set the License File
The License unlocks the features needed for the project. It must be set before any toolkit function is called. For details including tutorials for different platforms, refer to Setting a Runtime License.
There are two types of runtime licenses:
- Evaluation license, obtained at the time the evaluation toolkit is downloaded. It allows the toolkit to be evaluated.
- Deployment license. If a Deployment license file and developer key are needed, refer to Obtaining a License.
Placing the Annotation on Right Click
With the project created, dependencies added, the license set, and the Display Files in the Document Viewer tutorial code added, coding can begin.
Open the app.js file located in the project folder. Inside the loadDefaultDoc function, modify the code as shown below to add a rectangle annotation with a right click.
loadDefaultDoc = async (viewer, interactiveSelect) => {// Load a PDF documentconst url = "https://demo.leadtools.com/images/pdf/leadtools.pdf";try {let doc = await lt.Document.DocumentFactory.loadFromUri(url, null)const ready = () => {const panZoom = lt.Document.Viewer.DocumentViewerCommands.interactivePanZoom;interactiveSelect.value = panZoom;viewer.commands.run(panZoom, null)if (this.callback)this.callback(viewer);}doc.isReadOnly = false;let annContainers = await doc.annotations.getAnnotations(true)let annContainer = annContainers[0];let rectangleObj = new lt.Annotations.Engine.AnnRectangleObject();rectangleObj.rect = lt.LeadRectD.create(100, 100, 600, 600);rectangleObj.fill = lt.Annotations.Engine.AnnSolidColorBrush.create("transparent");annContainer.children.add(rectangleObj);doc.annotations.setAnnotations(annContainers).done(function () {viewer.setDocument(doc);});document.addEventListener("contextmenu",(e)=>{e.preventDefault();})viewer.operation.add((_sender, e) => {if (e.operation == lt.Document.Viewer.DocumentViewerOperation.createAutomation && e.isPostOperation) {viewer.annotations.automationControl.automationPointerDown.add(function (sender, e){if (e.button == 2) {let pos = e.location;let iv = viewer.view.imageViewer;let cont = viewer.annotations.automation.container;let imgrect = lt.LeadRectD.create(pos.x, pos.y, 50, 50);let annRect = cont.mapper.rectToContainerCoordinates(imgrect);let rectangleObj = new lt.Annotations.Engine.AnnRectangleObject();rectangleObj.rect = annRect;rectangleObj.fill = lt.Annotations.Engine.AnnSolidColorBrush.create("red");cont.children.add(rectangleObj);iv.invalidate(lt.LeadRectD.empty);}});}});if (doc.isStructureSupported && !doc.structure.isParse)doc.structure.parse()elseready();} catch (error) {console.error(error);}}
Run the Project
Before running the front end HTML5/JS Document Viewer, run the Document Service. The LEADTOOLS SDK installation provides three examples of the Document Service for the following platforms:
- .NET Framework
- .NET Core
- Java
For instructions on how to set up and configure the Document Service, in the three platforms previously listed, refer to the steps in the Get Started with the Document Viewer Demo - HTML5 JavaScript tutorial.
For the purposes of this tutorial, the .NET 6 Document Service is used and it can be found here: <INSTALL_DIR>\LEADTOOLS23\Examples\Document\JS\DocumentServiceDotNet\net.
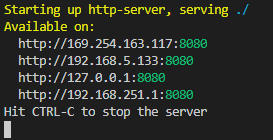
Once you have the back-end Document Service running, open the Command Line and cd into the project folder. Use the following command to run a static file server: http-server
The server should start and run on http://localhost:8080. A message should appear in the console indicating all the ports that the server is available on.

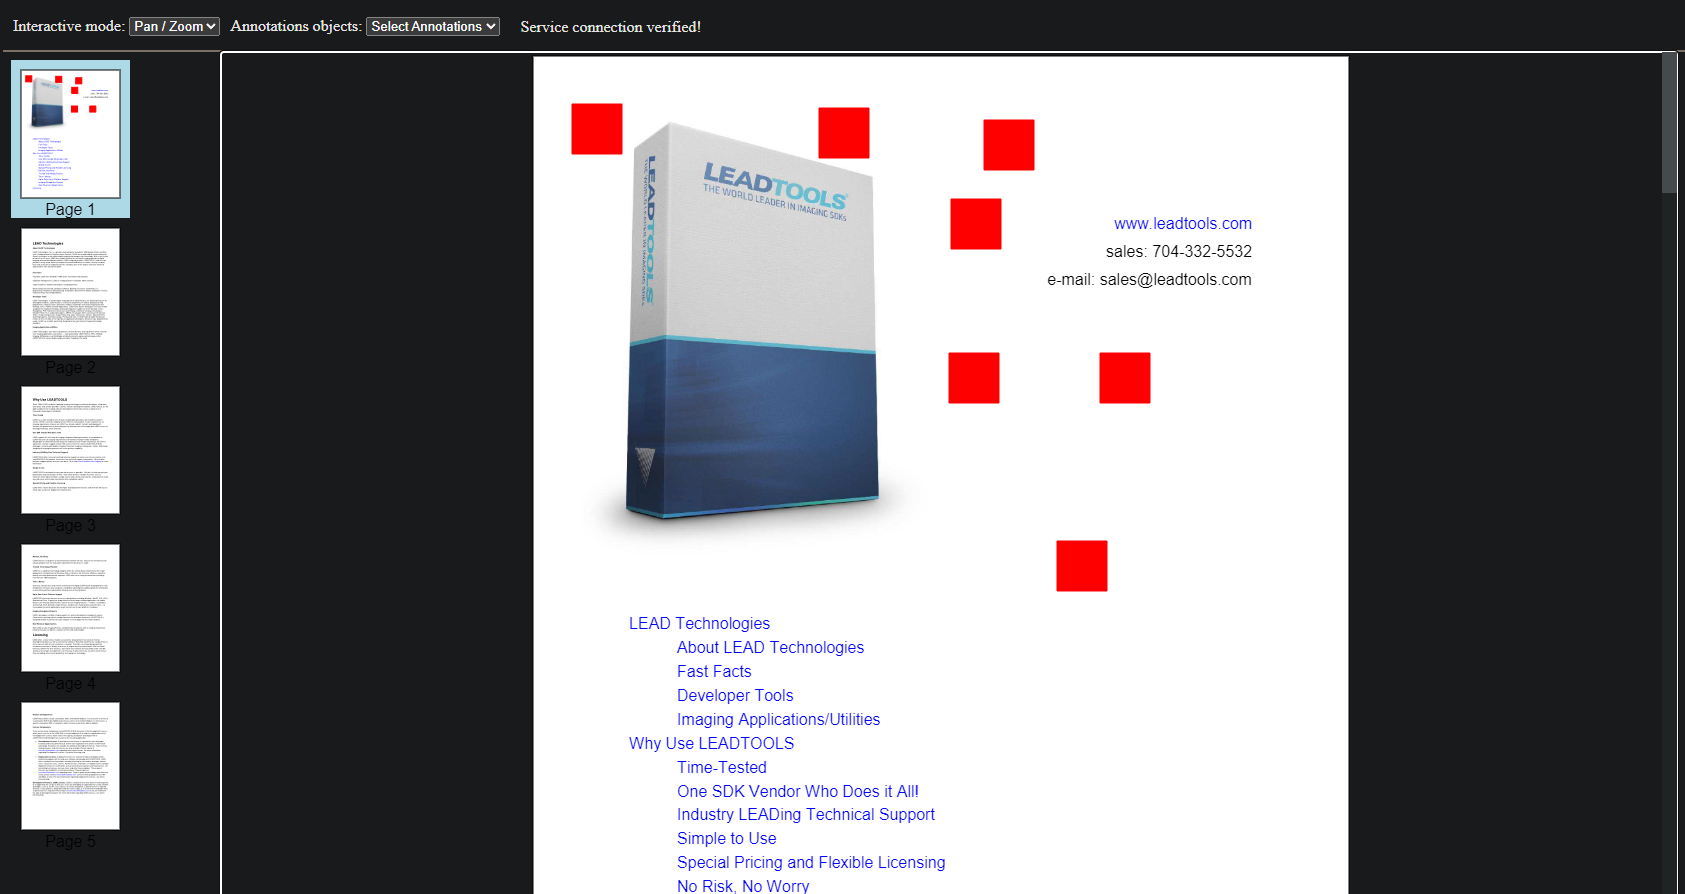
Insert the URL above to run the application. The application should create the Document Viewer and display the sample PDF file with a rectangle annotation located at the top left of the first page of the document.

Wrap-up
This tutorial showed how to add the ability for annotations to be placed with a right click inside the HTML5/JS Document Viewer.
