Deploy LEADTOOLS Document Service on Windows Server - .NET Framework
This tutorial demonstrates how to deploy the .NET Framework LEADTOOLS Document Service on a Windows Server 2019.
| Overview | |
|---|---|
| Summary | This tutorial covers how to host the LEADTOOLS Document Service on a Windows Service using IIS hosting. |
| Completion Time | 20 minutes |
| Platform | .NET Framework Application |
| IDE | Visual Studio 2019, 2022, Visual Studio Code - Client |
| Development License | Download LEADTOOLS |
Required Knowledge
Get familiar with the basic steps of running the LEADTOOLS Document Service by reviewing the Configure and Run the Document Service - .NET Framework tutorial, before working on the Deploy LEADTOOLS Document Service on Windows Server - .NET Framework tutorial.
Note
This tutorial covers how to deploy the LEADTOOLS Document Service to a Windows Server. However, the Document Service is an example project and not intended for a production environment.
Upload the Project
By following the steps in the Configure and Run the Document Service - .NET Framework tutorial, the Document Service project is ready to publish. Open the command line terminal, and cd into this directory: <LEADTOOLS_INSTALLDIR>\LEADTOOLS23\Examples\Document\JS\DocumentServiceDotNet\fx.
Insert the following command into the terminal:
dotnet publish -c Release -o DocumentServiceDlls DocumentService_Nuget.slnThis command will gather the dependencies and build the project, then output all of the DLL's into the <LEADTOOLS_INSTALLDIR>\Examples\Document\JS\DocumentServiceDotNet\fx\DocumentServiceDlls folder. The server requires the DocumentServiceDlls folder and the LEADTOOLS License files to run the Document Service. Upload the DocumentServiceDlls folder and the LEADTOOLS License files to the server.
Note
If "dotnet publish" is failing to execute, the same publish functionality can be achieved using Visual Studio. Right click the project file and click "Publish". Then, create a new folder publish profile. Make note of the output file path.
Setup the Server
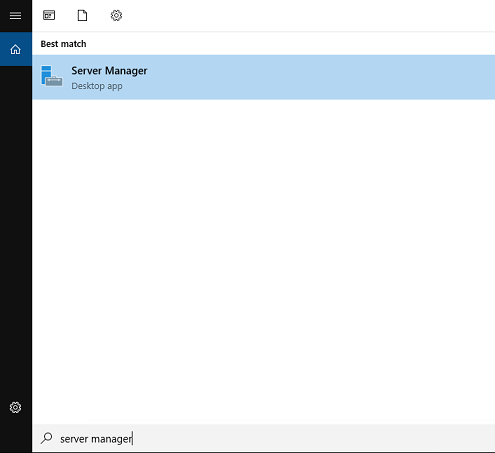
The Windows Server has to be configured to run the service. Log in to the server and open the Server Manager.
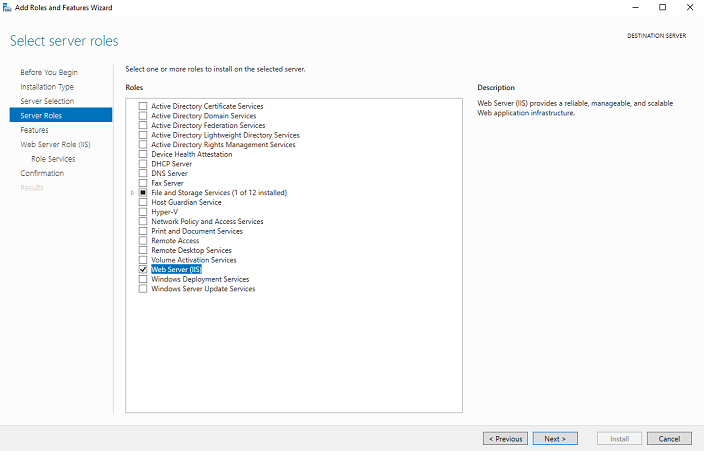
When the Server Manager launches, click the Add roles and features option in the main menu under Welcome to Server Manager. Click the Next button until you get to the Server Roles section. Select Web Server(IIS), then click Next to move onto Features.
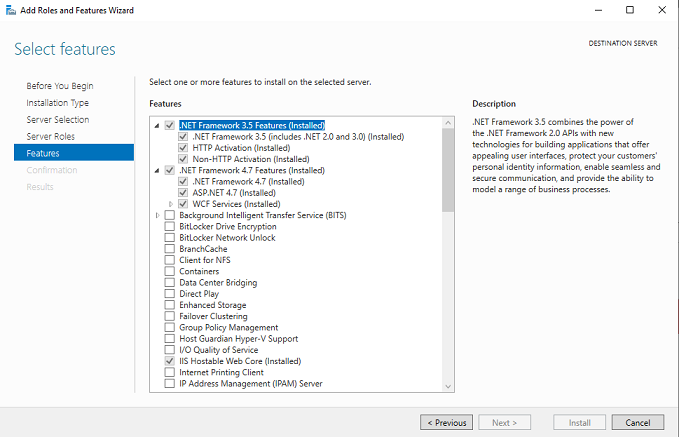
Under the Features section, select the following:
-
.NET Framework 3.5 Features
- .NET Framework 3.5 (includes .NET 2.0 and 3.0)
- HTTP Activation
- Non-HTTP Activation
-
.NET Framework 4.7 Features
- .NET Framework 4.7
- ASP.NET 4.7
- WCF Services
-
IIS Hostable Web Core
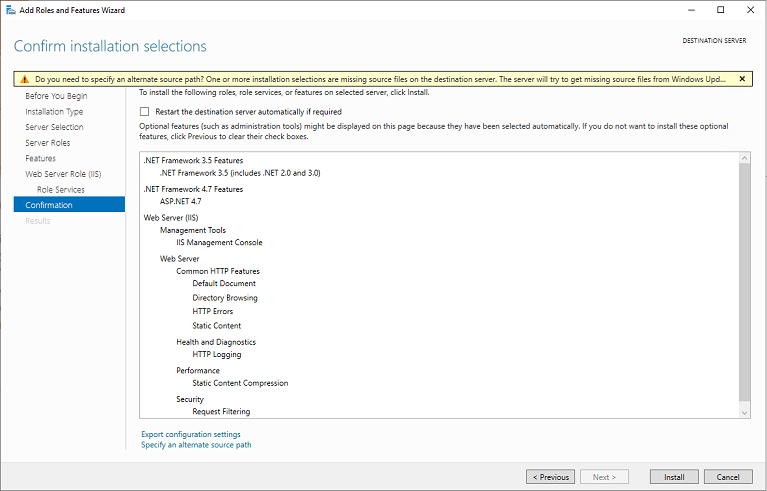
Click Next until you get to the Confirmation page. Once on the Confirmation page, click Install to install the selected features.
Install the ASP.NET Core Runtime Environment
The LEADTOOLS Document Service Fx project is a .NET Core application using .NET Framework DLL's for background processes. Therefore, it requires the ASP.NET Core Runtime. Open a browser and navigate to https://dotnet.microsoft.com/en-us/download/dotnet/6.0. Install the Windows Hosting Bundle under the ASP.NET Core Runtime section.
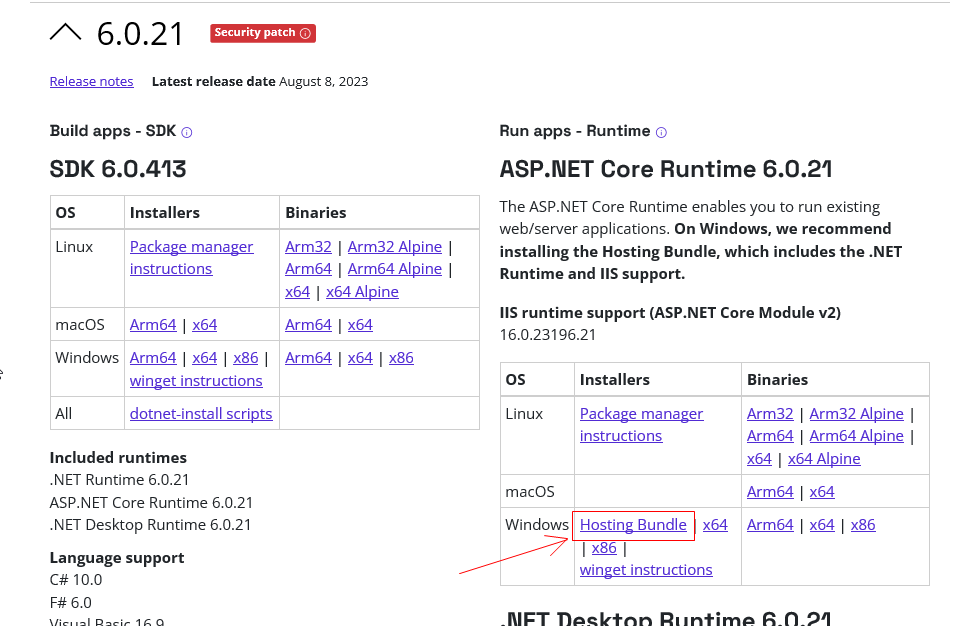
When the runtime environment is installed, restart the server. Additionally, if errors in relation to the AspNetCore module appear, refer to the note at the bottom of this guide.
Install the 2015-2022 Visual C++ Runtime
The 2015-2022 Visual C++ Runtime package is required to run the .NET Framework Document Service. To install the latest supported Visual C++ runtimes navigate to: https://support.microsoft.com/en-us/help/2977003/the-latest-supported-visual-c-downloads.
When the runtime environment is installed, restart the server.
Install .NET Framework 4.8 Runtime
The .NET Framework 4.8 Runtime is required for the application to run the .NET Framework Document Service. Open a browser and navigate to: https://dotnet.microsoft.com/en-us/download/dotnet-framework/net48. Ensure that you download the Runtime and not the Developer pack.
Once the .NET Framework Runtime is installed, restart the server.
Create a New User
Create a new user that will run the application and only have permission to access the Document Service. By restricting the user's permissions the server can be sure that only Document Service resources are accessed by the Document Service. First open the Start Menu and select Change account settings.
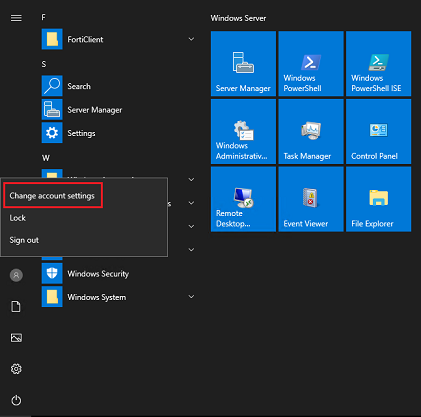
Under Other users, select Add someone else to this PC.
Click I don't have this person's sign-in information, then click Add a user without a Microsoft account. Fill out the form to create a local account. This example will use doc_service as the new user.
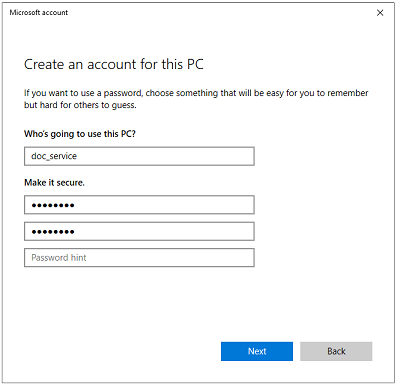
Click Next to create the new user.
Create the IIS Application Pool
Open the Internet Information Services (IIS) Manager.
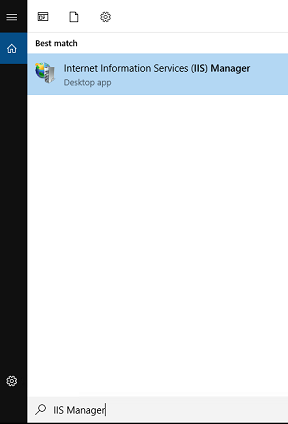
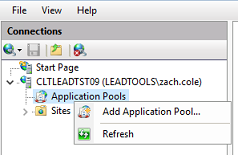
Right-click Application Pools and select Add Application Pool.
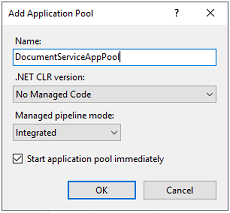
Create a new application pool. This tutorial will call the new application pool DocumentServiceAppPool. For the .NET CLR version select No Managed Code, and for the Managed pipeline mode select Integrated. Click OK to create the application pool.
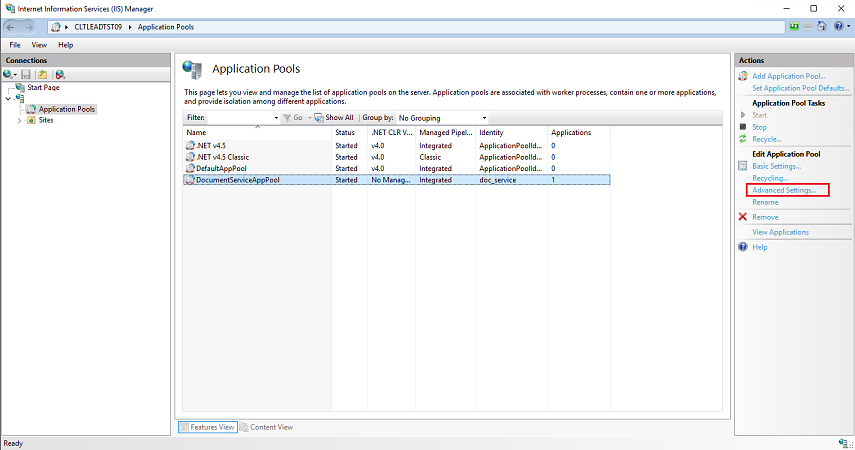
After the application pool has been created, open its Advanced Settings menu.
Change the application pool's Identity to the user that was created earlier in this tutorial.
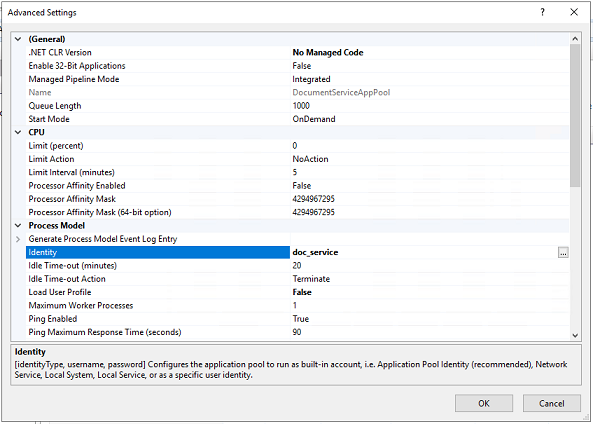
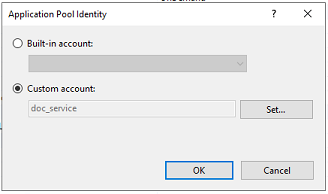
Click OK to apply the changes.
Create the Web Site
In the IIS Manager, right-click Sites and select Add Website.
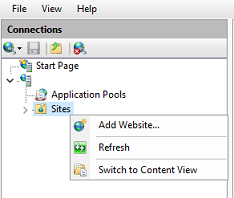
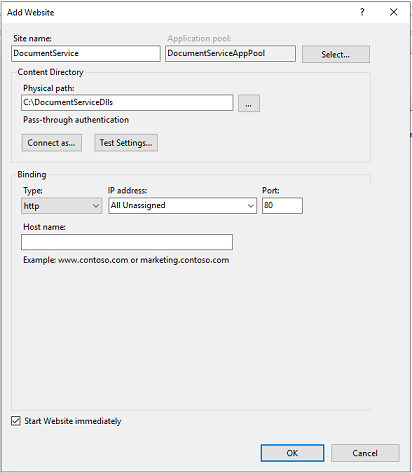
Create the Document Service website by filling out the Add Website form. Choose a name for the application, this tutorial will call it DocumentService. Select the application pool that was created earlier in this tutorial, then select the physical path to the Document Service DLL's folder. Click OK to create the website.
Run the Project
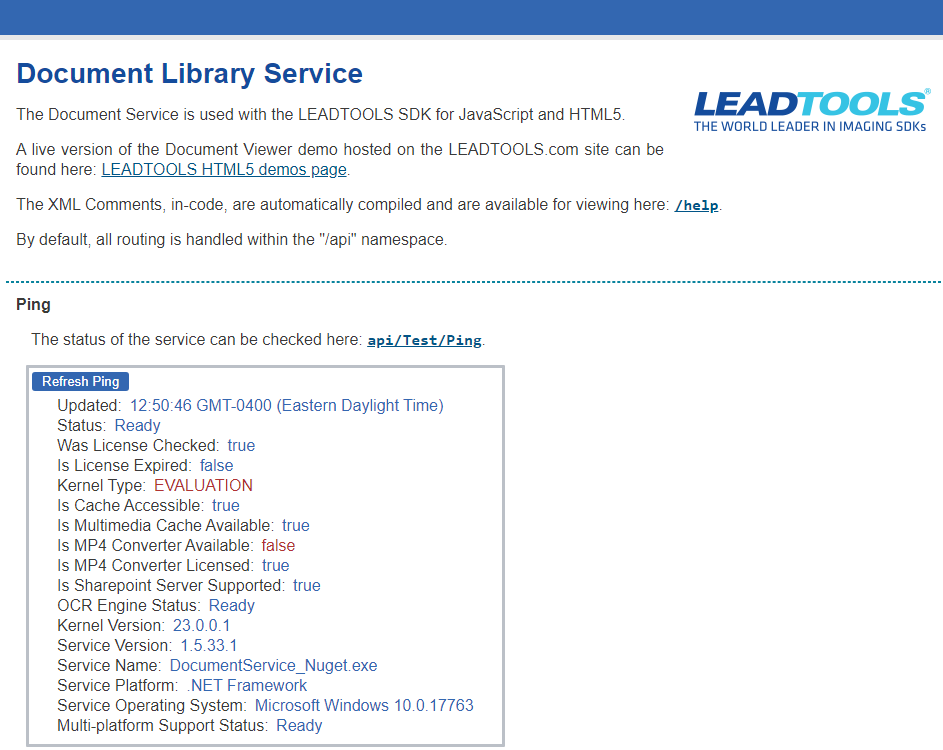
Open a browser on the server and navigate to http://localhost. Alternatively, you can navigate to http://<Server IP Address>:80.
Note
If the license file is not checked, make sure that the
appsettings.jsonfile is configured correctly as seen in the Configure and Run the Document Service - .NET Framework tutorial.If browsing the website via IIS yields "502.5 - Process Failure (502 Bad Gateway)", ensure that only the correct version of ASP.NET Core Hosting Bundle is installed on the machine. Additionally, some modifications may be necessary in the published "web.config" file. Find the following line:
<aspNetCore processPath="%LAUNCHER_PATH%" stdoutLogEnabled="false" stdoutLogFile=".\logs\stdout" arguments="%LAUNCHER_ARGS%" />And modify it to:
<aspNetCore processPath="<ABSOLUTE PATH TO PUBLISHED DOCUMENTSERVICE.EXE>" stdoutLogEnabled="false" stdoutLogFile=".\logs\stdout" arguments="" />Furthermore, when using .NET 6.0+, the module required for
aspNetCoreis now calledAspNetCoreModuleV2. In the<add>tag within<handlers>,web.config, ensure thatmodules="AspNetCoreModuleV2".After making the changes, restart IIS to resolve the 502.5 error.
Wrap-up
This tutorial showed how to deploy the LEADTOOLS .NET Framework Document Service on a Windows server.
