Add References and Set a License - WPF C# .NET 6
This tutorial shows how to use the LEADTOOLS SDK in a WPF C# application and create a project, add references, and set the LEADTOOLS license.
| Overview | |
|---|---|
| Summary | This tutorial covers how to set a license in a WPF C# application. |
| Completion Time | 10 minutes |
| Visual Studio Project | Download tutorial project (3 KB) |
| Platform | WPF C# Application |
| IDE | Visual Studio 2022 |
| Development License | Download LEADTOOLS |
| Try it in another language |
|
Required Knowledge
Before any functionality from the SDK can be leveraged, a valid runtime license will have to be set.
For instructions on how to obtain a runtime license refer to Obtaining a License.
Create the Project
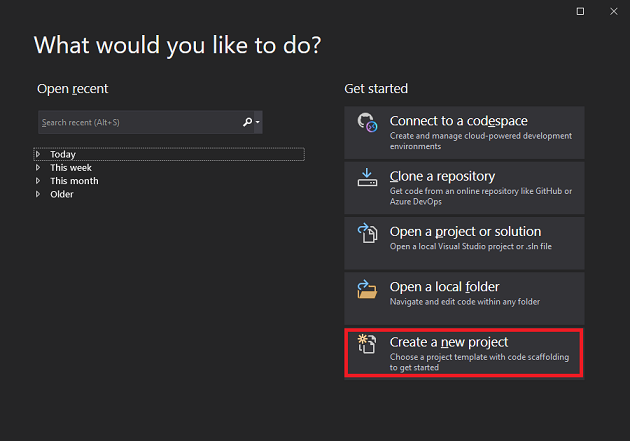
Launch Visual Studio and select Create a new project.
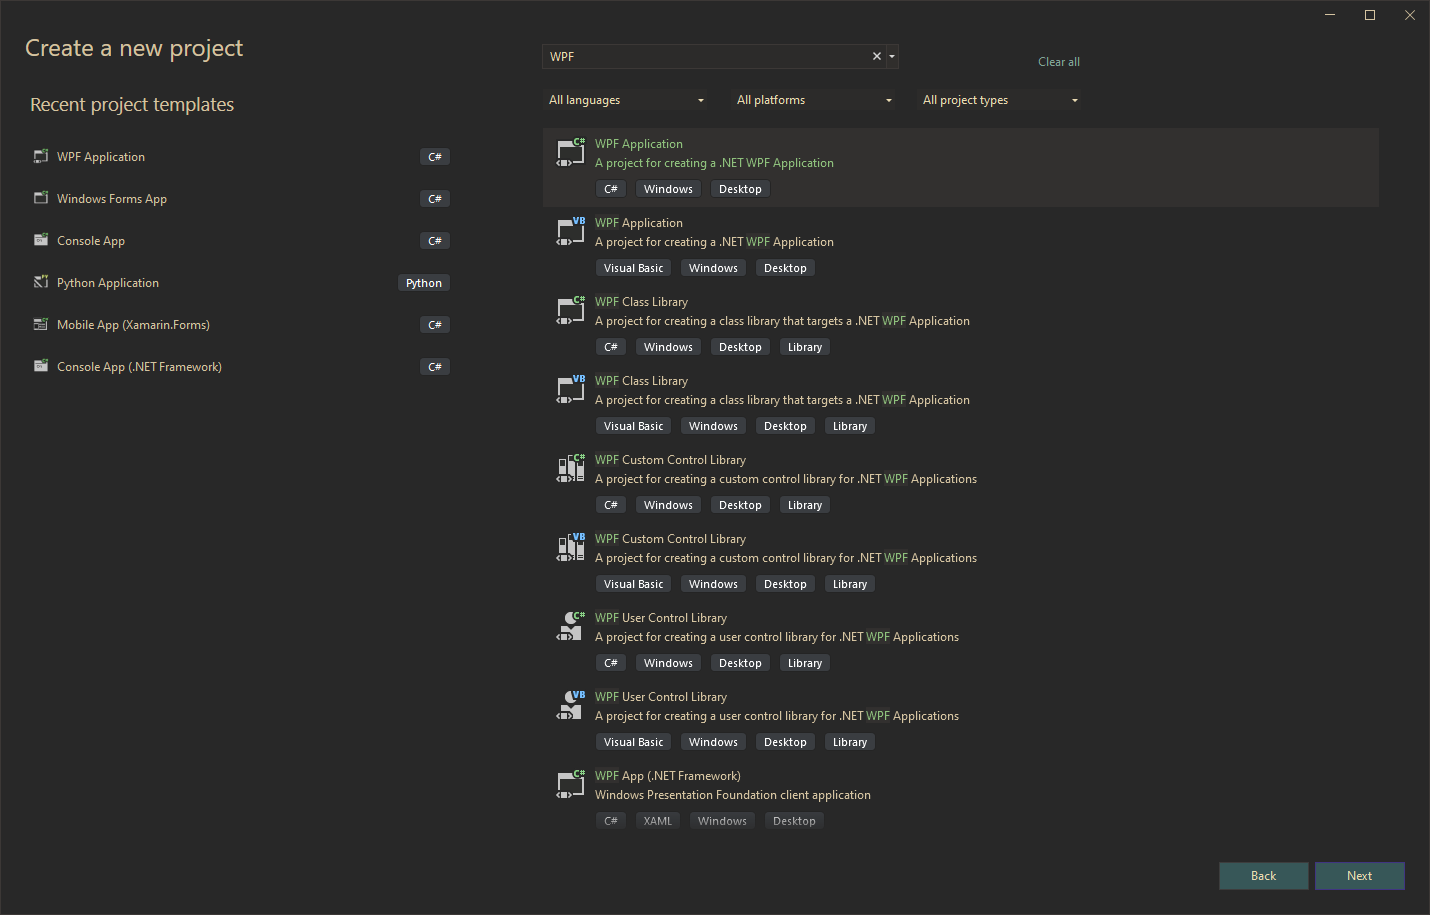
Select WPF Application using C# and click Next.
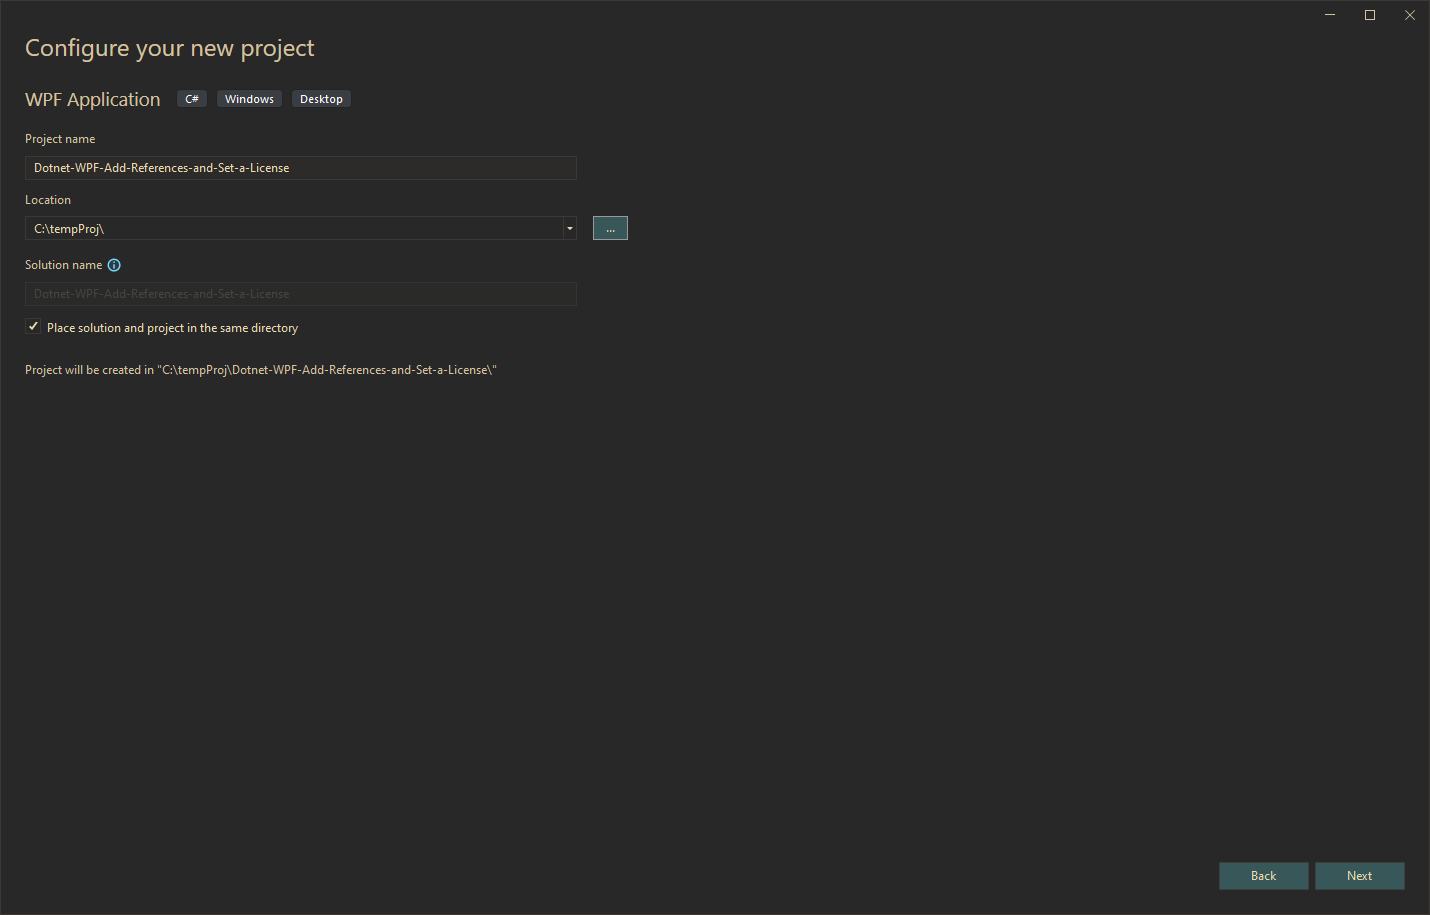
Add the project name, specify the location where the project to be saved to and the other project details, then click Create.
Add the LEADTOOLS References
Add the necessary LEADTOOLS references. The references needed depend upon the purpose of the project. References can be added by one or the other of the following two methods (but not both).
- NuGet Reference - Add LEADTOOLS References via NuGet
- Local Reference - Add Reference to LEADTOOLS Local DLLs
NuGet Reference - Add LEADTOOLS References via NuGet
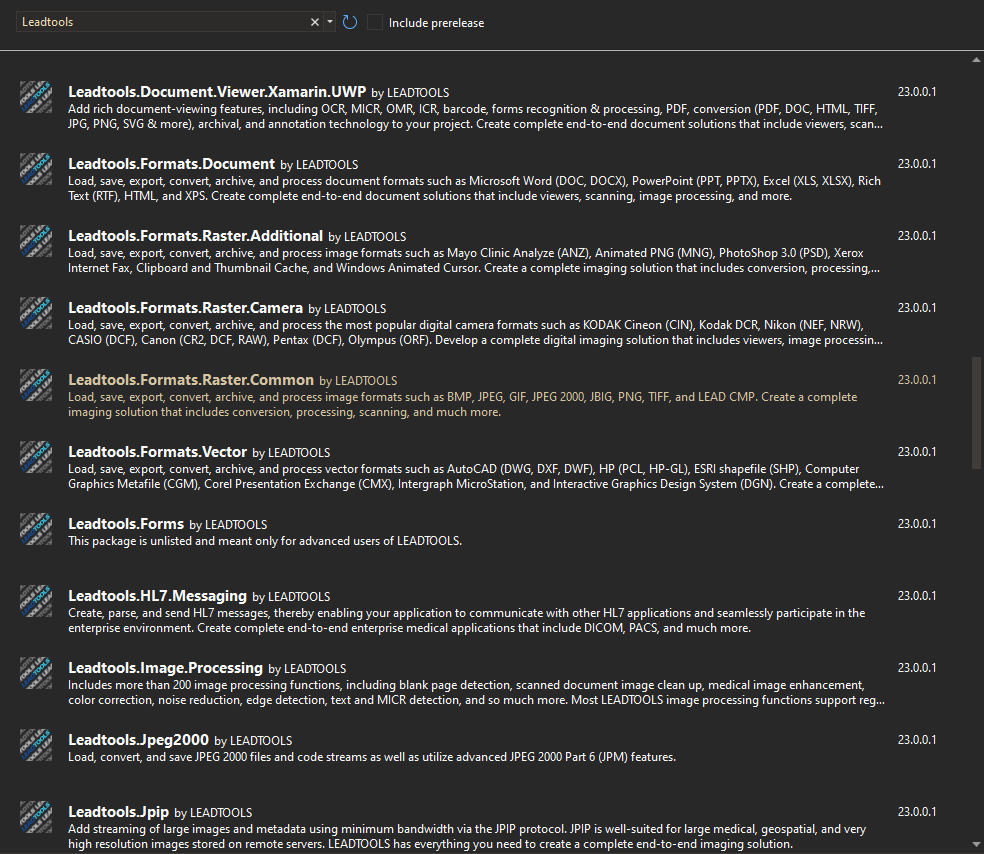
Right-click the C# project in the Solution Explorer and select Manage NuGet Packages...
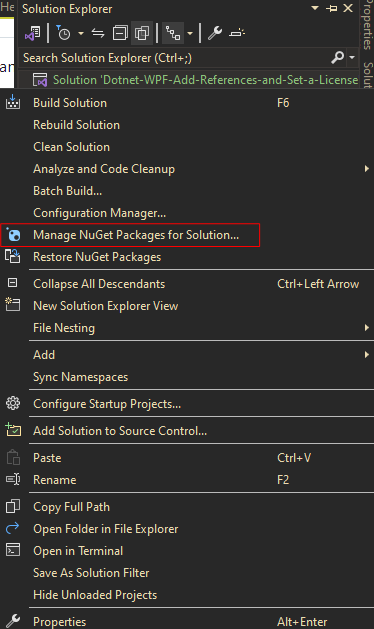
Using nuget.org as your NuGet package source, browse for LEADTOOLS. Select any of the LEADTOOLS NuGet packages and install it. Accept LEAD's End User License Agreement.
Local Reference - Add Reference to LEADTOOLS Local DLLs
To add the LEADTOOLS references locally, perform the following steps:
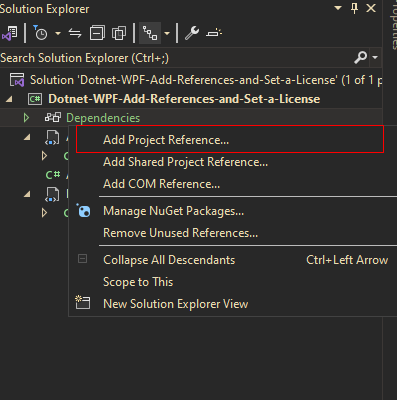
In the Solution Explorer, right-click References, and select Add Reference.
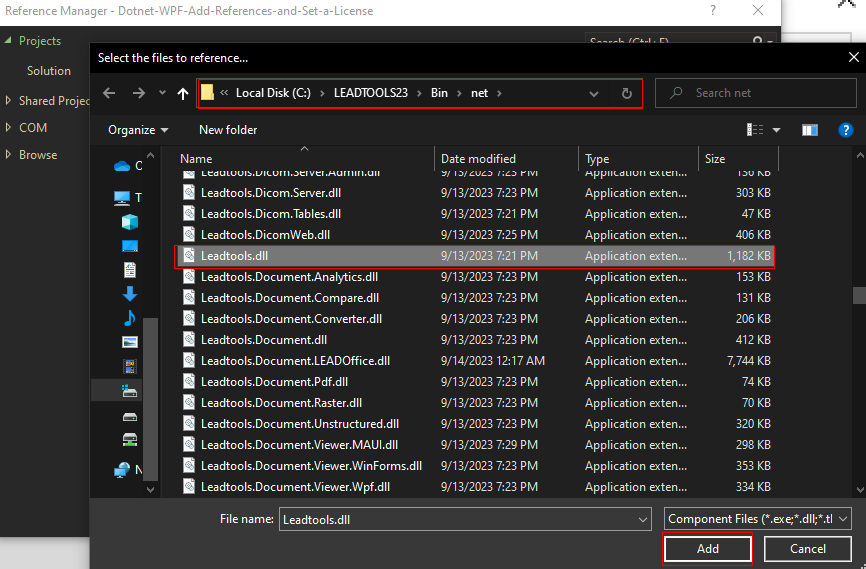
In the Reference Manager, select Browse and then navigate to the directory where the LEADTOOLS Assemblies are located: <INSTALL_DIR>\LEADTOOLS23\Bin\Dotnet4\x64
Select and add Leadtools.dll, then click OK.
Add the Set License Code
Now that the LEADTOOLS references have been added to the project, coding can begin. The License unlocks the LEADTOOLS features needed for the project. It must be set before any toolkit function is called. The exact function called depends on the platform used. For details, refer to Setting a Runtime License.
There are two types of runtime licenses:
- Evaluation license, obtained at the time the evaluation toolkit is downloaded. It allows the toolkit to be evaluated.
- Deployment license. If a Deployment license file and developer key are required, refer to Obtaining a License
Right-click on MainWindow.xaml in the Solution Explorer, and select View Code, or press F7, to bring up the code behind the window. Add the following statements to the using block.
using System;using System.IO;using System.Windows;using Leadtools;
Inside the MainWindow class, add a new method called SetLicense(). Call this new method inside the MainWindow() method. Add the code below to properly set your LEADTOOLS runtime license.
void SetLicense(){Platform.LibraryPath = @"C:\LEADTOOLS23\Bin\CDLL\x64";string license = @"C:\LEADTOOLS23\Support\Common\License\LEADTOOLS.LIC";string key = File.ReadAllText(@"C:\LEADTOOLS23\Support\Common\License\LEADTOOLS.LIC.KEY");RasterSupport.SetLicense(license, key);if (RasterSupport.KernelExpired)MessageBox.Show("License file invalid or expired.");elseMessageBox.Show("License file set successfully");}
Run the Project
Run the project by pressing F5, or by selecting Debug -> Start Debugging.
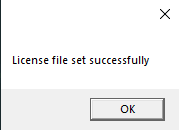
If the steps are followed correctly, the application runs and a message box displays License file set successfully.
Wrap-up
This tutorial showed how to create a new C# .NET WPF Project, add references via NuGet or local LEADTOOLS DLLs, and set the license.
This is the basis for all C# .NET 6+ WPF applications using the LEADTOOLS SDK. All functionality in the SDK is unlocked via setting a license. SetLicense must be called before calling any other LEADTOOLS SDK methods.
After the SDK is purchased, the evaluation license can be replaced with a valid release license to disable the Nag Message.
