Detect and Extract Barcodes - React JS
This tutorial shows how to perform barcode detection and recognition in a React JS application using the LEADTOOLS SDK.
| Overview | |
|---|---|
| Summary | This tutorial covers how to detect and extract barcodes from an image in a React JS application. |
| Completion Time | 30 minutes |
| Visual Studio Project | Download tutorial project (2 MB) |
| Platform | React JS Web Application |
| IDE | Visual Studio : Service & Visual Studio Code : Client |
| Development License | Download LEADTOOLS |
| Try it in another language |
|
Required Knowledge
Get familiar with the basic steps of creating a project and loading an image in an ImageViewer by reviewing the Add References and Set a License and Display Images in an Image Viewer tutorials, before working on the Detect and Extract Barcodes - React JS tutorial.
Make sure that Yarn is installed so that creating a React application can be done quickly via the command line. If yarn is not installed, it can be found on:
https://classic.yarnpkg.com/en/docs/install/#windows-stable
Create the Project and Add LEADTOOLS References
Start with a copy of the project created in the Display Images in an Image Viewer tutorial. If you do not have a copy of that tutorial project, follow the steps inside that tutorial to create it.
The references needed depend upon the purpose of the project. For this project, the following JS files are needed and located here: <INSTALL_DIR>\LEADTOOLS23\Bin\JS
jquery.d.tsLeadtools.Annotations.Engine.d.tsLeadtools.Annotations.Engine.jsLeadtools.Controls.d.tsLeadtools.Controls.jsLeadtools.d.tsLeadtools.Document.d.tsLeadtools.Document.jsLeadtools.js
Make sure to copy these files to the public\common folder and import them in the public\index.html file.
For more information on which files to include for your JavaScript application, see Files to be Included with your Application.
Set the License File
The License unlocks the features needed for the project. It must be set before any toolkit function is called. For details, including tutorials for different platforms, refer to Setting a Runtime License.
There are two types of runtime licenses:
- Evaluation license, obtained at the time the evaluation toolkit is downloaded. It allows the toolkit to be evaluated.
- Deployment license. If a Deployment license file and developer key are required, refer to Obtaining a License.
Note: Adding LEADTOOLS local references and setting a license are covered in more detail in the Add References and Set a License tutorial.
Import LEADTOOLS Dependencies
Open the index.html file in the public folder. Add the below necessary script tags inside the head to import LEADTOOLS dependencies.
<!DOCTYPE html><html lang="en"><head><!-- Leadtools Dependencies --><script type="text/javascript" src="/common/Leadtools.js"></script><script type="text/javascript" src="/common/Leadtools.Controls.js"></script><script type="text/javascript" src="/Common/Leadtools.Annotations.Engine.js"></script><script type="text/javascript" src="/common/Leadtools.Document.js"></script><!-- Other Dependencies --><script src="https://code.jquery.com/jquery-3.4.1.min.js" integrity="sha256-CSXorXvZcTkaix6Yvo6HppcZGetbYMGWSFlBw8HfCJo=" crossorigin="anonymous"></script><title>Detect and Extract Barcodes</title></head><body><noscript>You need to enable JavaScript to run this app.</noscript><div id="root"></div></body></html>
Create the DocumentHelper Component and Connect to Document Service
With the project created, the references added, the license set, and the ImageViewer initialized, coding can begin.
Navigate to the Components directory and create a new file named DocumentHelper.tsx. Add the following code to establish a connection with the Document Service.
///<reference path="../../public/Common/Leadtools.Controls.d.ts" />///<reference path="../../public/Common/Leadtools.Document.d.ts" />import { useState, useEffect } from "react";function DocumentHelper() {const [serviceStatus, setServiceStatus] = useState(String);useEffect(() => {connectToDocumentService();}, []);async function connectToDocumentService() {try {lt.Document.DocumentFactory.serviceHost = "http://localhost:40000";lt.Document.DocumentFactory.servicePath = "";lt.Document.DocumentFactory.serviceApiPath = "api";setServiceStatus("Connecting to service " + lt.Document.DocumentFactory.serviceUri);await lt.Document.DocumentFactory.verifyService();setServiceStatus("Service Connection Verified!");} catch (error) {setServiceStatus("Service not properly connected.");}}return <p id="serviceStatus">{serviceStatus}</p>;}export default DocumentHelper;
Create the BarcodeDetection Component to detect and scan Barcodes
Next, create another new file inside of the Components directory and name it BarcodeDetection.tsx. Add the following code in order to scan, detect, and output the information in barcodes.
///<reference path="../../public/Common/Leadtools.Controls.d.ts" />///<reference path="../../public/Common/Leadtools.Document.d.ts" />///<reference path="../../public/Common/jquery.d.ts" />import { useEffect, useState } from "react";import { v4 as uuidv4 } from "uuid";interface Props {image: string;}function BarcodeDetection({ image }: Props) {const [imageBlob, setImageBlob] = useState<Blob>();const [outputs, setOutputs] = useState<Array<{ value: string }>>([]);useEffect(() => {imageToBlob();}, [image]);const imageToBlob = async () => {try {const response = await fetch(image);const blobData = await response.blob();setImageBlob(blobData);} catch (error) {console.error("Error fetching image:", error);}};async function handleBarcodeClick() {try {if (!imageBlob) {alert("No Image Chosen for Barcode Recognition.");} else {const leadDoc = await lt.Document.DocumentFactory.loadFromFile(imageBlob, new lt.Document.LoadDocumentOptions());console.log("Document loaded and has cache id: " + leadDoc.documentId);const data = await leadDoc.pages.item(0).readBarcodes();console.log("Number of barcodes read: " + data.length + " (data in console)", data[0].value);setOutputs(data);}} catch (error) {setOutputs([{ value: "No Barcode Detected." }]);}}return (<div className="btnMenu"><button onClick={handleBarcodeClick}>Detect Barcode</button><span className="nice-list">{outputs.map((output: any) => (<p key={uuidv4()}>{output.value}</p>))}</span></div>);}export default BarcodeDetection;
After the BarcodeDetection component has been created, insert one into the ImageViewer component that was made in the Display Images in an Image Viewer tutorial.
return (<><span className="btnMenu"><input type="file" onChange={handleFileUpload} accept=".jpg,.jpeg,.png" /><button onClick={handleDownloadClick}>Save Image</button></span><div className="imageViewerDiv" ref={imageViewerRef}></div><BarcodeDetection image={chosenFile} /></>);
Open the App.js file in the src folder and replace the return statement with the following code:
return (<div className="App"><header className="App-header"><p>Displaying an Image Example</p><ImageViewer /><DocumentHelper /></header></div>);
Improve the Visuals of the Project
Navigate to App.css, in the src folder which creates our HTML elements. Replace its contents with the following code to improve the visuals of the application.
.App {text-align: center;}.App-header {background-color: #282c34;font-weight: 700;min-height: 100vh;display: flex;flex-direction: column;align-items: center;justify-content: center;font-size: calc(10px + 2vmin);color: white;}.App-link {color: #61dafb;}.btnMenu {background-color: #555555;display: flex;flex-direction: column;width: 350px;padding: 10px;}.output {background-color: #888888;width: 100%;padding-left: 15px;padding-right: 15px;}.imageViewerDiv {background-color: rgba(170, 170, 170, 1);border-radius: 1%;margin-top: 5px;height: 576px;width: 1024px;}.nice-list {list-style-type: none;padding: 0;}.nice-list p {display: block;overflow: hidden;margin: 5px 0;font-size: 30px;font-weight: 500;color: #555555;background-color: #f2f2f2;border-radius: 1px;}
Run the Document Service
In order to run this application successfully, the LEADTOOLS .NET Framework Document Service is required. The LEADTOOLS .NET Framework Document Service project is located at <INSTALL_DIR>\LEADTOOLS23\Examples\Document\JS\DocumentServiceDotNet\fx.
Note: Only the .NET FrameWork Document Service is able to uploadDocumentBlob, so this will not function with the .NET Core Document Service.
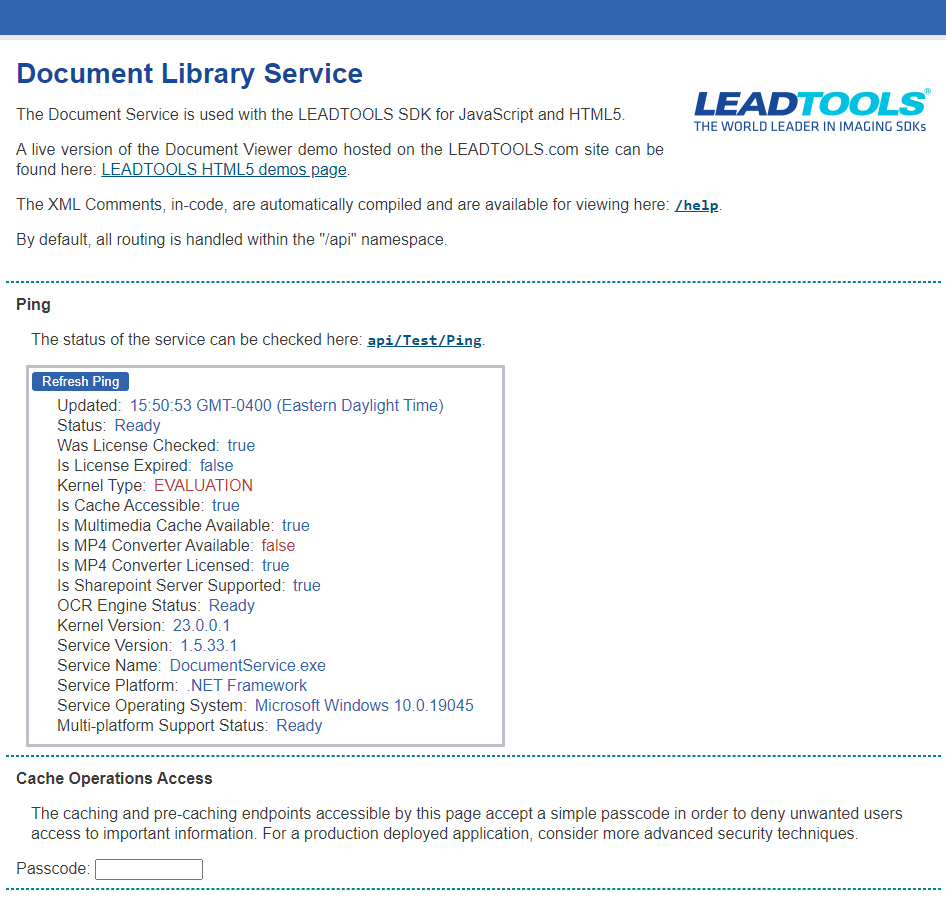
Open the DocumentService.csproj and run the project using IIS Express. After running the Document Service project in Visual Studio, the webpage will show that the service is listening. The Client Side will be able to communicate with the Document Service, allowing the Image Data processing, and returning the Barcodes from the image.

Run the Project
To run the barcode project, open a new terminal window and cd into the root of the project. From there run the command, yarn start. If you do not have the node modules included with the project, be sure to also run the command, npm install before running the project.
To test the project, follow the step below:
-
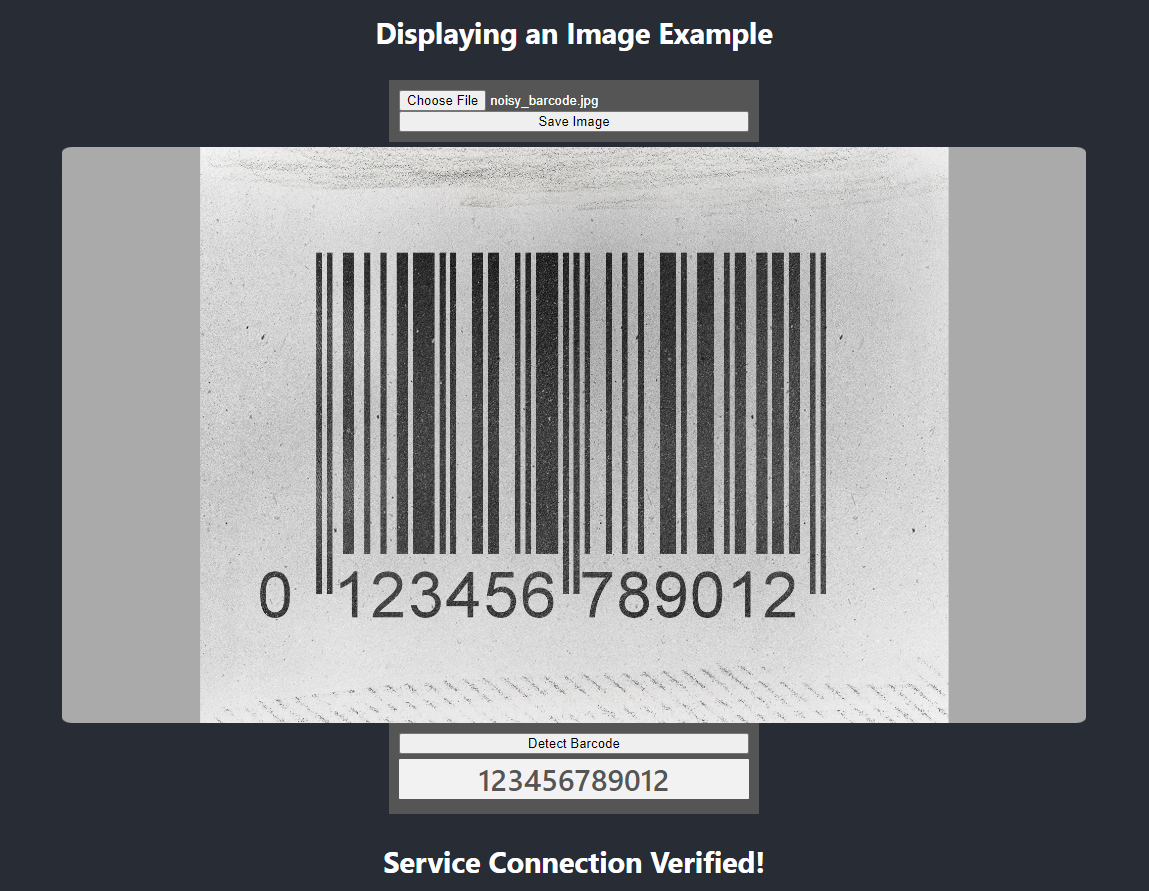
A default image will appear upon project start. To load your barcode image select Choose File, which will bring up a file dialog. Upon selecting the file, the chosen image will be loaded into the ImageViewer.
Note: The web based ImageViewer does not support compressed images.
-
To run barcode detection, press Detect Barcode. If any barcodes are detected, their extracted information will display below the viewer.

Wrap-Up
This tutorial showed how to detect and extract barcode values.
