Install and Configure LEADTOOLS Medical Web Viewer - HTML5 JavaScript
This tutorial shows how to install and configure the LEADTOOLS Medical Web Viewer.
| Overview | |
|---|---|
| Summary | This tutorial covers how to install and configure the LEADTOOLS Medical Web Viewer |
| Completion Time | 30 minutes |
| Platform | JavaScript Web Application |
| IDE | Visual Studio 2022, Visual Studio Code - Client |
| Development License | Download LEADTOOLS |
Required Knowledge
Before working on the Install and Configure LEADTOOLS Medical Web Viewer - HTML5 JavaScript tutorial, complete the Install and Configure LEADTOOLS Medical Web Service tutorial.
SQL Server
Note
At least SQL Server Express 2005 or newer is required for this application.
By default, the LEADTOOLS configuration demos configure the LEADTOOLS Windows services and web services to run as the LocalSystem (NT Authority\System) identity. This is a special built-in account that has full access to the local system. SQL Server 2008 R2 and earlier included this account as a login with full access to SQL Server. Microsoft considered this a security flaw and the login was removed from the newer versions of SQL Server. For more information about creating a login, refer to the Microsoft topic, SQL Server – "Create a Login", at:
If enabled in SQL Server, SQL Server authentication can be used. If using SQL authentication, before running the LEADTOOLS Database Configuration demo, the SQL login must already exist. When adding the SQL login, make sure that the option "Must change password" is unchecked (cleared). Once the SQL login and user is created, connect to the database engine in Visual Studio or SQL Server Management Studio to test.
Use either Windows or SQL authentication to log into SQL Server. The mapped user must have the correct permissions to perform the functions required by the configuration tools and demos. For development, associating the user with the sysadmin server role and the dbowner role is the quickest but is not recommended for production due to obvious security concerns.
Using Windows authentication requires a Windows user account, a SQL login for the Windows user account, and a SQL user account mapped to the SQL login associated with the Windows user account.
Ensure the Windows user account is set up with access to the following items:
- The web service site
- The database provider (SQL Server) for creating, reading, writing, and removing a database.
-
The following shared folders and files:
- GlobalPacs.config
- Storage Server Directory
- Image Storage Directory
- Image Overwrite Directory
Microsoft Typescript
Although TypeScript is not required to run the LEADTOOLS HTML5 Medical Web Viewer Demo, it is highly recommended in order to modify the JavaScript code that calls the LEADTOOLS web services.
For more information, refer to:
IIS Features
IIS with at least the following features is required (Select ALL options under each section):
- Web Management
- World Wide Web Services
For Windows 8 or newer the following features are required: .NET Framework Advanced Services
- ASP.NET 4.5
- WCF Services
Note
In Windows 8 / Server 2015 and newer, be sure to select version 4.7.
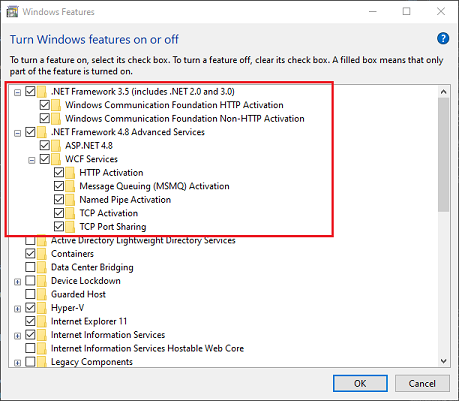
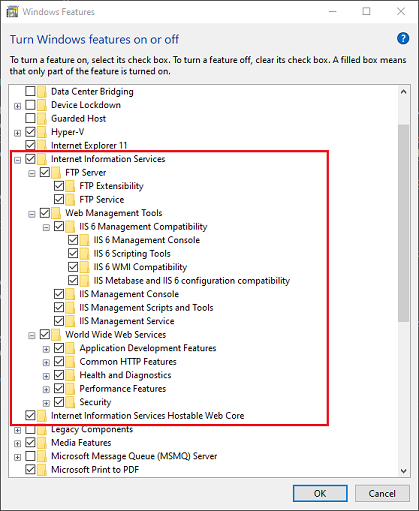
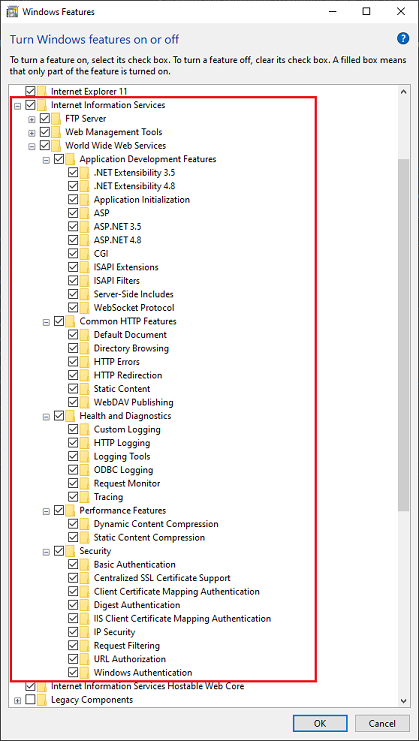
Open the Windows Start menu and start typing "Turn Windows features on or off". Open the Windows Features dialog box and make the following selections (both a listing of the selections and screenshots of the selections within the dialog box are provided below):
-
.NET Framework 3.5 (includes .NET 2.0 and 3.0)
- Windows Communication Foundation HTTP Activation
- Windows Communication Foundation Non-HTTP Activation
-
.NET Framework 4.7 Advanced Services
- ASP.NET 4.7
- WCF Services
- HTTP Activation
- Message Queuing (MSMQ) Activation
- Named Pipe Activation
- TCP Activation
- TCP Port Sharing
-
Internet Information Services
- FTP Server
- FTP Extensibility
- FTP Service
- Web Management Tools
-
IIS 6 Management Compatibility
- IIS 6 Management Console
- IIS 6 Scripting Tools
- IIS 6 WMI Compatibility
- IIS Metabase and IIS 6 configuration compatibility
- IIS Management Console
- IIS Management Scripts and Tools
- IIS Management Service
- World Wide Web Services
- Application Development Features
- .NET Extensibility 4.7
- Application initialization
- ASP
- ASP.NET 4.7
- CGI
- ISAPI Extensions
- ISAPI Filters
- Server-Side Includes
- WebSocket Protocol
- Common HTTP Features
- Default Document
- Directory Browsing
- HTTP Errors
- HTTP Redirection
- Static Content
- WebDAV Publishing
- Health and Diagnostics
- Custom Logging
- HTTP Logging
- Logging Tools
- ODBC Logging
- Request Monitor
- Tracing
- Performance Features
- Dynamic Content Compression
- Static Content Compression
- Security
- Basic Authentication
- Centralized SSL Certificate Support
- Client Certificate Mapping Authentication
- Digest Authentication
- IIS Client Certificate Mapping Authentication
- IP Security
- Request Filtering
- URL Authorization
- Windows Authentication
-
Internet Information Services Hostable Web Core
Set the License File
The HTML5 Viewer requires that a LEADTOOLS.lic.txt file be placed into a sub-folder in the Members directory. Adding this license file will remove the Nag Message seen by the client. This LEADTOOLS.lic.txt file is generated separately from the LEADTOOLS.LIC and LEADTOOLS.LIC.KEY files. Note that the LEADTOOLS.lic.txt file cannot be created based on either of those files. This file must be generated by the LEAD Sales department and be provided to you. After you receive the file, create a folder called "LEADTOOLS" in the following directory:
<LEADTOOLS_INSTALLDIR>\Examples\Medical\JS\MedicalWebViewer\MedicalWebViewerDemo\src\Scripts
Inside the "LEADTOOLS" folder, add the LEADTOOLS.lic.txt file. The following file should now exist:
<LEADTOOLS_INSTALLDIR>\Examples\Medical\JS\MedicalWebViewer\MedicalWebViewerDemo\src\Scripts\LEADTOOLS\LEADTOOLS.lic.txt
If there is any question about where the code is searching for the LEADTOOLS.lic.txt file, simply open the browser's JavaScript debugger and check the console to determine where the viewer is searching for the LEADTOOLS.lic.txt.
Required Runtimes
The LEADTOOLS kernel module (for example Leadtools.dll for .NET) is required for applications.
LEADTOOLS binaries for .NET require the Microsoft Visual C++ 2017 Runtime. The Microsoft Visual C++ 2017 Redistributable Package cannot be installed on some versions of Windows. For supported versions, see Choosing a Deployment Method and Update for Universal C Runtime in Windows. The Microsoft Visual C++ 2017 Runtime also requires the Windows Universal CRT library, which is distributed as part of Windows 10. For information on how to redistribute the universal CRT, see Introducing the Universal CRT.
The file names are the same for Win32 and x64. However, the actual binaries are different. For more information about distributing the Microsoft C/C++ runtime files, refer to:
https://learn.microsoft.com/en-us/visualstudio/releases/2017/2017-redistribution-vs
Directory Structure
The entire Medical Viewer project can be found in the <LEADTOOLS_INSTALLDIR>\Examples\Medical\JS\MedicalWebViewer\MedicalWebViewerDemo\src folder.
Steps to Configure the Medical Web Viewer
Perform the following steps to configure the Medical Web Viewer:
-
Browse to the
<LEADTOOLS_INSTALLDIR>\Shortcuts\Medical Viewer\JavaScript\Medical Web Viewerfolder. -
This step varies, depending on the version, as follows:
- Run the "Run This First to Run the Medical Web Viewer 32-bit Demo" when using the 32-bit demo.
- Run the "Run This First to Run the Medical Web Viewer 64-bit Demo" when using the 64-bit demo.
-
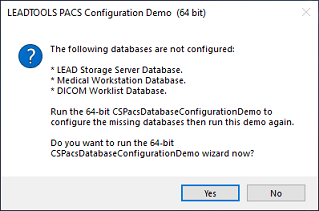
A dialog similar to the following figure, stating that the databases are not configured, may be displayed. Click the Yes button to configure the database.
-
The Database Configuration Demo will attempt to enumerate the SQL Servers available on the network. If the demo was unable to enumerate the SQL Servers, it may display a message box similar to the following figure:
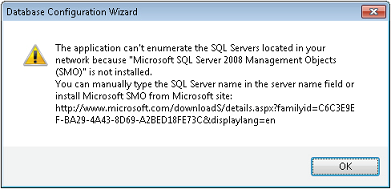
- If it does, click OK.
-
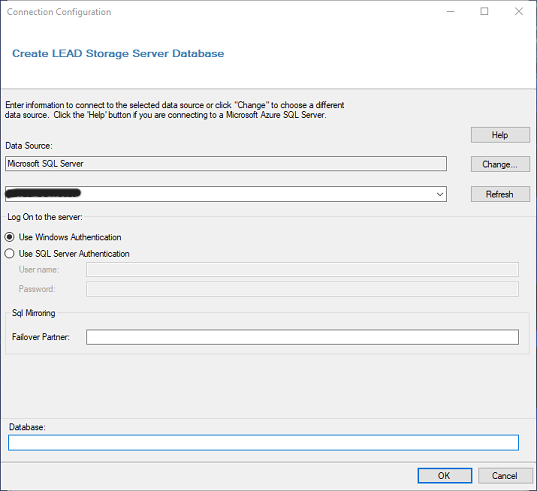
The configuration manager will find all the SQL Servers it has access to on the network and set one of them to the default. Change the default SQL Server by clicking the Change button underneath the
Databasessection. The configuration application will scan for available databases and present the options in the dropdown menu. Then choose eitherWindow AuthenticationorSQL Server Authenticationto connect to the server. Click OK to save the new options.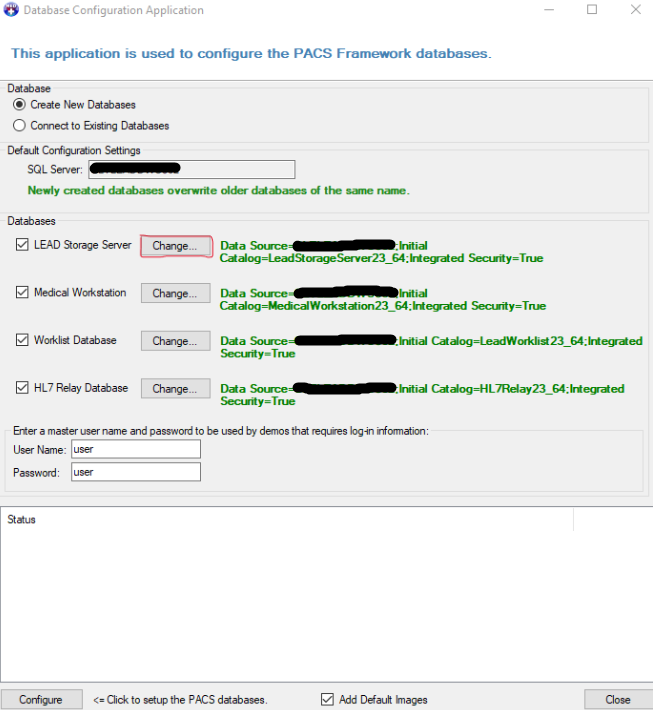
-
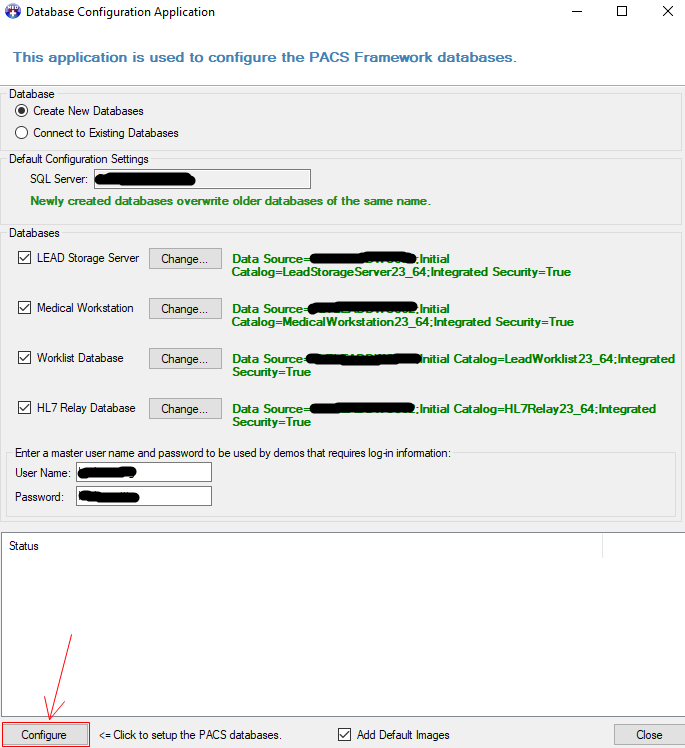
Choose from the database options. Create a new database or connect to an existing database. Enter the User Name and Password for the application. This will be the User Name and Password to log into the Medical Web Viewer once it is running. Once these settings have been adjusted as desired, click the Configure button on the bottom left.
-
A dialogue box will appear summarizing the options made from the previous window. Click the OK button to confirm.
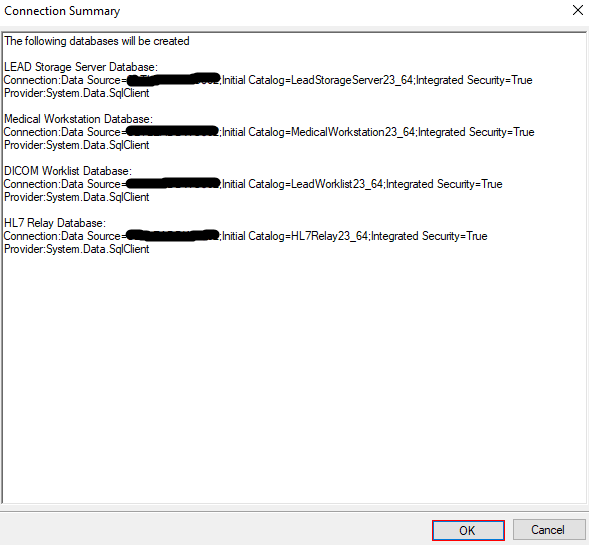
-
The application will configure the databases and display its progress in the
Statuswindow.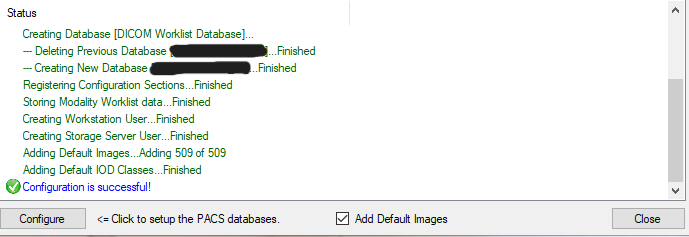
-
When the application completes the SQL Server set up, a
Configuration is successful!message will appear in theStatusdialogue box. Click the Close button to continue. -
After configuring the SQL Server the demos have to be set up. A
Helpwindow will appear explaining the optional and required settings for the demo application. Read through the options listed and click OK when ready.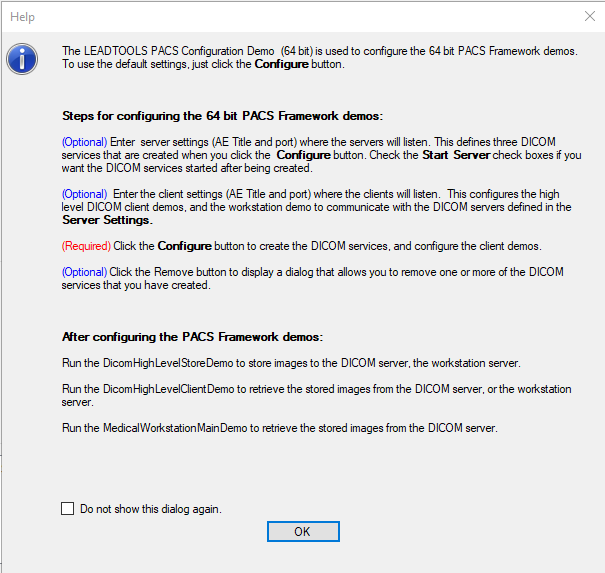
-
Review the settings listed under
DICOM Servers SettingsandDICOM Client Settings. When the settings are configured as desired, click the Configure button to create the DICOM services and configure the client demos.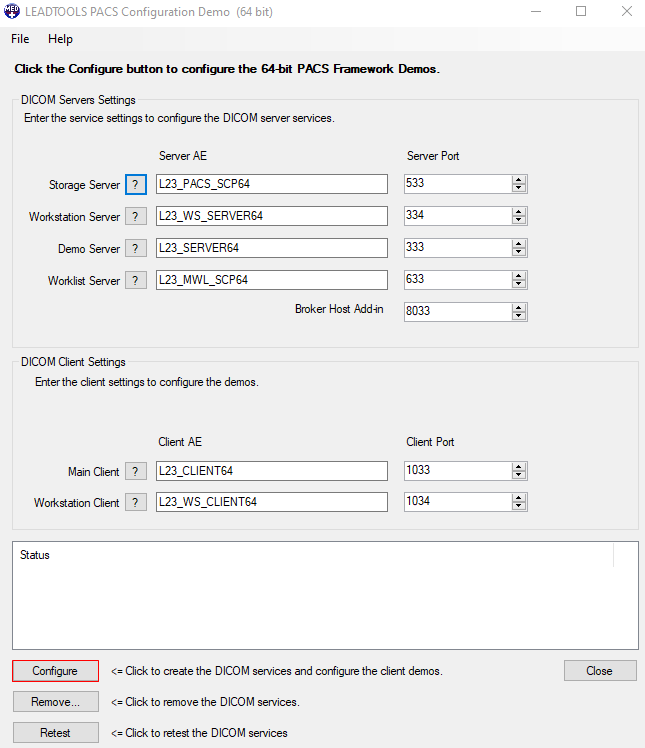
The
Statuswindow will display the progress of the configuration application as it sets up the demos. -
After all services are installed, the demo then tries to communicate with the SQL Server instance through each service. If any of the services fail this test, follow the steps detailed in the SQL Server with Windows Authentication section. To complete the configuration, run the following utility from the
<LEADTOOLS_INSTALLDIR>\Examples\Viewers\DotNet\MedicalWebViewer\WebViewerConfigurationfolder:- Run the "Run This Second to Run the Medical Web Viewer 32-bit Demo" when using the 32-bit demo
- Run the "Run This Second to Run the Medical Web Viewer 64-bit Demo" when using the 64-bit demo
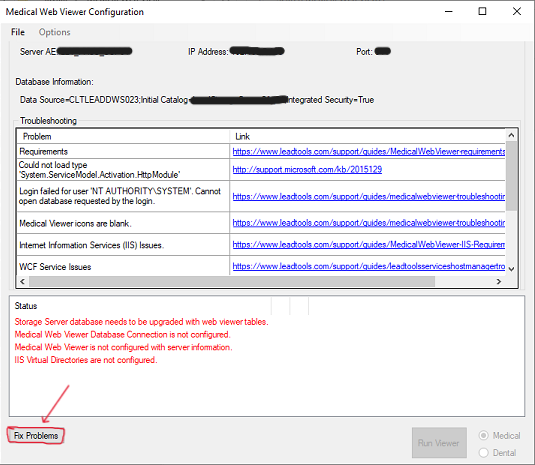
The selected utility loads and is shown in the following figure:
-
Click the Fix Problems button to complete the configuration. If the demo displays an IIS warning, make sure you have all the IIS Prerequisites. Then, restart the Medical Web Viewer demo and try again.
-
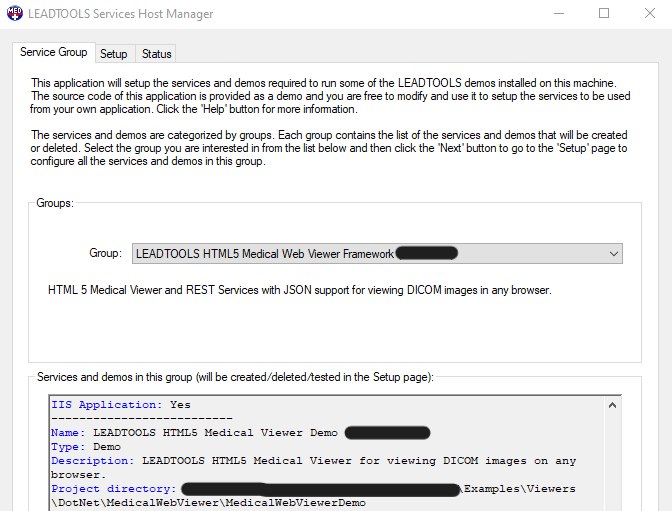
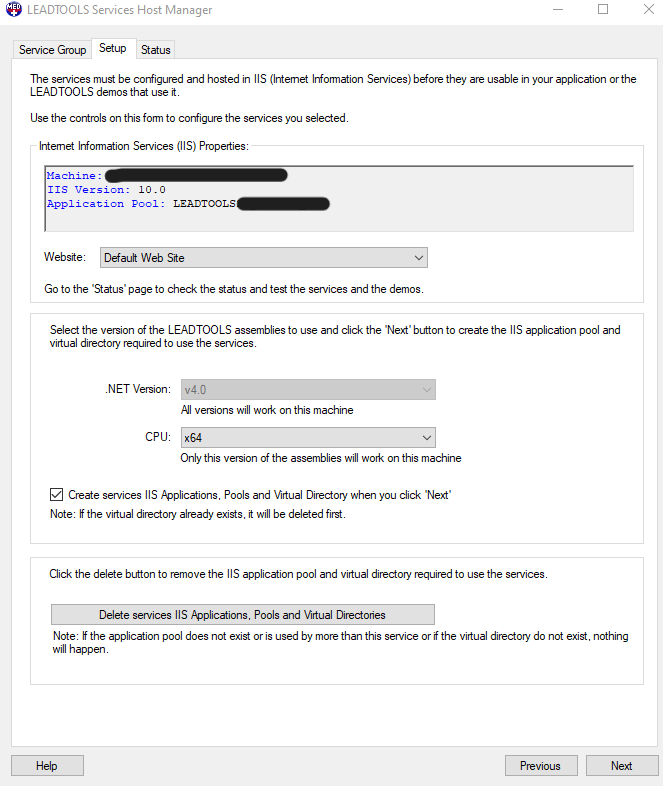
The LEADTOOLS Service Host Manager will start. Accept the default settings and click Next to proceed through the Service Group and Setup tabs. The tabs are shown in the following figures.
-
The LEADTOOLS Service Host Manager will next create an Application Pool named
LEADTOOLS23_DOTNET_v40, and three IIS applications, as follows:-
The
MedicalViewerService23application hosts the LEADTOOLS WCF service classes as web services. -
The
MedicalViewerServiceAsp23application hosts the LEADTOOLS Asp.Net service classes as web services. -
The
MedicalViewer23application hosts the LEADTOOLS HTML5 Medical Web Viewer demo application files.
-
-
In the
Statustab, click the Test All button, then follow any troubleshooting links and make any required adjustments.- Continue to click Test All until all issues are resolved. The status tab is shown in the following figure.
-
If you are using SQL Server with Windows Authentication, perform the following steps to login to the demo.
-
Open the IIS Manager.
-
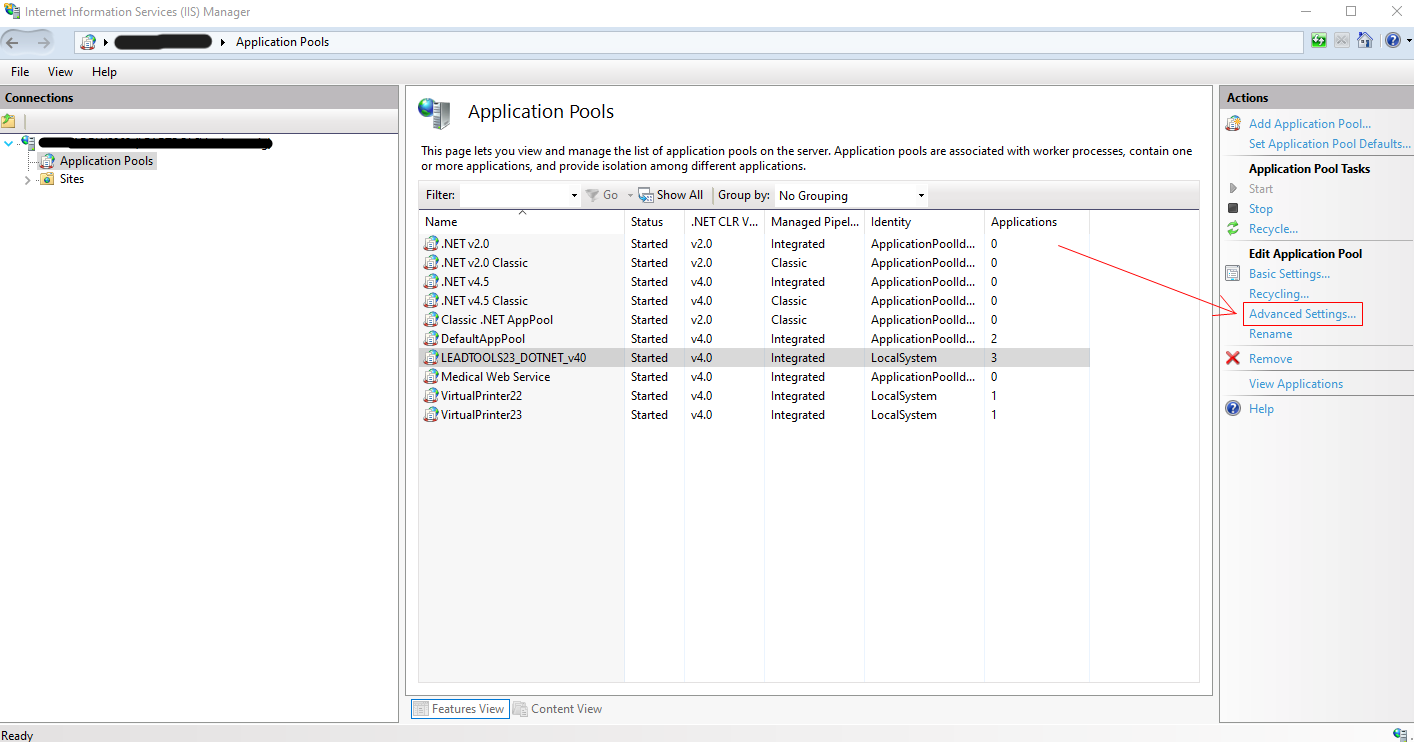
Highlight the
LEADTOOLS23_DOTNET_v40in order to prompt additional Actions to become available. -
Click Advanced Settings in the Edit Application Pool section of the Actions panel, as shown in the following figure:
-
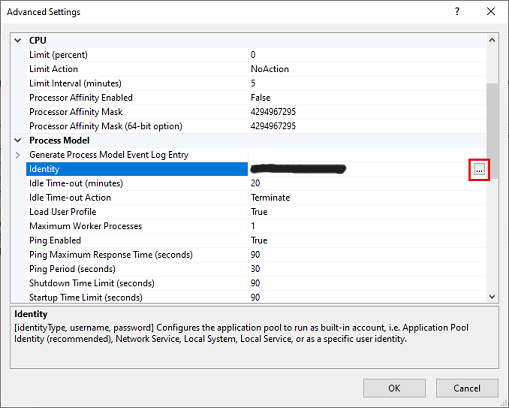
In the Advanced Settings dialog box, click Identity in order to open the drop-down list, as shown in the following figure:
-
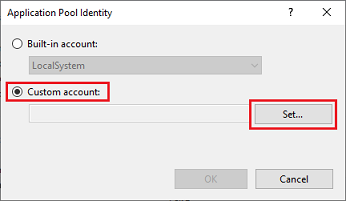
Select the Custom Account radio button and then click Set, as shown in the following figure:
-
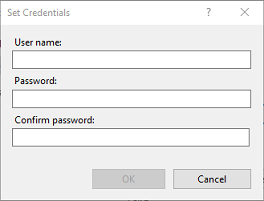
In the Set Credentials dialog box, fill out the User Name and Password, using the ones that will be used for validation. The dialog box is shown in the following figure:
-
Run the Project
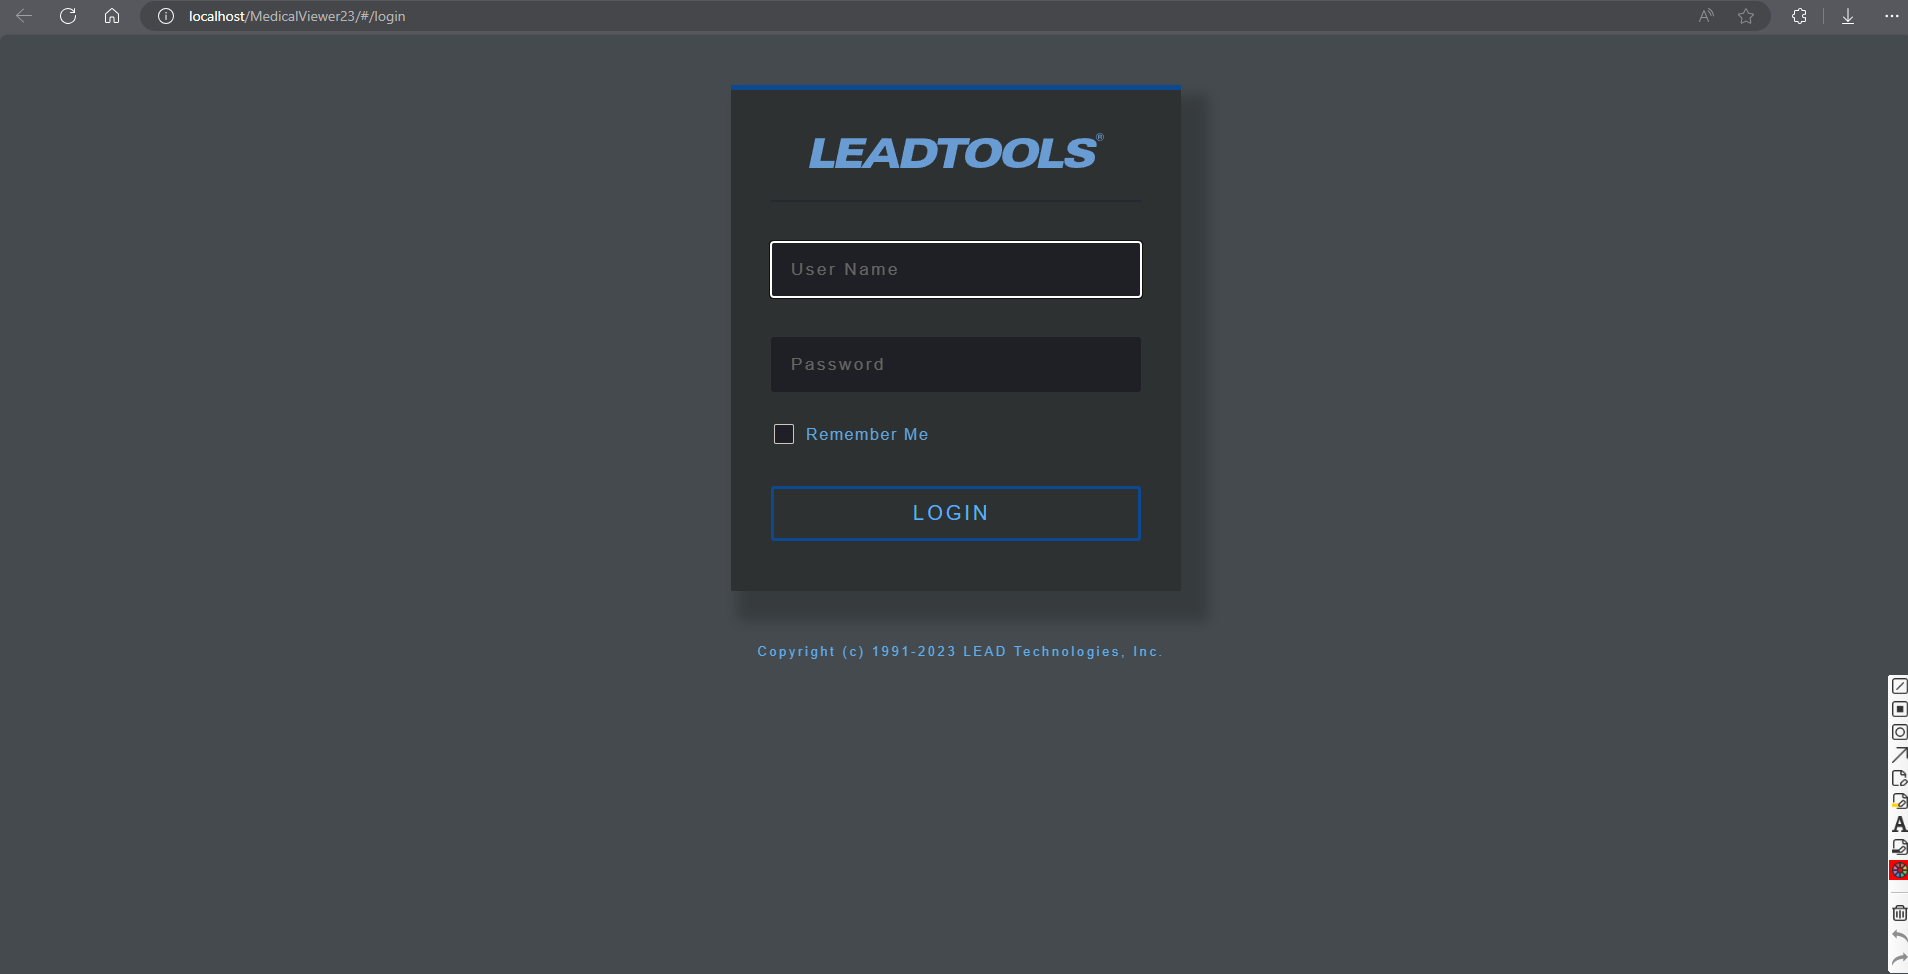
You should now be able to navigate to the link shown in the screenshot in Step 16. Login using the credentials set in Step 6. At this point the LEADTOOLS Medical Web Viewer demo is fully functional and you can begin your testing. You should see the default login page load.
-
Log in:
-
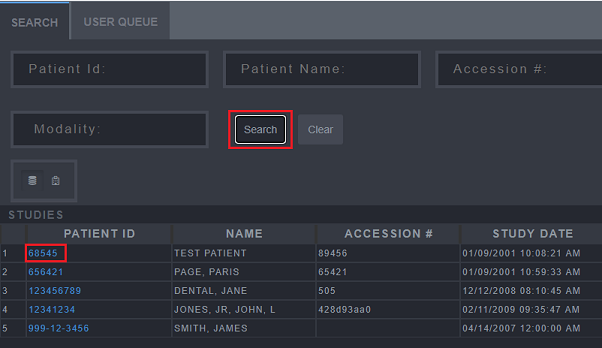
Search for studies and series:
-
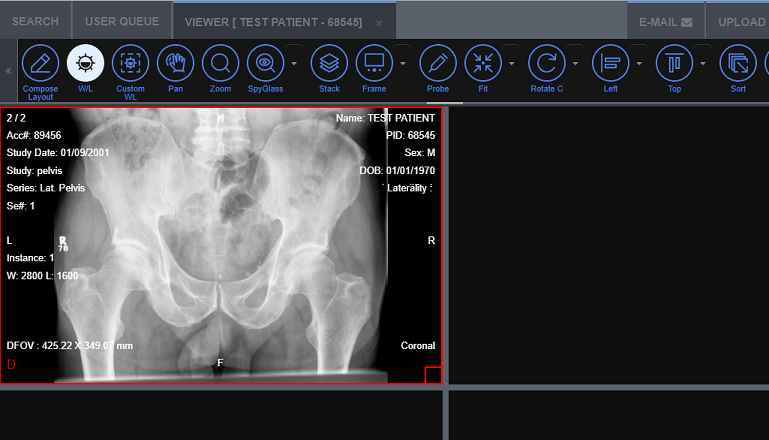
Select a series to see it loaded into the viewer:
Wrap-up
This tutorial showed how to install and configure the Medical Web Viewer to load and view patient studies.
