Configure and Run the Medical Workstation Viewer Demo - C# .NET WinForms
This tutorial shows how to configure, run, and use the features of the LEADTOOLS Medical Workstation Viewer Demo.
| Overview | |
|---|---|
| Summary | This tutorial covers how to use the DocumentConverter class in a C# .NET Framework 4.8 application. |
| Completion Time | 20 minutes |
| Platform | C# Console Application |
| IDE | Visual Studio 2019, 2022 |
| Runtime Target | .NET Framework 4.8 |
| Development License | Download LEADTOOLS |
Required Knowledge
Download and install the LEADTOOLS v22 SDK here, and make sure that the license and key files are located in the <INSTALL_DIR>\LEADTOOLS22\Support\Common\License directory.
To set the license, refer to the Add References and Set a License tutorial.
The LEADTOOLS Medical Workstation Viewer is an end-user like application with functionality comparable to many DICOM viewers used today in the health care industry. The workstation is built on LEADTOOLS PACS Framework components, and supports the below features:
- DICOM SCU Query/Retrieve, Store, Storage Commit
- DICOM SCP service to provide Query/Retrieve and Store
- DICOM Media import
- Medical Image Viewing (display layouts, annotations, Zoom, Pan, Window-Level tools, etc.)
- User Access Control
Configure the Medical Workstation Main Demo
Navigate to the example source code for the project:
<INSTALL_DIR>\LEADTOOLS22\Examples\Medical\DotNet\MedicalWorkstationMainDemo\fx
Open the CSPROJ file, with administrator rights. The demo projects are set up to run out of the box, so you can run the project by pressing F5 or Start. When running the LEADTOOLS Medical Workstation for the first time, the following message will display.
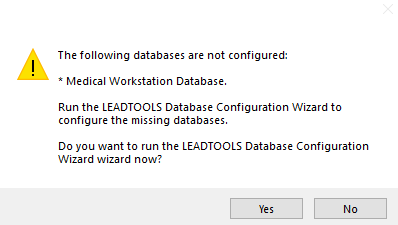
Click Yes, which will bring up the below display.
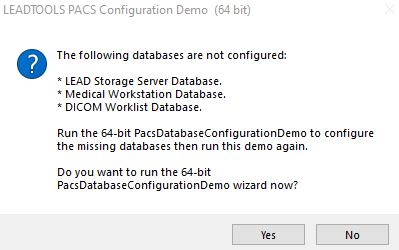
Click Yes to run the PACS Database Configuration application. Next, click the Configure button in the bottom left, the databases will then be created.
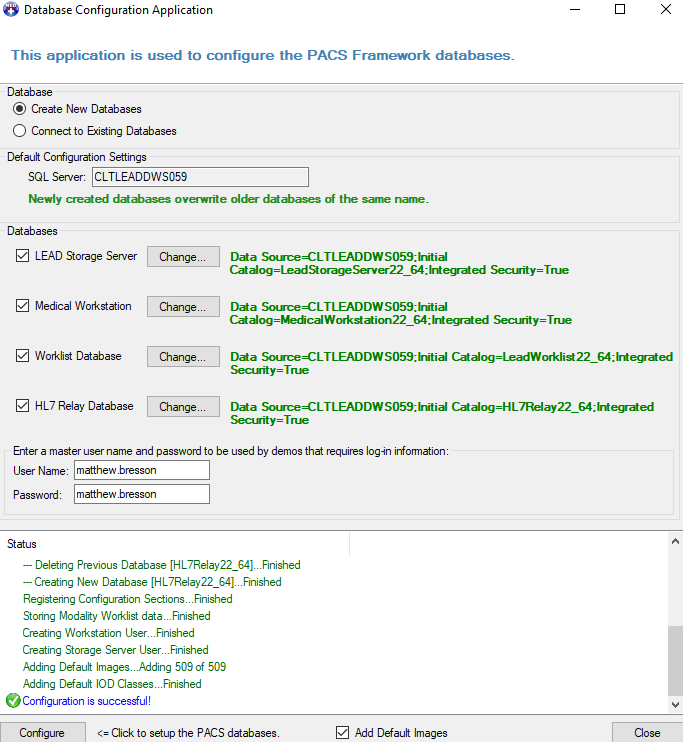
Click Close and this will run the 2nd PACS Configuration Demo.
Default AE Titles and ports are provided for each of the servers and clients, but you can change the AE Title to any name and the port to use a unique port number. You can also have this demo automatically start each service.
To reset any previous client configuration, select the Reset Client Configuration check box. Otherwise, the current configuration will be added to any previous configurations.
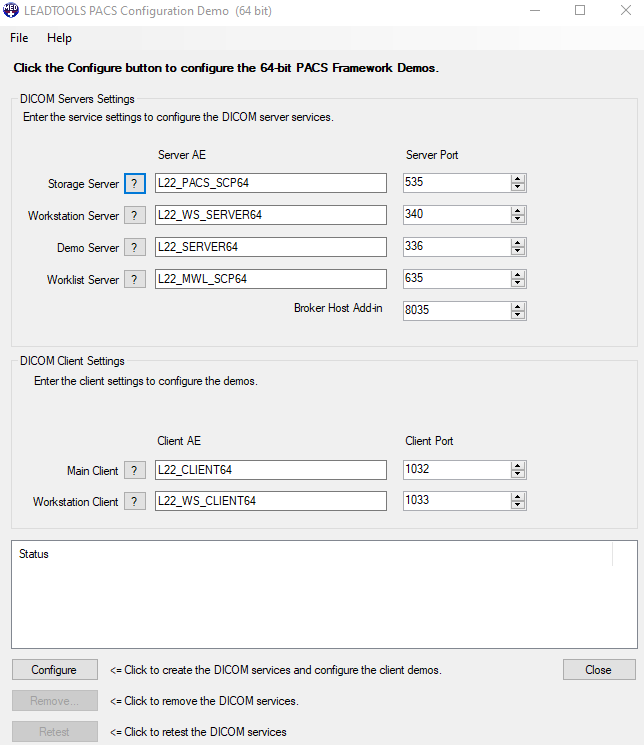
Click Configure to create each of the services and client demos. Click Close to close the demo. The Medical Workstation will then automatically launch.
LEADTOOLS Medical Workstation Main Demo
Once you click Close on the PACS Configuration Demo, this will launch the Medical Workstation Demo. The login dialog will then appear. Use the credentials that you entered in the PACS database configuration demo.
Query, Retrieve, and View Images
-
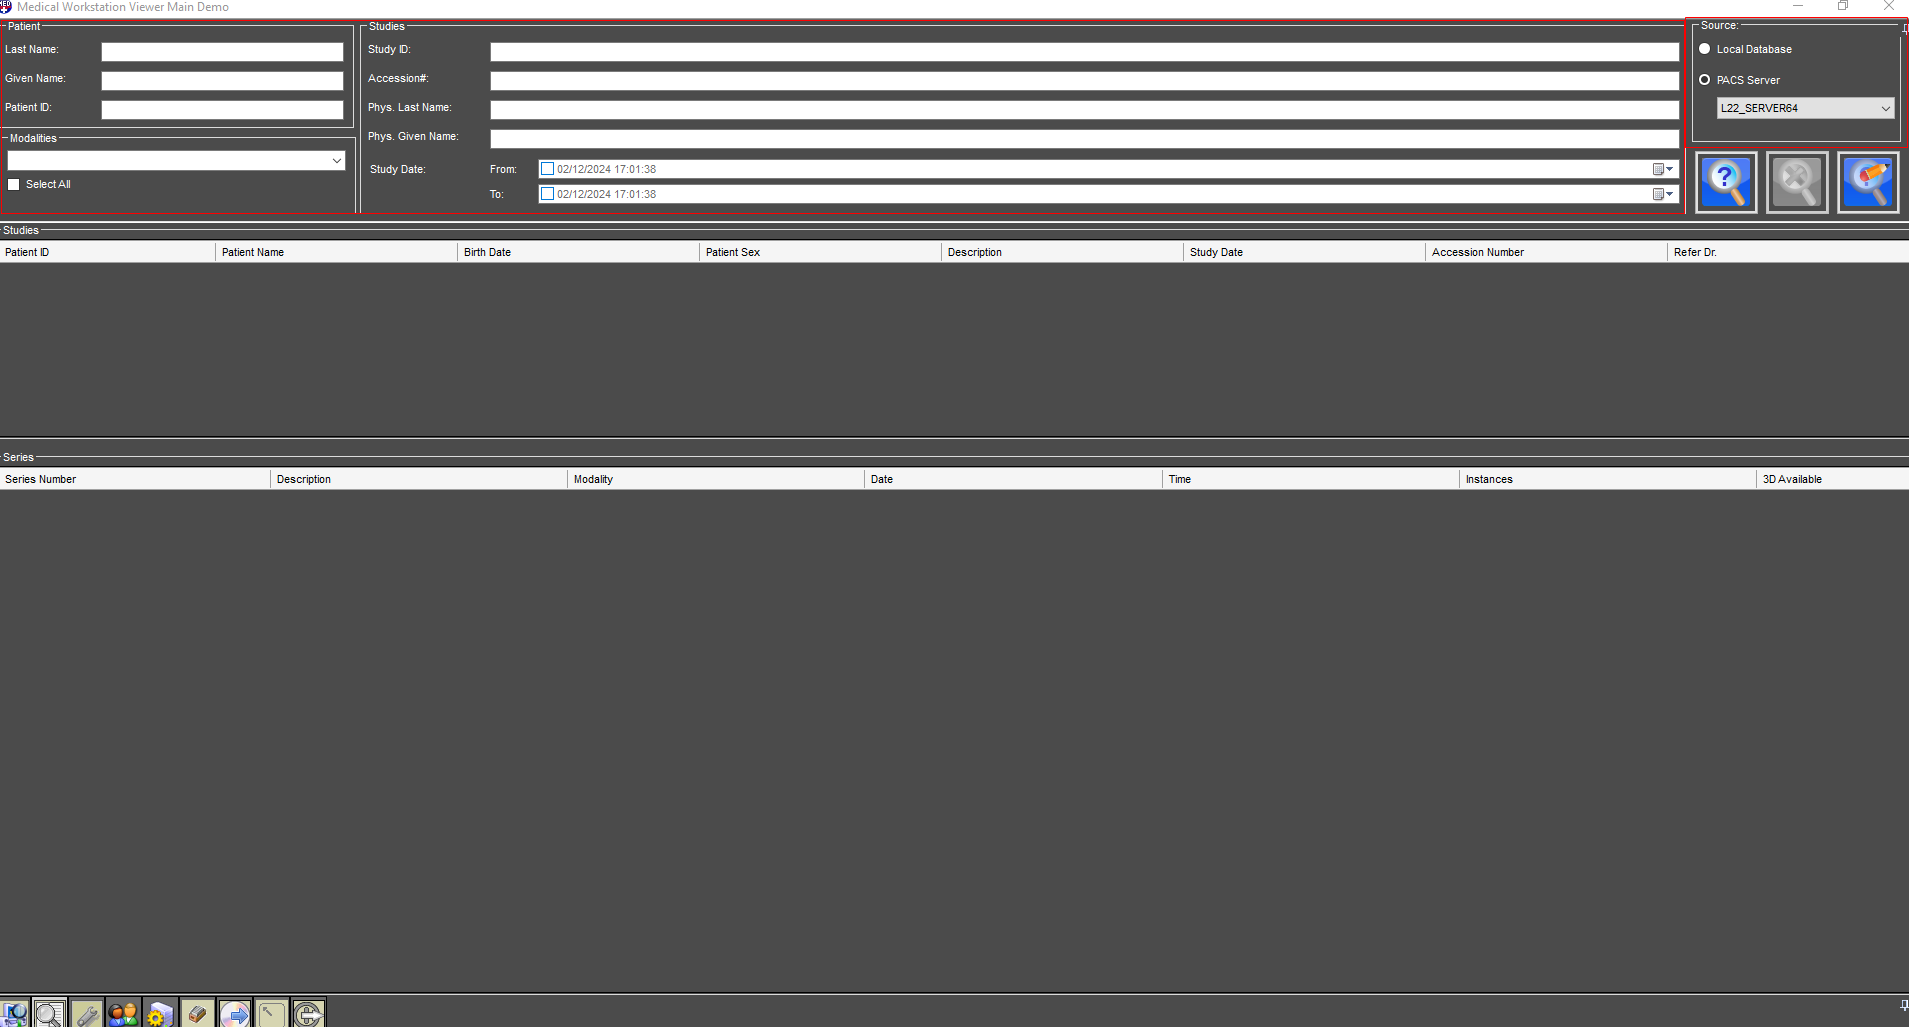
The Search Control is initially displayed as the default view. The search control lets you specify the query parameters to search the available DICOM Studies/Series and view images. On the right side of the Search control, above the Search button, you can select whether you want to perform the query against a local database or a configured DICOM Server (source).
-
Click on the Search button to query the studies and series information on that server. You can view all the series images from a study by performing one of the following actions:
- Right-clicking on the study and selecting Add all series to Queue Manager.
- Right-clicking on the specified series and selecting Add series to Queue Manager.
- Double-clicking the series and selecting Add series to the Queue Manager.
-
When you add a series to the Queue Manager, the Queue Manager dialog will open and show you the progress of the
Moveoperation. You can configure the Queue Manager to load the retrieved images directly into the Viewer control. Also, you have the option to auto-clear the task from the list when an image is retrieved successfully.
Note
Note that any retrieved images will be automatically stored into the workstation database. Subsequently, you can search for the images and view them by selecting Local Database from the Search control.
- Click on the Viewer button from the toolbar located at the bottom of the window to view the retrieved images.
User Accounts
You can add new users into the workstation by clicking the User Accounts button on the toolbar located at the bottom of the windows. Users can be either administrators or non-administrators. A non-administrator does not have access to the Workstation Configuration or the Service Manager .
Service/Database Manager
-
To add images directly into the database, click the Service Manager button on the toolbar at the bottom of the window.

-
Click the Database Manager button on the toolbar at the top of the window.

-
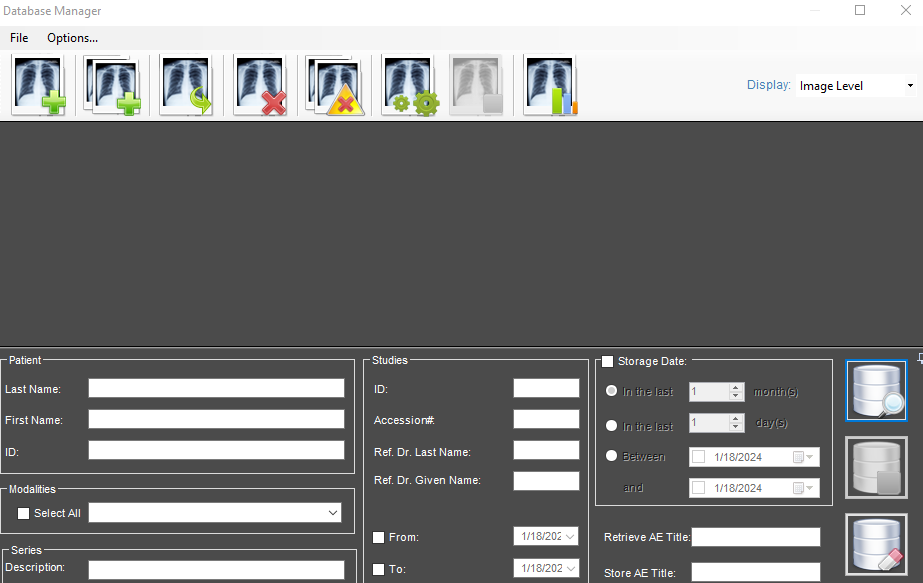
Use the Database Manager to perform the following tasks from the toolbar at the top of the window.
- Add a DICOM file.
- Add a complete DICOM directory.
- Delete selected entries from the results grid view.
- Clear the entire database.
-
View the status report.
-
You can also perform a search as if you were using the Search control. After adding images, close the Database Manager and return to the Search control.
-
Select the Local Database option from the Source box and click the Search button.
-
You can view a complete study's series or a specific study directly by right-clicking on the Study/Series and selecting Add study to viewer or Open in Viewer.
-
If you select Add Series/Study to Viewer, the images will be loaded in the viewer but you will remain in the Search control. If you select Open in Viewer, you will be navigated to the Viewer control.
Adding a PACS Server
-
To add and configure a DICOM Server to search images from, click the Configure button located on the toolbar at the bottom of the window.
-
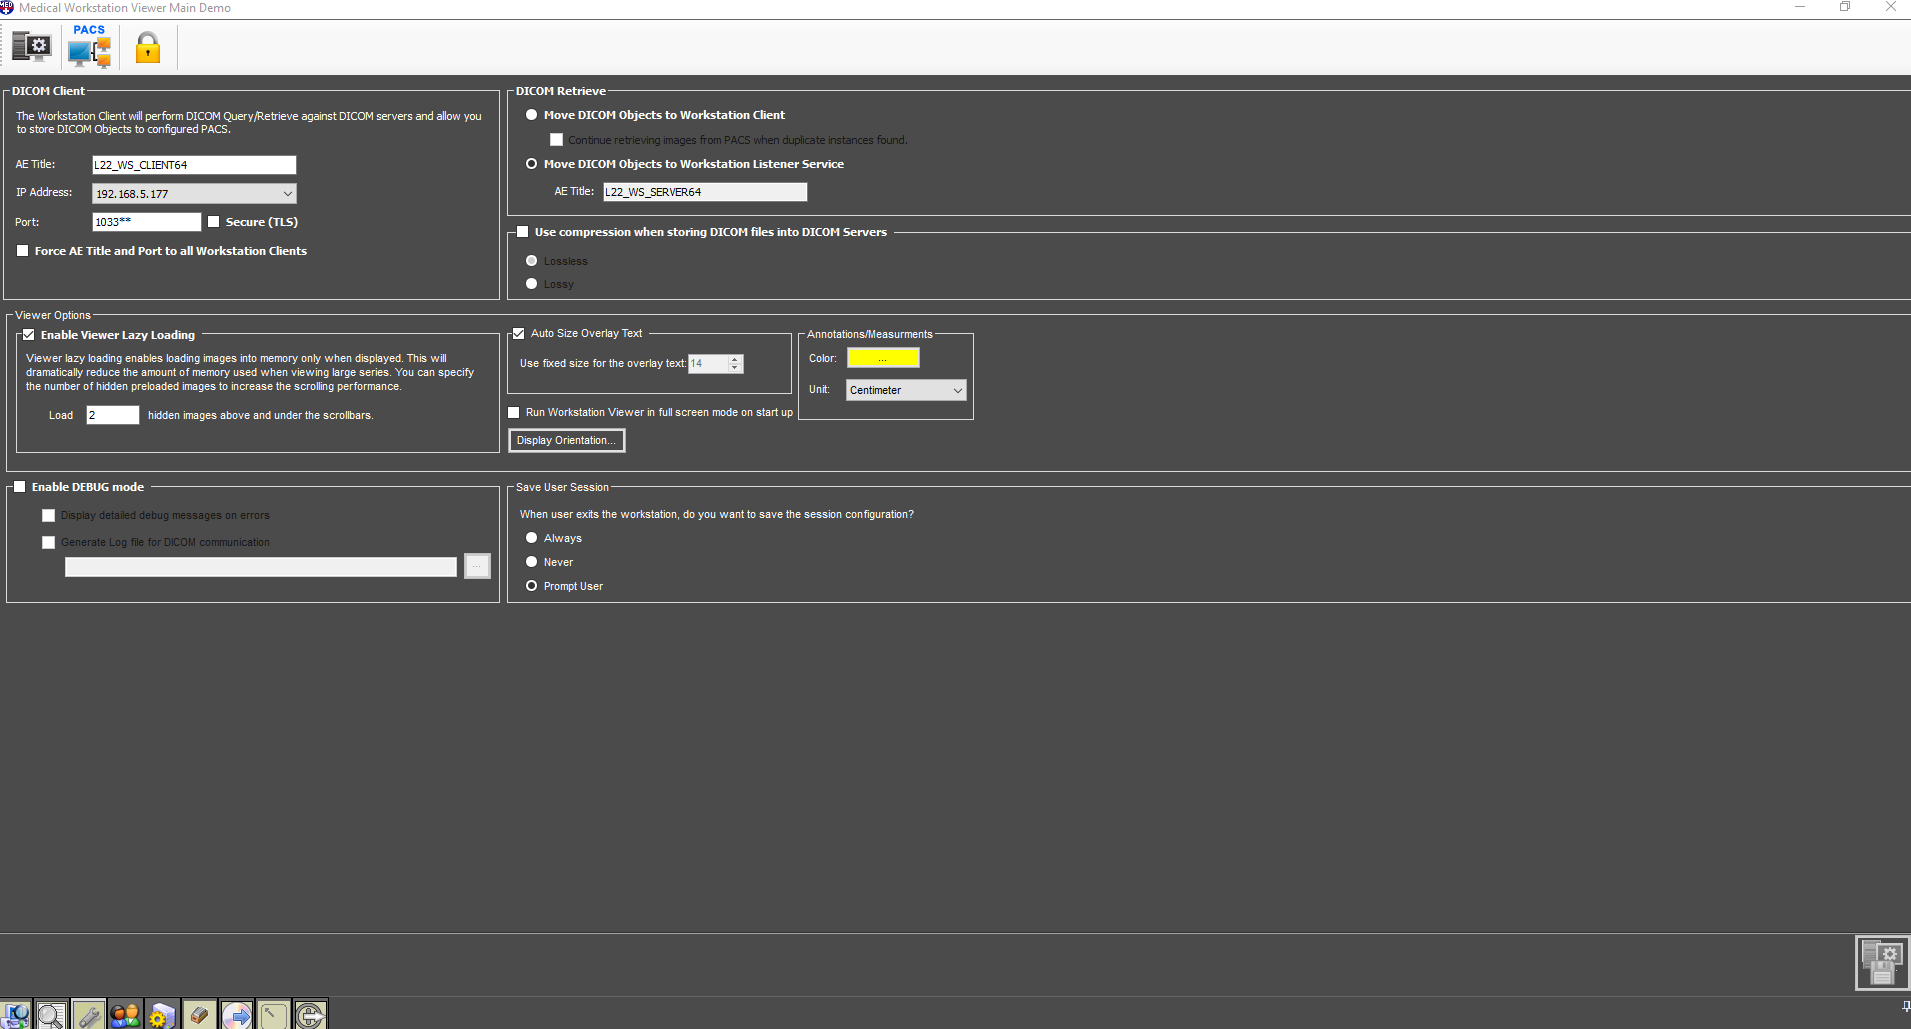
The initial view contains configuration information for the workstation client. Click the Remote PACS button on the toolbar at the top of the application in order to display the PACS configuration.
-
Click the Add Remote PACS button on the toolbar at the top of the window.
-
Enter the information for one or more DICOM Servers on which you want to perform a query/retrieve operation. Note that the High-Level DICOM Server is already added to the list. You can also enter the low level DICOM server installed with the toolkit. Note that there is a Default Storage option for storing information from the local database to the server.
-
To configure the DICOM Server with workstation client information (Add a client to the DICOM Server demo), click the Workstation Client button and use the displayed workstation client information.
-
If you start the PACS Server Manager Demo, this is where the workstation client information would be added to the
L22_SERVER64. Notice that theL22_WS_SERVER64has also been added to the list of clients. This is because when a Query/Retrieved is performed, the retrieved dataset is placed in theL22_WS_SERVER64server. Therefore, it must also be added to the client list. -
Return to the Search Control and notice that you can select the DICOM servers you just entered previously.
Storing Images on Remote DICOM Servers
-
After inserting images into the Workstation database you can store them to other DICOM servers.
-
Use the Search Control, select the Local Database source option and click the Search button.
-
Select a study/series from the results view and right-click on it.
-
You will see an option to store the study/series to the configured DICOM Servers. Select the default DICOM Server or choose one from the context menu list.
-
The Store operation will be added to the Queue Manager to show the operation status.
Using the Workstation Listener Service
The Workstation Listener Service is used by DICOM clients to communicate with the workstation (Query/Retrieve and store DICOM).
-
Click the Service Manager button on the toolbar in the bottom of the window.
-
Ensure that
L22_WS_SERVER64is running. If it is running, then the Start Server button will be grayed out. -
Run the
DicomHighlevelClientDemo_Original.exeto connect to theL22_WS_SERVER64. In the drop-down box selectL22_WS_SERVER64and then click Search to query the LEADTOOLS Medical Workstation Viewer.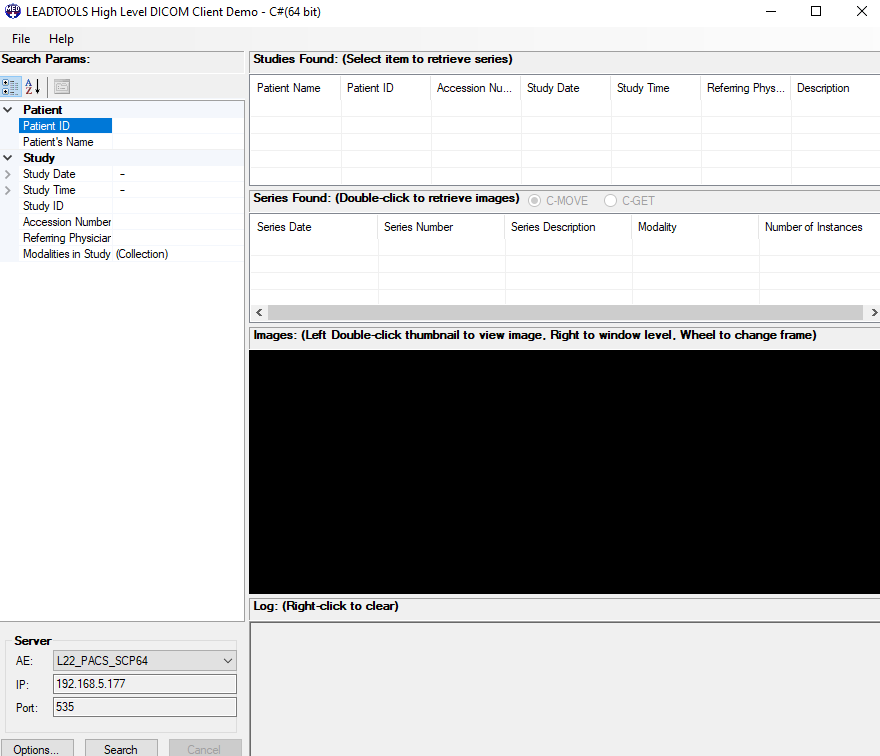
-
Start the
DicomHighlevelStoreDemo_Original.exe, and selectL22_WS_SERVER64in the drop-down box. Then click Store to store the images to the LEADTOOLS Medical Workstation Viewer.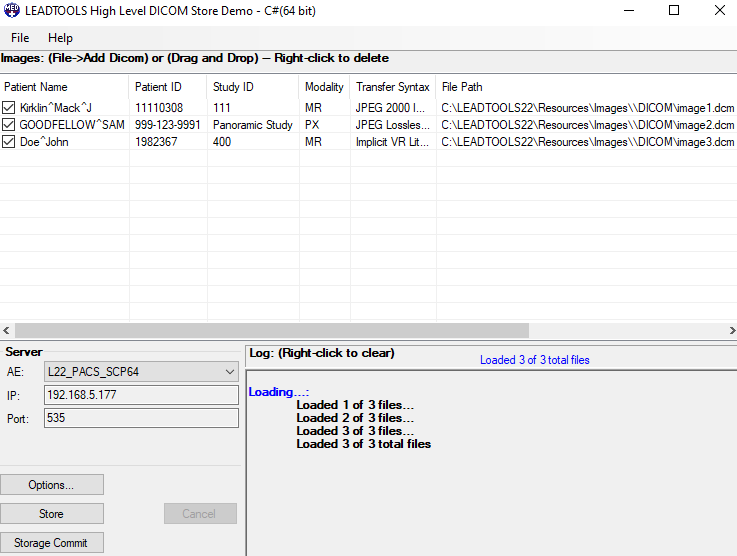
-
Make a search in the workstation's Search control to verify that the image has been successfully stored.
Workstation Client Configuration Overview
The Workstation Client Configuration dialog is shown in the following figure:
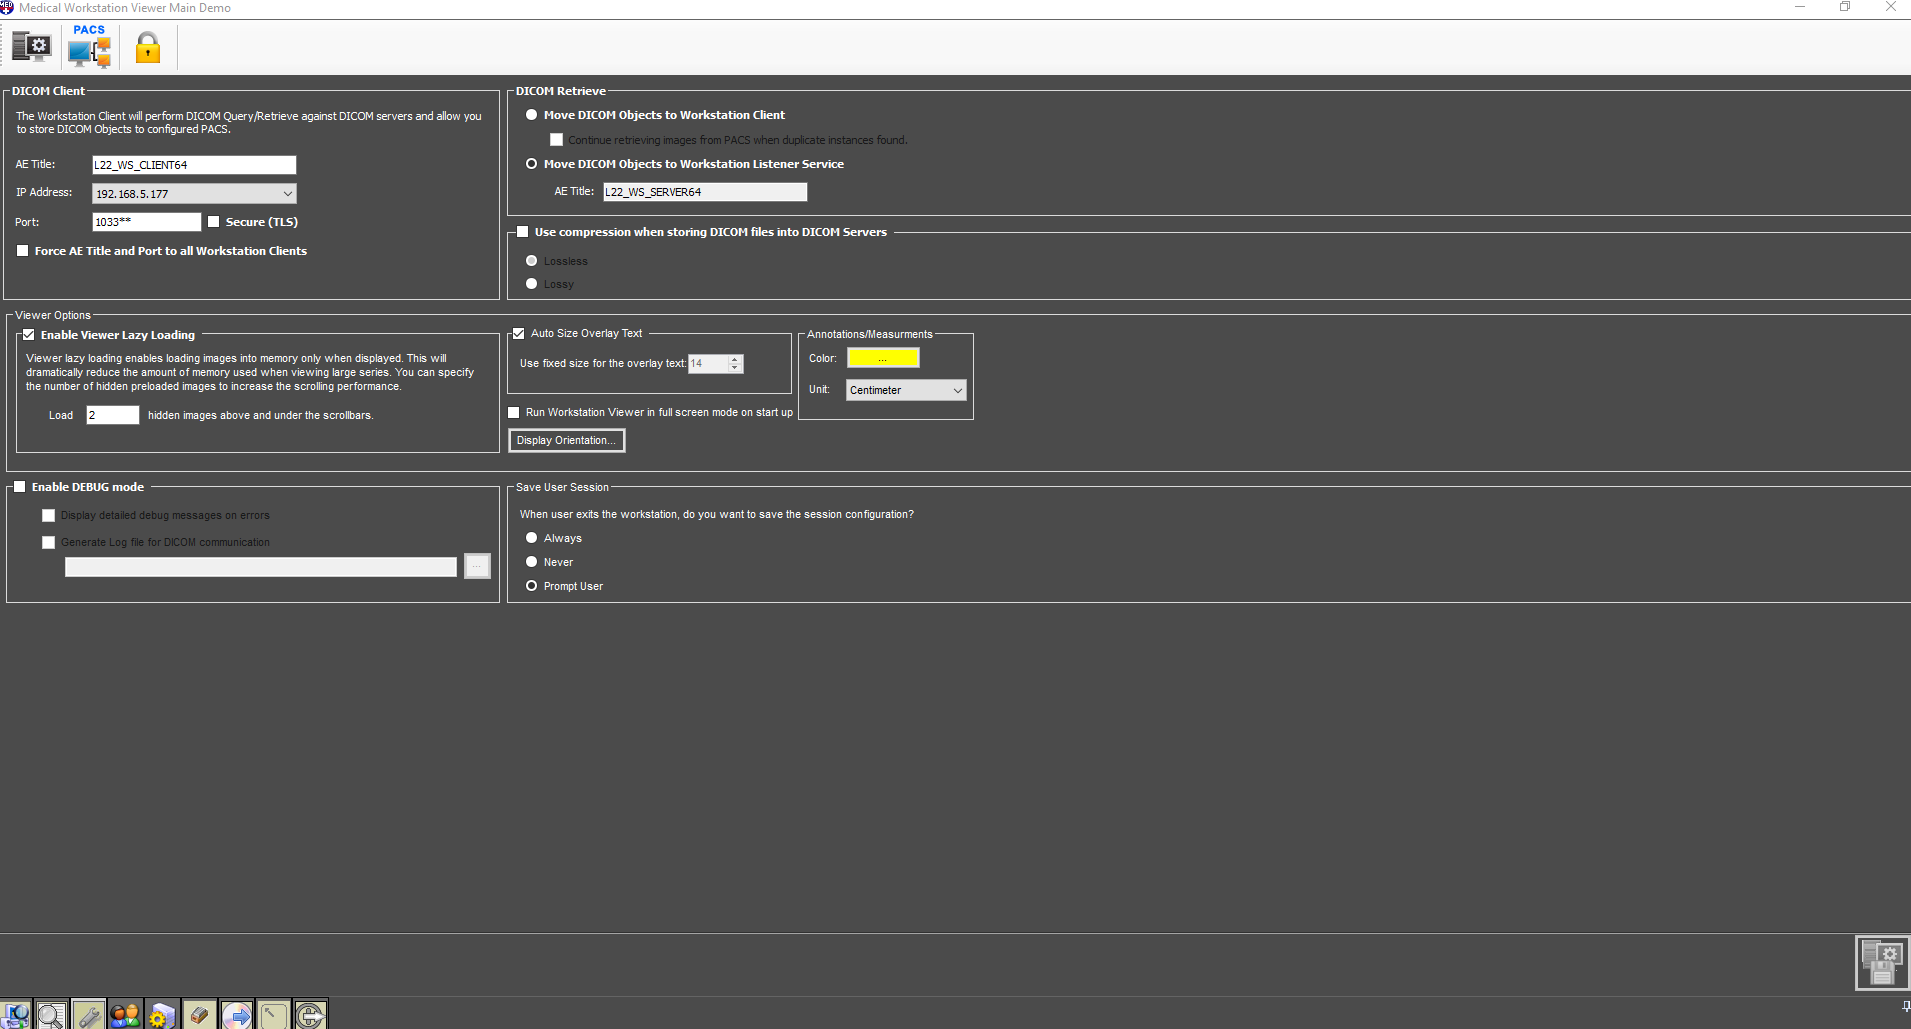
The fields can be described as follows:
-
DICOM Client: Contains information about the workstation client which will connect to remote DICOM servers to query, retrieve and store images.
-
Enable Debug Mode: Allows you to run the workstation in debug mode. Check box options allow you to display detailed debug messages, and generate a log file for DICOM communication.
-
Enable Viewer Lazy Loading: When this is enabled, the viewer control does not load the series images into memory, but loads them only when they need to be displayed on the screen. This makes the initial image display faster and does not take as much memory as it would if they were all loaded. However, Cine playing speed can be slower than it would when all of the images are loaded. To overcome slow Cine speed, specify how many hidden sequential images should be loaded in addition to the displayed images.
-
DICOM Retrieve: If this check box is clear, when retrieving images from DICOM Servers should one or more images be found to be currently existing in the workstation local database, the retrieve operation will fail. When this check box is selected, the workstation will continue retrieving the rest of the images even if they currently exist in the local database.
-
Auto Size Overlay Text: If this check box is selected, any overlay text is automatically sized. If this check box is clear, the text is set to the specified fixed size.
-
Run Viewer in Full Screen Mode: If this check box is selected, the viewer will run in full screen mode the next time it is started. If this check box is clear, the viewer can be sized, maximized, and minimized.
3D Viewing
-
To view images in 3D, load a 3D dataset into the Medical Workstation's local database (Refer to the Service/Database Manager section).
-
Once loaded, close the Database Manager and go back to the search screen. Change the source from
PACS ServertoLocal Databaseand perform a search. Right-click on the study or series found corresponding to the 3D dataset and select Open in Viewer. -
It may take a few seconds to load all the frames. Once loaded, select the Create a 3D Volume icon.
-
The 3D volume screen is divided into the volume and the original slices along with two other generated slices. There are scout lines you can adjust as well as a slab rectangle which can be used to modify the clipping of the volume. The volume can be rotated, magnified, panned, and window-leveled, with many other options as well.
-
To change the type of volume that is rendered, right-click on the volume and select one of the options in the menu that appears. We support Maximum Intensity Projection (MIP), Minimum Intensity Projection (MinIP), Multi-Planar Reconstruction (MPR), Surface-Shaded Display (SSD), and Volume Rendering Technique (VRT).
-
You can also store the 3D volume once it is rendered. Any workstation connecting to the workstation database will then be able to load the 3D volume without having to regenerate it. This allows for faster load times. You can store the state of the 3D volume as well. Simply right-click on the volume and select Store Volume or Store Volume State.
MPR Viewing
-
To perform MPR viewing, follow the first two steps from the 3D Viewing section above. Once the image is loaded, select the MPR Icon. You can select either a single or a double line and add more each time you select the icon.
-
To view the corresponding images, right-click on the image and select Series Layout. Then select a layout so that all corresponding images can be seen.
Logging
-
To view the log, click the Service Manager icon and then select the Event Log Viewer button. You can filter the results of the log or leave all filters blank and click Single Query to display all logs.
-
Double-click an item to see more information. If a dataset was part of the communication it will also be available. The dataset can be saved as text, XML, or as a DICOM file to disk.
-
To view logs as they happen in real time, click Start Continuous Query.
Wrap-up
This tutorial showed how to configure, run, and use the LEADTOOLS Medical Workstation Demo.
