Is this page helpful?
Add References and Set a License - Java
This tutorial shows how to get started with the LEADTOOLS SDK in a Java application.
| Overview | |
|---|---|
| Summary | This tutorial covers how to set a license in a Java application. |
| Completion Time | 30 minutes |
| Project | Download tutorial project (1 KB) |
| Platform | Java Application |
| IDE | Eclipse |
| Runtime License | Download LEADTOOLS |
| Try it in another language |
|
Required Knowledge
Before any functionality from the SDK can be leveraged, a valid runtime license will have to be set.
For instructions on how to obtain a runtime license refer to Obtaining a License.
Create the Project
Launch Eclipse and select File -> New -> Java Project, then add the project name and click Finish.
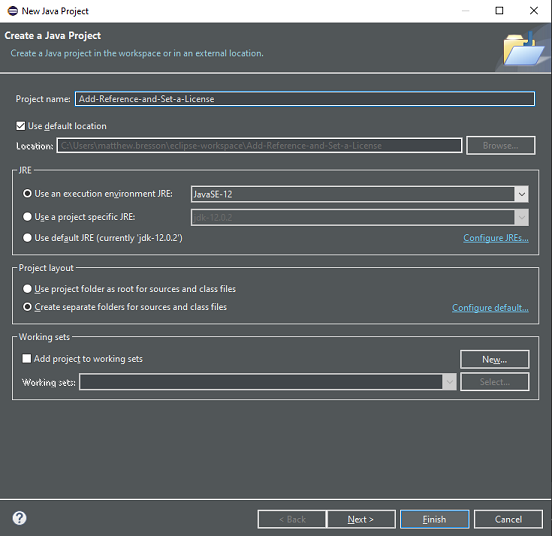
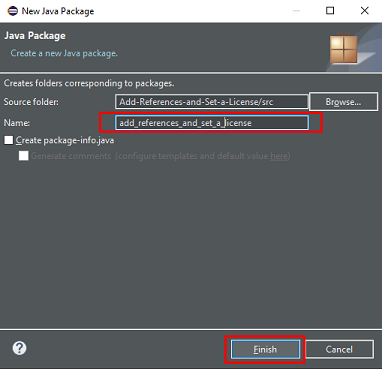
In the new window it will ask to create a new module-info.java file, select Don't Create. Once the project is created, right-click the project and select New -> Package. Add a package name and click Finish.
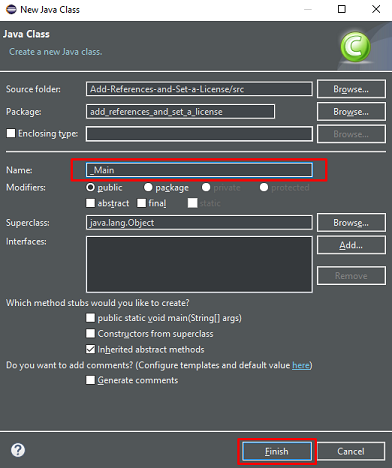
Add a new class to the package by right-clicking the package and selecting New -> Class. Add a name for the class and click Finish.
Add LEADTOOLS References
To leverage the LEADTOOLS SDK in a Java project, references to the LEADTOOLS JAR files will be need.
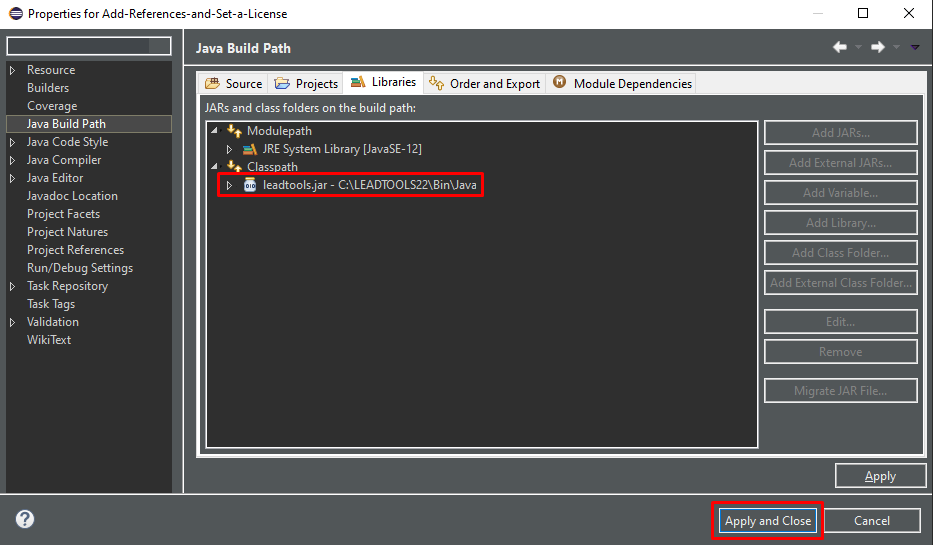
Right-click on the Java project in the Package Explorer and select Properties. Select Java Build Path, and click on the Libraries tab. Select Classpath, then click Add External JARs....
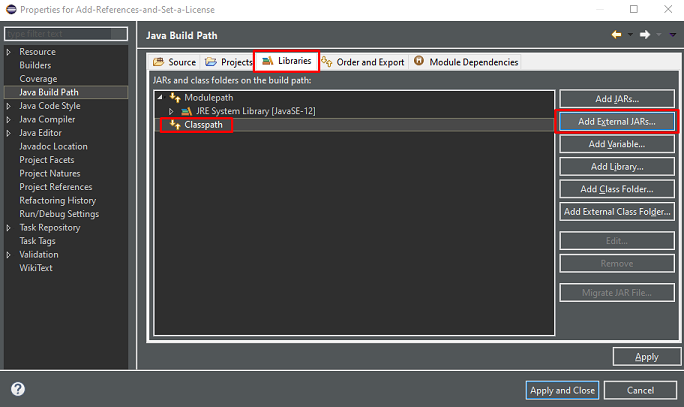
Navigate to this path: <INSTALL_DIR>\LEADTOOLS22\Bin\Java
The following JAR file is required for this tutorial.
leadtools.jar
Select Open, then click Apply and Close
Open the _Main.java class in the Package Explorer. Add the following import statements to the import block at the top.
import java.io.IOException;import java.nio.file.*;import leadtools.*;
Add a new method to the _Main class named run(String[] args). This method will be called inside the main() as shown below.
public static void main(String[] args) throws IOException{new _Main().run(args);}
Inside the run() method add the following to set the library path to where the CDLL files are located, as well as load the LEADTOOLS library that was previously imported.
private void run(String[] args) {try {Platform.setLibPath("C:\\LEADTOOLS22\\Bin\\CDLL\\x64");Platform.loadLibrary(LTLibrary.LEADTOOLS);SetLicense();}catch(Exception ex) {System.err.println(ex.getMessage());ex.printStackTrace();}}
Add the Set License Code
In the _Main class add a new method called SetLicense() and call the method inside the run() method, as shown in the previous section. Add the following code to properly set the LEADTOOLS license.
private void SetLicense() throws IOException{String licenseFile = "C:\\LEADTOOLS22\\Support\\Common\\License\\LEADTOOLS.LIC";String developerKey = new String(Files.readAllBytes(Paths.get(licenseFile + ".key")));RasterSupport.setLicense(licenseFile, developerKey);if(RasterSupport.getKernelExpired())System.out.println("License file invalid or expired.");elseSystem.out.println("License file set successfully.");}
Run the Project
Run the project by selecting Run -> Run.
If the steps were followed correctly, a message in the Console window will show License file set successfully.

Wrap-up
This tutorial showed how to create a new Java Project, add LEADTOOLS JAR and DLL references, and set the license.
This is the basis for all Java applications leveraging the LEADTOOLS SDK. All functionality in the SDK is unlocked via setting a license. The SetLicense method must be called before calling any other LEADTOOLS SDK methods.
Once the SDK is purchased, the evaluation license can be replaced with a valid runtime license to disable the Nag Message.
