Get Started with the DICOM Server Manager Demo
This tutorial shows how to configure and use the DICOM Server Manager Demo.
| Overview | |
|---|---|
| Summary | This tutorial shows how to start and use the DICOM Server Manager Demo. |
| Completion Time | 10 minutes |
| Platform | .NET WinForms |
| IDE | Visual Studio 2019, 2022 |
| Development License | Download LEADTOOLS |
Required Knowledge
Be sure to download and install the LEADTOOLS SDK, and make sure the license and key files are located in the <INSTALL_DIR>\LEADTOOLS22\Support\Common\License directory. To set the license, refer to the Add References and Set a License tutorial.
Get familiar with the overview of how LEADTOOLS DICOM messaging works by reviewing the following:
To use the demo you will need to have an evaluation license or a LEADTOOLS product that supports the PACS Server Framework, such as LEADTOOLS Medical Suite.
About the DICOM Server Manager Demo
The LEADTOOLS DICOM Server Manager Demo configures three different DICOM Servers by default. These DICOM Servers use the LEADTOOLS PACS Server Framework. Each DICOM Server implements different DICOM Services using different add-ins. Additionally, a Server Manager application is provided to configure and manage all of the servers from a single user interface.
Users can add or remove supported DICOM Services from any of the servers by simply adding or removing the add-ins under the server folder. Note that one add-in can implement multiple DICOM Services but multiple add-ins are not allowed to support the same DICOM service under a single server configuration.
Open the DICOM Server Manager Demo
Navigate to the pre-compiled .exe: <INSTALL_DIR>\LEADTOOLS22\Bin\DotNet4\x64\Leadtools.Dicom.Server.Manager_Original.exe.
Alternatively, navigate to the example source code for the project:
<INSTALL_DIR>\LEADTOOLS22\Examples\Medical\DotNet\Dicom.Server.Manager\fx\Dicom.Server.Manager.csproj
Open the project in Visual Studio and run the DICOM Server Manager project using Start or F5. This will build the .exe file to run the demo.
Setup the DICOM Server Manager Demo
Once the demo starts, it may first ask to run the PACS Configuration Demo. This is required for the DICOM Server Manager Demo to function.
Press the Configure button to create the DICOM services.
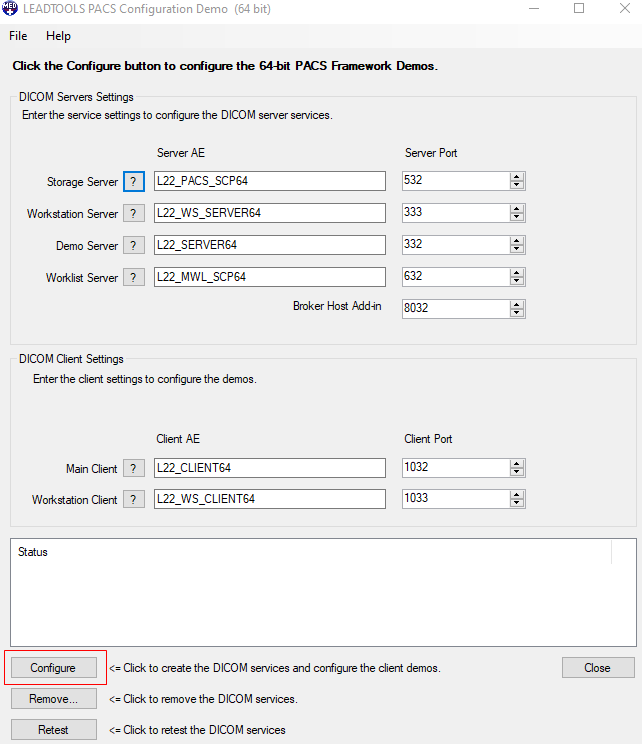
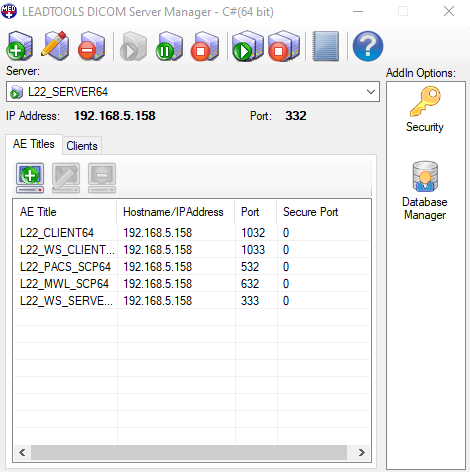
Once the servers have been configured, close the PACS Configuration Demo. The DICOM Server Manager Demo should then load.
Adding a New Server to the Server Manager
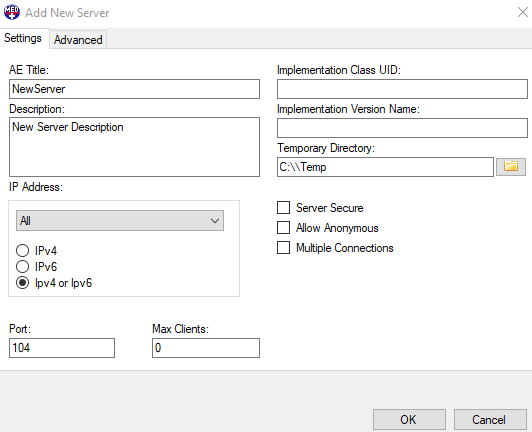
To add a server to the server manager press the Add Server button.
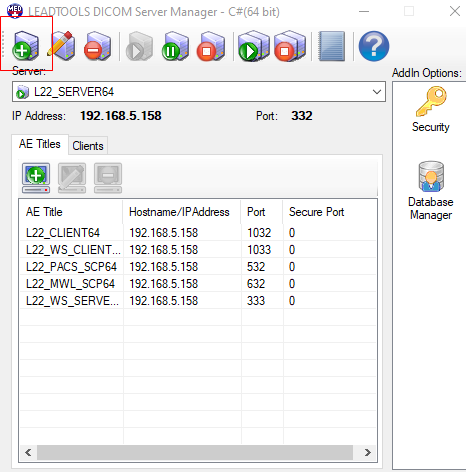
Once the Add Server button is selected, an option menu appears.
Editing the server settings can be done with the Edit Server button, and a server can be removed with the Delete Server button.
Run, Pause, and Stop the Server
To run the currently selected server from the drop-down list box, press the Start Server button. If this is grayed out, the server is already started.
To pause the currently selected server from the drop-down list box, press the Pause Server button. If this is grayed out, the currently selected server is already paused or stopped.
To stop the currently selected server from the drop-down list box, press the Stop Server button. If this is grayed out, the currently selected server is already stopped.
To start all of the servers that are in the drop-down list box, press the Start All Servers button.
To stop all of the servers that are in the drop-down list box, press the Stop All Servers button.
Using the Event Log
To view the Event Log, press the Log button.
The Event Log dialog should appear as below:
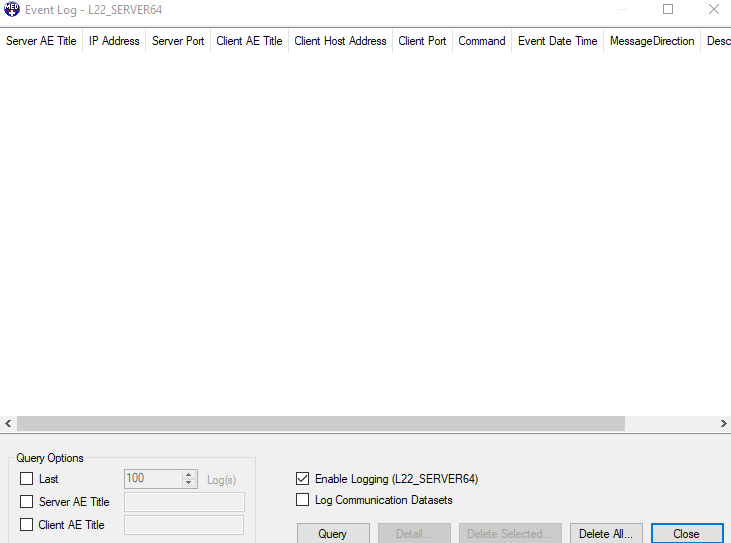
The Event Log will appear empty until the Query button is selected.
To filter the query results use the Query Options panel.
Note
The Event Log will only log the server that is currently selected in the Server drop-down list box.
AE Titles
The location of the Application Entity Titles panel can be seen below:
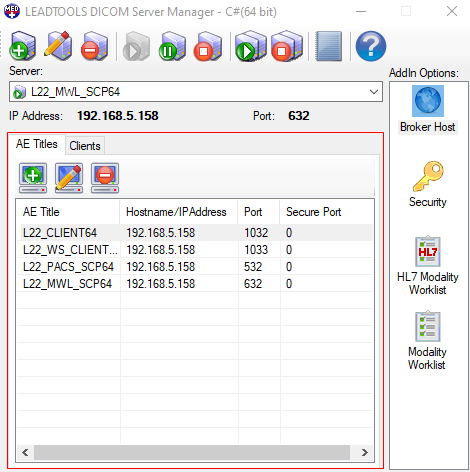
To add an AE Title, select the Add AE Title button.
Editing and deleting AE Titles can be done with the Edit AE Title button and Delete AE Title button respectively.
Server Add-ins
Selecting a server from the list box displays a list of icons under the Add-in Options List, as shown in the following figure:

Each icon represents an installed Add-in on the server. Double-clicking an icon displays the settings` dialog for that Add-in.
Wrap-up
This tutorial showed how to launch and use the DICOM Server Manager Demo.
