Apply Image Processing to an Image - HTML5 JavaScript
This tutorial shows how to apply image processing techniques using the LEADTOOLS SDK in an HTML5 JavaScript application.
| Overview | |
|---|---|
| Summary | This tutorial covers how to use image processing commands in an HTML5 JavaScript application. |
| Completion Time | 15 minutes |
| Visual Studio Project | Download tutorial project (947 KB) |
| Platform | JS Web Application |
| IDE | Visual Studio Code - Client |
| Development License | Download LEADTOOLS |
Required Knowledge
Get familiar with the basic steps of creating a project by reviewing the Add References and Set a License - HTML5 JavaScript tutorial, before working on the Apply Image Processing to an Image - HTML5 JavaScript tutorial.
This tutorial makes use of http-server, a console command for running a static file server. To install http-server first install Node.js and then install http-server.
Create the Project and Add LEADTOOLS References
Start with a copy of the project created in the Add References and Set a License - HTML5 JavaScript tutorial. If that project is unavailable, follow the steps in that tutorial to create it.
The references needed depend upon the purpose of the project. References can be added by .js files located at <INSTALL_DIR>\LEADTOOLS22\Bin\JS.
For this project, the following references are needed:
Leadtools.jsLeadtools.Controls.jsLeadtools.ImageProcessing.Color.js
Make sure to copy these files to the project's lib folder.
For a complete list of which JS files are required for your application, refer to Files to be Included with your Application
Set the License File
The License unlocks the features needed for the project. It must be set before any toolkit function is called. For details including tutorials for different platforms, refer to Setting a Runtime License.
There are two types of runtime licenses:
- Evaluation license, obtained at the time the evaluation toolkit is downloaded. It allows the toolkit to be evaluated.
- Deployment license. If a Deployment license file and developer key are needed, refer to Obtaining a License.
Write the HTML File
Open your project's index.html file. Add the below code to import the LEADTOOLS dependencies, LEADTOOLS logic, and set the container for the ImageViewers.
<!DOCTYPE html><html lang="en" xmlns="http://www.w3.org/1999/xhtml"><head><meta charset="utf-8" /><title>LEADTOOLS Demo</title><!-- LEADTOOLS Libraries --><script type="text/javascript" src="lib/Leadtools.js"></script><script type="text/javascript" src="lib/Leadtools.Controls.js"></script><script type="text/javascript" src="app.js"></script></head><body><div style="float:left" ><div id="imageViewerDiv1" style="width: 600px; height: 600px; background-color: darkgray"></div><label id="viewer1Label">Viewer 1</label></div><div><div id="imageViewerDiv2" style="width: 600px; height: 600px; background-color: lightgray"></div><label id="viewer2Label">Viewer 2</label></div></body></html>
Write the JS File
Open the app.js file located in the project folder. Create 3 new functions in the app.js file named InitViewers(), LoadImages(), and Invert(viewer). Call InitViewers() and LoadImages() inside the onload function, as seen below.
let viewer1 = null;let viewer2 = null;window.onload = function () {// If you have a JS license (LEADTOOLS.LIC.TXT) and key file (LEADTOOLS.LIC.KEY.TXT), you can use the code below to set your licenseconst licenseUrl = "./LEADTOOLS/LEADTOOLS.lic.txt";const developerKey = "ADD THE CONTENTS OF THE LEADTOOLS.lic.key.txt FILE";// If you are evaluating and do not have a JS license or key file, you can use the code below to set your license:// const licenseUrl = "https://demo.leadtools.com/licenses/js/LEADTOOLSEVAL.txt";// const developerKey = "EVAL";lt.RasterSupport.setLicenseUri(licenseUrl, developerKey, function (setLicenseResult) {// Check the status of the licenseif (setLicenseResult.result) {console.log("LEADTOOLS client license set successfully");} else {const msg = "LEADTOOLS License is missing, invalid or expired\nError:\n";console.log(msg);alert(msg);}});InitViewers();LoadImages();};
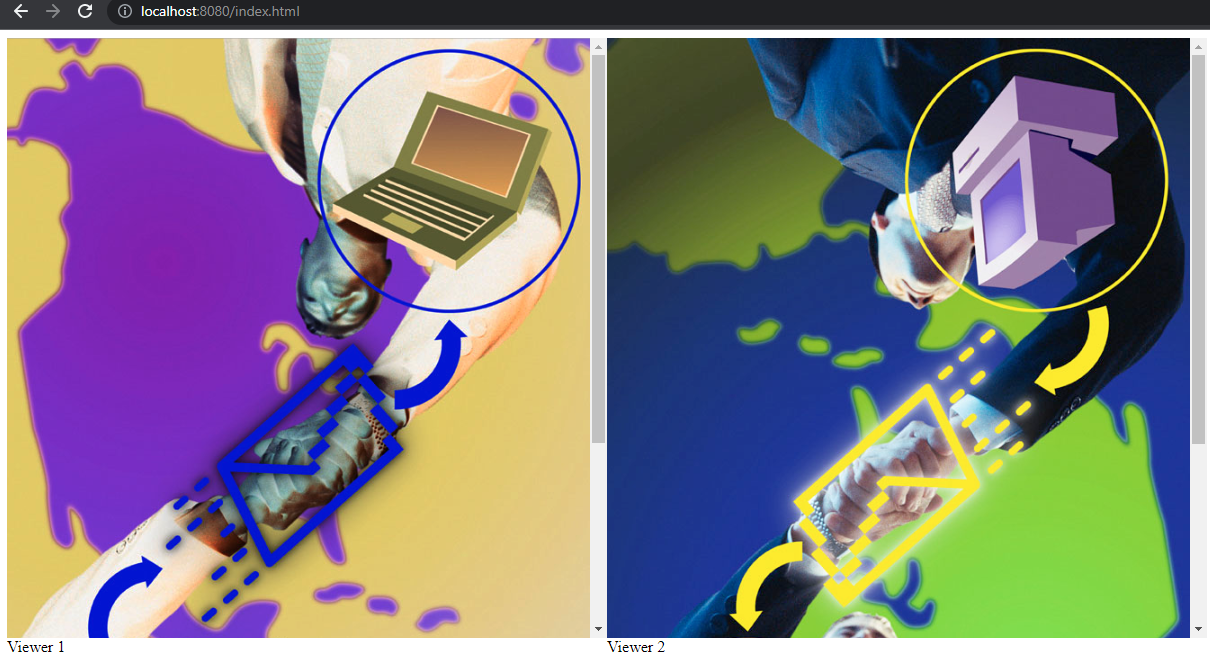
Input the code below to the respective functions to create the two ImageViewers, load in a sample PNG file, and then apply the invert image processing to the first ImageViewer.
function InitViewers(){// Create Viewer 1let imageViewerDiv1 = document.getElementById("imageViewerDiv1");let createOptions = new lt.Controls.ImageViewerCreateOptions(imageViewerDiv1);viewer1 = new lt.Controls.ImageViewer(createOptions);viewer1.autoCreateCanvas = true;viewer1.zoom(lt.Controls.ControlSizeMode.fitWidth, 1, viewer1.defaultZoomOrigin);viewer1.itemChanged.add(function (sender, e) {if(e.reason == lt.Controls.ImageViewerItemChangedReason.url){Invert(viewer1);}});// Create Viewer 2imageViewerDiv1 = document.getElementById("imageViewerDiv2");createOptions = new lt.Controls.ImageViewerCreateOptions(imageViewerDiv2);viewer2 = new lt.Controls.ImageViewer(createOptions);viewer2.autoCreateCanvas = true;viewer2.zoom(lt.Controls.ControlSizeMode.fitWidth, 1, viewer1.defaultZoomOrigin);viewer2.itemChanged.add(function (sender, e) {if(e.reason == lt.Controls.ImageViewerItemChangedReason.url){viewer2.rotateAngle = 180;}});}function LoadImages(){// Load an image into the viewerviewer1.imageUrl = "images/PngImage.png";viewer2.imageUrl = "images/PngImage.png";}function Invert(viewer){// Do invert command processingconst myCanvas = viewer.canvas;const context = myCanvas.getContext("2d");const imageProcessing = new lt.ImageProcessing();imageProcessing.jsFilePath = "Scripts/Leadtools.ImageProcessing.Color.js";imageProcessing.command = "Invert";imageProcessing.imageData = context.getImageData(0, 0, myCanvas.width, myCanvas.height);imageProcessing.completed.add(function(sender, e) {context.putImageData(e.imageData, 0, 0);viewer.invalidate(lt.LeadRectD.empty);});imageProcessing.run();}
Run the Project
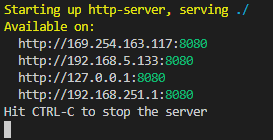
Open the command line console, then cd into the root of the project. Use the following command to run a static file server: http-server
The server should start and run on http://localhost:8080. A message should appear in the console indicating all the ports that the server is available on.

Open your browser and navigate to: http://localhost:8080/index.html

Wrap-up
This tutorial showed how to apply image processing onto an image using the ImageProcessing object and display the image in an ImageViewer object.
